Salta al contenuto principale

Pentax Spotmatic Viewfinder Removal

Cosa ti serve

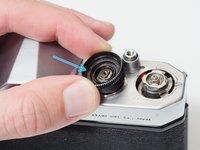
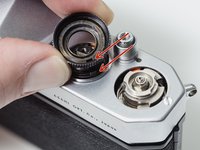
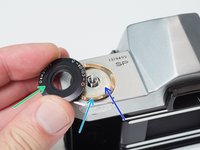
  1. Pentax Spotmatic Viewfinder Removal, Remove frame counter: passo 1, immagine 1 di 3 Pentax Spotmatic Viewfinder Removal, Remove frame counter: passo 1, immagine 2 di 3 Pentax Spotmatic Viewfinder Removal, Remove frame counter: passo 1, immagine 3 di 3
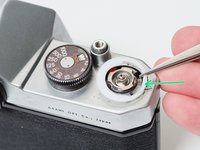
    • Loosen three grub screws. Do not remove them from the frame counter cover.

    • Lift off frame counter cover.

    • Remove one 2.5 mm flat head screw. It is reverse or left-hand threaded.

    • Remove the frame counter dial.

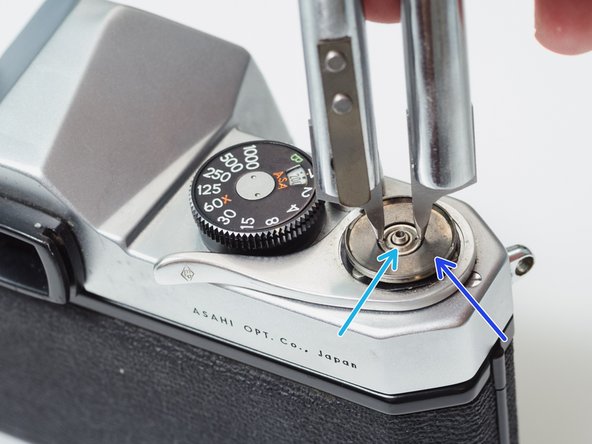
    • Remove the retaining nut using a spanner wrench. A pair of fine tipped nippers can also work.

    • On some Spotmatics, this nut may be reverse threaded. Work carefully.

    • Remove the dial seat.

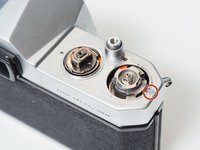
  2. Pentax Spotmatic Viewfinder Removal, Remove advance lever: passo 2, immagine 1 di 3 Pentax Spotmatic Viewfinder Removal, Remove advance lever: passo 2, immagine 2 di 3 Pentax Spotmatic Viewfinder Removal, Remove advance lever: passo 2, immagine 3 di 3
    • Remove three 2.3 mm flat head screws.

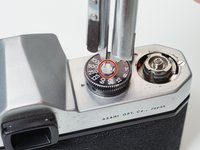
    • Use a pick to rotate the retaining washer until the lobed sections are free.

    • Lift off the advance lever.

    • Remove the plastic shim washer.

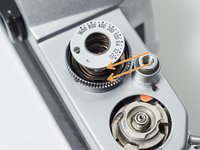
  3. Pentax Spotmatic Viewfinder Removal, Remove shutter speed dial: passo 3, immagine 1 di 3 Pentax Spotmatic Viewfinder Removal, Remove shutter speed dial: passo 3, immagine 2 di 3 Pentax Spotmatic Viewfinder Removal, Remove shutter speed dial: passo 3, immagine 3 di 3
    • Remove one 2.8 mm pin head screw.

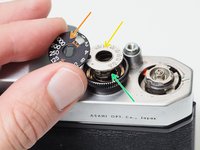
    • The dial assembly is spring loaded. Keep two fingers on top of the dial as you are loosening the screw to prevent it from popping off.

    • Remove the shutter speed dial.

    • Remove the ISO dial.

    • Remove the internal spring.

    • Remove the dial housing.

  4. Pentax Spotmatic Viewfinder Removal, Installation Notes: Shutter Speed Dial: passo 4, immagine 1 di 2 Pentax Spotmatic Viewfinder Removal, Installation Notes: Shutter Speed Dial: passo 4, immagine 2 di 2
    • The hole in the dial housing needs to go over the tab on the speed resistor.

    • The tab on the ISO dial needs to mate with the hole in the dial housing.

    • It can be difficult to line everything up while compressing the spring and installing the center screw. Be patient.

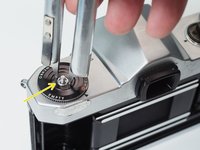
  5. Pentax Spotmatic Viewfinder Removal, Remove film winder assembly: passo 5, immagine 1 di 3 Pentax Spotmatic Viewfinder Removal, Remove film winder assembly: passo 5, immagine 2 di 3 Pentax Spotmatic Viewfinder Removal, Remove film winder assembly: passo 5, immagine 3 di 3
    • Place a thin, sturdy tool in the spindle fork.

    • Unscrew the rewind knob.

    • Use a spanner wrench to unscrew the retaining nut.

    • Remove the film reminder

    • Remove the spring washer.

    • Remove the friction plate.

  6. Pentax Spotmatic Viewfinder Removal, Remove top cover: passo 6, immagine 1 di 2 Pentax Spotmatic Viewfinder Removal, Remove top cover: passo 6, immagine 2 di 2
    • Remove one 3.0 mm flat head screw.

    • Remove top cover.

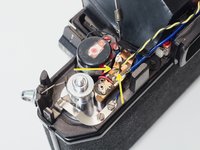
  7. Pentax Spotmatic Viewfinder Removal, Unsolder meter circuit: passo 7, immagine 1 di 2 Pentax Spotmatic Viewfinder Removal, Unsolder meter circuit: passo 7, immagine 2 di 2
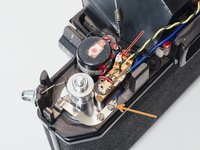
    • Unscrew or unsolder one black wire. This is the main power coming from the meter switch on the side of the mirror box.

    • Unscrew one blue wire. This is the ground wire that connects the meter circuit to the body of the camera.

    • Unsolder one yellow and one black wire from the speed resistor.

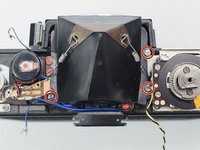
  8. Pentax Spotmatic Viewfinder Removal, Remove viewfinder assembly: passo 8, immagine 1 di 2 Pentax Spotmatic Viewfinder Removal, Remove viewfinder assembly: passo 8, immagine 2 di 2
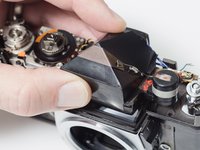
    • Remove three 5.7 mm flat head screws.

    • Lift out the viewfinder assembly.

    • The pentaprism, eye piece and meter circuit will come out with the viewfinder.

Conclusione

To reassemble your device, follow these instructions in reverse order.

Sam Gustafson

Membro da: 09/01/22

7.682 Reputazione

42 Guide realizzate

Un commento

Very clear description of the procedure to remove the top cover and of course the pentaprism and view finder . Great photographs to accompany each step and so well presented, could not be bettered. So that many thanks indeed - very very helpful. regards mark

mark steed - Replica
Aggiungi Commento

Visualizza Statistiche:

Ultime 24 Ore: 5

Ultimi 7 Giorni: 11

Ultimi 30 Giorni: 55

Tutti i Tempi: 192