Questa versione può contenere modifiche errate. Passa all'ultima istantanea verificata.
Cosa ti serve
-
Questo passaggio è privo di traduzione. Aiuta a tradurlo
-
Remove the following screws:
-
Two silver 3.15mm Phillips #00 screws on the right side of the camera
-
Two silver 2.08mm Phillips #00 screws on the left side of the camera
-
-
Questo passaggio è privo di traduzione. Aiuta a tradurlo
-
Remove the two indicated screws on the bottom of the camera:
-
The screw circled in red is a longer silver 3.15mm Phillips #00 screw
-
The screw circled in blue is a shorter silver 2.25mm Phillips #00 screw
-
-
-
Questo passaggio è privo di traduzione. Aiuta a tradurlo
-
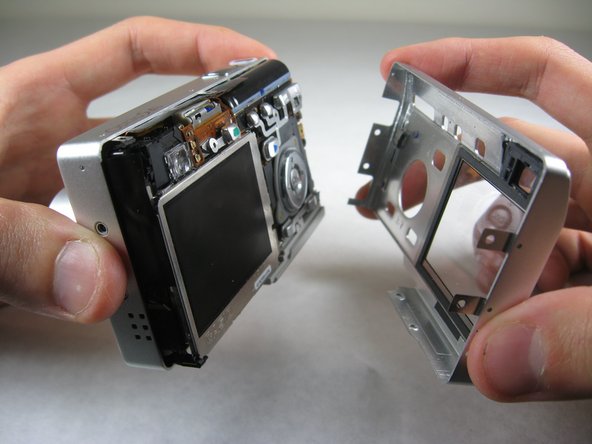
Carefully pull the back of casing away from the front.
-
-
Questo passaggio è privo di traduzione. Aiuta a tradurlo
-
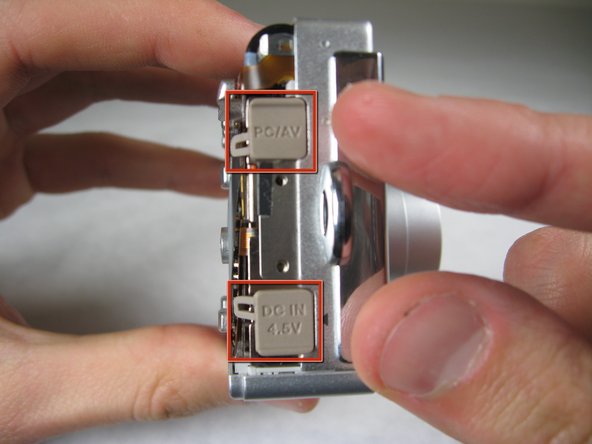
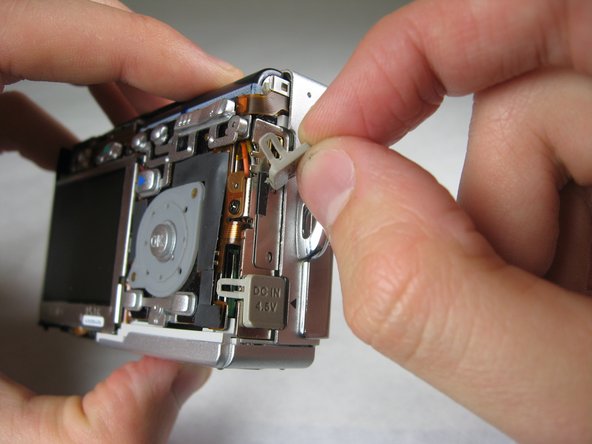
Silver donut-shaped button will fall off. Place separately. Remove the plug covers on the right side of camera, labeled “PC/AV” and “DC IN 4.5V”.
-
-
Questo passaggio è privo di traduzione. Aiuta a tradurlo
-
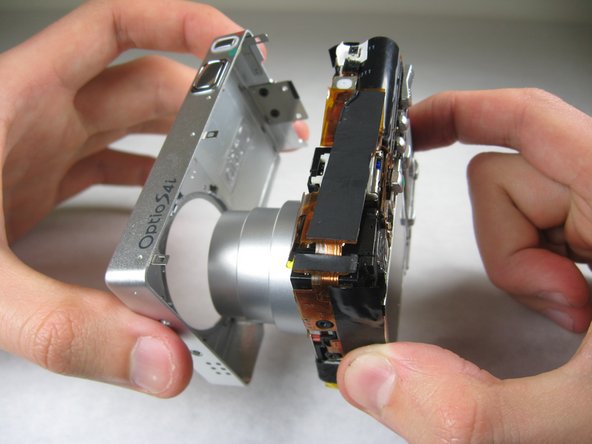
To remove the front cover, gently hold the inside structure of the camera and slowly pull the front cover off.
-
Annulla: non ho completato questa guida.
Un'altra persona ha completato questa guida.


