Salta al contenuto principale

Parkside X20V 4Ah repair of broken battery contact and blown fuse

  1. Parkside X20V 4Ah repair of broken battery contact and blown fuse, open the case: passo 1, immagine 1 di 2 Parkside X20V 4Ah repair of broken battery contact and blown fuse, open the case: passo 1, immagine 2 di 2
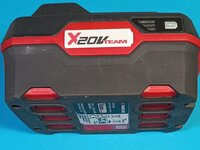
    • My X20 battery was dead after I accidentally did a short circuit.

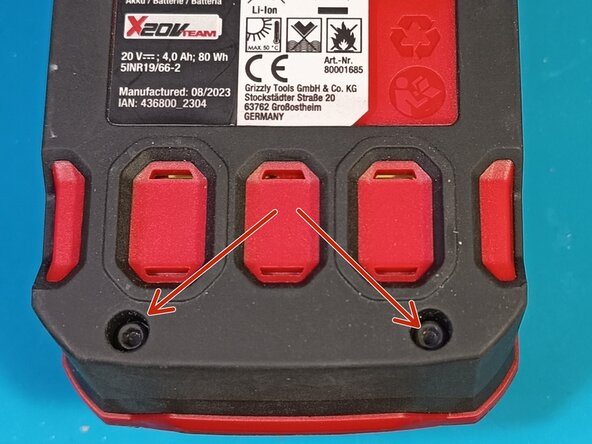
    • To open it, unscrew the 4 screws at the bottom.

  2. Parkside X20V 4Ah repair of broken battery contact and blown fuse, unsolder the pcb: passo 2, immagine 1 di 2 Parkside X20V 4Ah repair of broken battery contact and blown fuse, unsolder the pcb: passo 2, immagine 2 di 2
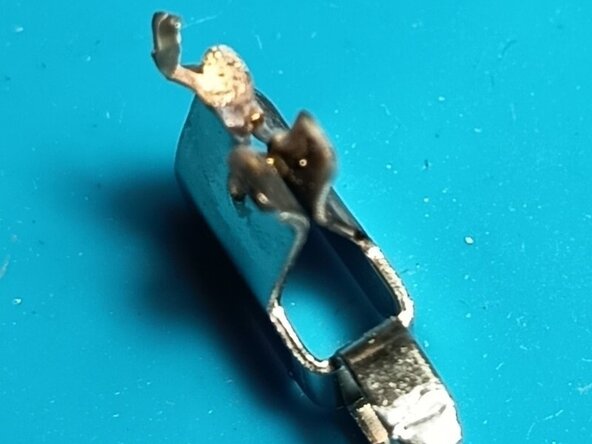
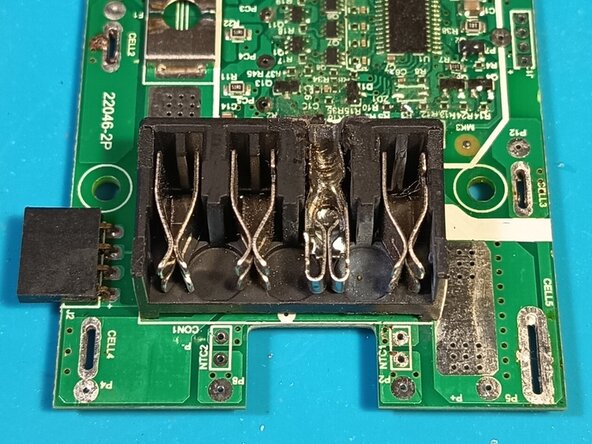
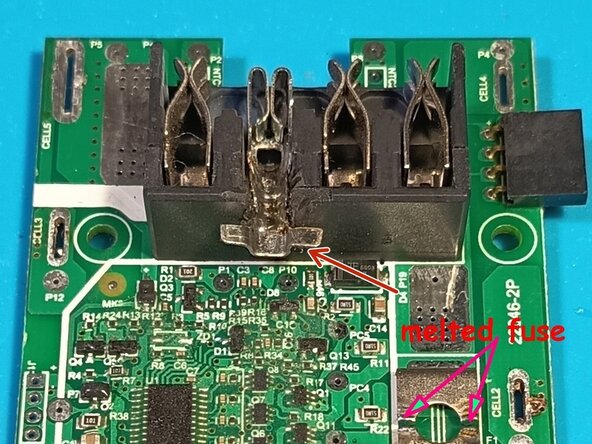
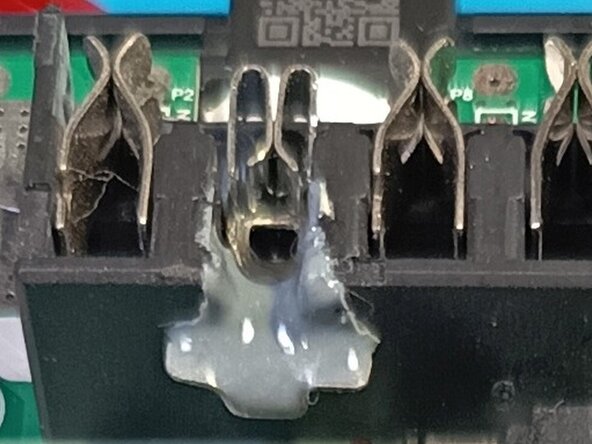
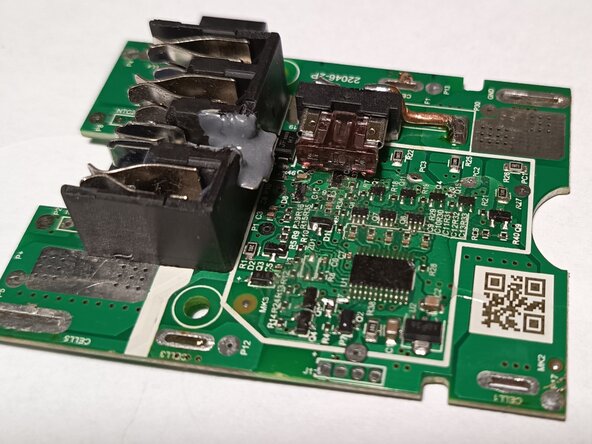
    • The '+' contact was melted and weld shut, and the fuse on the board was blown.

    • I unsoldered the pcb with the help of some good solder wick.

    • To avoid more short circuits during soldering, I covered the surrounding contacts with painters tape.

    • There is also a thermistor which needs to be unsoldered to get the pcb off.

    • After unsoldering, take the pack out of the case to unplug the display board and take off the pcb.

  3. Parkside X20V 4Ah repair of broken battery contact and blown fuse, replace the broken contact: passo 3, immagine 1 di 3 Parkside X20V 4Ah repair of broken battery contact and blown fuse, replace the broken contact: passo 3, immagine 2 di 3 Parkside X20V 4Ah repair of broken battery contact and blown fuse, replace the broken contact: passo 3, immagine 3 di 3
    • After the pcb was off, I unsoldered the broken contact and one of the middle contacts, which are only used with small currents.

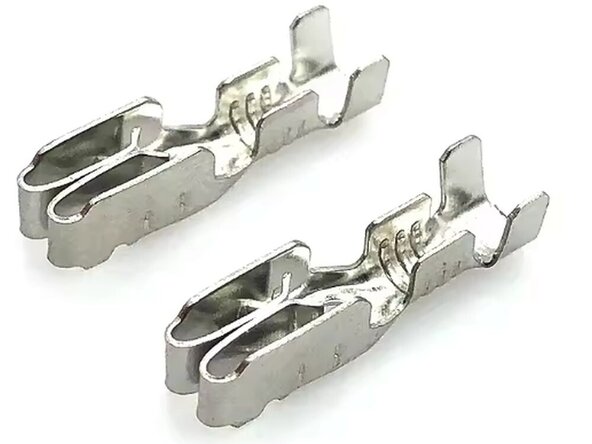
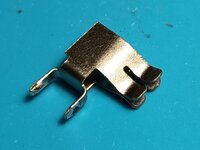
    • I replaced the broken contact with the good one and used a Dremel to cut off the solder pins of the broken contact.

    • Then I soldered a car fuse holder terminal on top of it to create a replacement for the middle contact.

  4. Parkside X20V 4Ah repair of broken battery contact and blown fuse, fix the replacement contact: passo 4, immagine 1 di 3 Parkside X20V 4Ah repair of broken battery contact and blown fuse, fix the replacement contact: passo 4, immagine 2 di 3 Parkside X20V 4Ah repair of broken battery contact and blown fuse, fix the replacement contact: passo 4, immagine 3 di 3
    • I also cut a slot into the back side of the plastic holder to get some strain relief on the replaced middle contact.

    • Then I added 2k glue to fix the contact even more.

  5. Parkside X20V 4Ah repair of broken battery contact and blown fuse, replace the fuse: passo 5, immagine 1 di 3 Parkside X20V 4Ah repair of broken battery contact and blown fuse, replace the fuse: passo 5, immagine 2 di 3 Parkside X20V 4Ah repair of broken battery contact and blown fuse, replace the fuse: passo 5, immagine 3 di 3
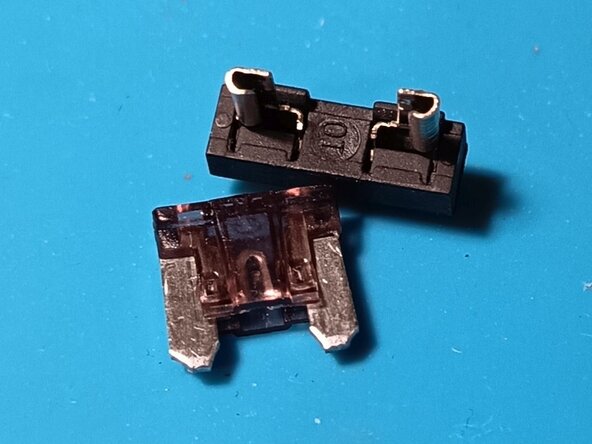
    • I unsoldered the broken fuse and replaced it with a mini fuse holder.

    • I used 1.5mm copper wire to get a good and rugged joint for the fuse holder.

    • I also made sure that the fuse holder is mounted so that it fits properly into the case.

    • As the battery is capable of delivering high currents, I put in a 40A fuse.

  6. Parkside X20V 4Ah repair of broken battery contact and blown fuse, putting everything back into place: passo 6, immagine 1 di 1
    • After the replacement work was done, I put everything back into place.

    • Do not forget the thermistor contacts before soldering the battery contacts.

    • Also, don't forget the screws which hold the pcb and plug in the display board before putting the pack back into the case.

    • As always, it is good advice to gently turn the screws counterclockwise to sense the proper fit of the plastic thread turns, before screwing the screws in.

Linea Traguardo

0Commenti sulla guida

Aggiungi Commento

Visualizza Statistiche:

Ultime 24 Ore: 22

Ultimi 7 Giorni: 181

Ultimi 30 Giorni: 355

Tutti i Tempi: 878