Salta al contenuto principale

Pantech Matrix Motherboard Replacement

Cosa ti serve

  1. Pantech Matrix Motherboard Replacement, Phone Orientation: passo 1, immagine 1 di 1
    • Place phone with screen side facing toward you.

  2. Pantech Matrix Motherboard Replacement, Phone Orientation: passo 2, immagine 1 di 1
    • Flip phone over so screen side is now facing down.

  3. Pantech Matrix Motherboard Replacement, Remove Back Cover: passo 3, immagine 1 di 2 Pantech Matrix Motherboard Replacement, Remove Back Cover: passo 3, immagine 2 di 2
    • Gently slide the backside phone cover off exposing the battery underneath.

  4. Pantech Matrix Motherboard Replacement, Lift Battery: passo 4, immagine 1 di 1
    • Carefully lift the battery up from where the spudger is pointed.

  5. Pantech Matrix Motherboard Replacement, Remove Battery: passo 5, immagine 1 di 1
    • Remove the battery from its dock.

  6. Pantech Matrix Motherboard Replacement, Slide SIM Card Out: passo 6, immagine 1 di 3 Pantech Matrix Motherboard Replacement, Slide SIM Card Out: passo 6, immagine 2 di 3 Pantech Matrix Motherboard Replacement, Slide SIM Card Out: passo 6, immagine 3 di 3
    • Slide the SIM Card out of its dock.

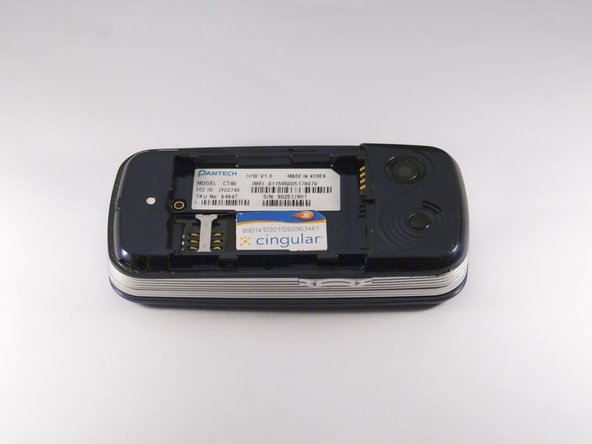
  7. Pantech Matrix Motherboard Replacement, Remove Phone Screws: passo 7, immagine 1 di 2 Pantech Matrix Motherboard Replacement, Remove Phone Screws: passo 7, immagine 2 di 2
    • Use a Phillips screwdriver to remove the four 2mm Phillips #000 screws from each corner of the device.

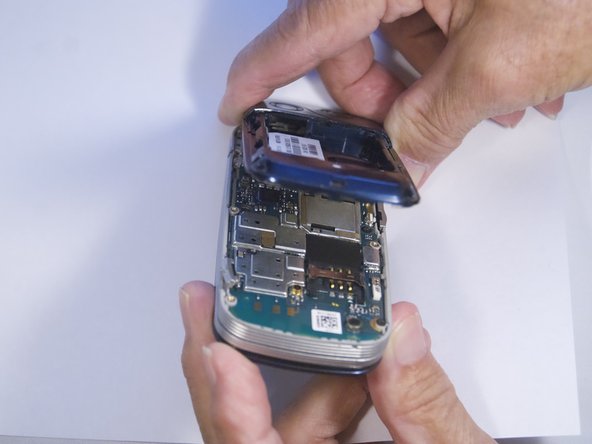
  8. Pantech Matrix Motherboard Replacement, Remove Phone Casing: passo 8, immagine 1 di 2 Pantech Matrix Motherboard Replacement, Remove Phone Casing: passo 8, immagine 2 di 2
    • Rotate the phone so the base is facing you.

    • Use spudger to separate phone casing and inside as shown.

    • Remove the casing carefully and set aside.

  9. Pantech Matrix Motherboard Replacement, Remove Camera Screws: passo 9, immagine 1 di 2 Pantech Matrix Motherboard Replacement, Remove Camera Screws: passo 9, immagine 2 di 2
    • Place phone with exposed motherboard facing you.

    • Use a Phillips screwdriver to remove the five 2mm Phillips #000 screws holding the camera in place.

  10. Pantech Matrix Motherboard Replacement, Expose Keypad: passo 10, immagine 1 di 1
    • Carefully lift up the motherboard to expose the back of the keypad.

  11. Pantech Matrix Motherboard Replacement, Remove Keypad: passo 11, immagine 1 di 2 Pantech Matrix Motherboard Replacement, Remove Keypad: passo 11, immagine 2 di 2
    • Use spudger to gently pry the keypad away from the rest of the phone.

  12. Pantech Matrix Motherboard Replacement, Remove Motherboard: passo 12, immagine 1 di 3 Pantech Matrix Motherboard Replacement, Remove Motherboard: passo 12, immagine 2 di 3 Pantech Matrix Motherboard Replacement, Remove Motherboard: passo 12, immagine 3 di 3
    • Grip the motherboard and gently pull to separate it from the rest of the phone.

Conclusione

To reassemble your device, follow these instructions in reverse order.

Un'altra persona ha completato questa guida.

Zeel Patel

Membro da: 10/13/14

1.078 Reputazione

9 Guide realizzate

0 Commenti

Aggiungi Commento

Visualizza Statistiche:

Ultime 24 Ore: 0

Ultimi 7 Giorni: 0

Ultimi 30 Giorni: 1

Tutti i Tempi: 200