Cosa ti serve
-
Questo passaggio è privo di traduzione. Aiuta a tradurlo
-
Twist the top assembly of the flashlight off by turning it counterclockwise above the rubber gasket.
-
-
Questo passaggio è privo di traduzione. Aiuta a tradurlo
-
Unscrew the bulb base by twisting counter-clockwise, taking care not to drop the bulb. Remove the bulb.
-
-
Questo passaggio è privo di traduzione. Aiuta a tradurlo
-
Remove the rubber gasket from the top assembly.
-
-
-
Questo passaggio è privo di traduzione. Aiuta a tradurlo
-
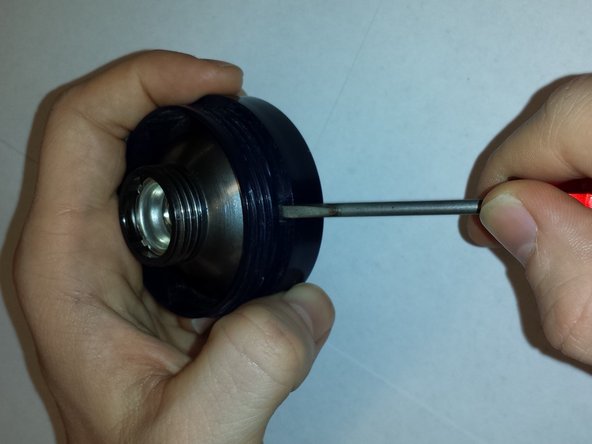
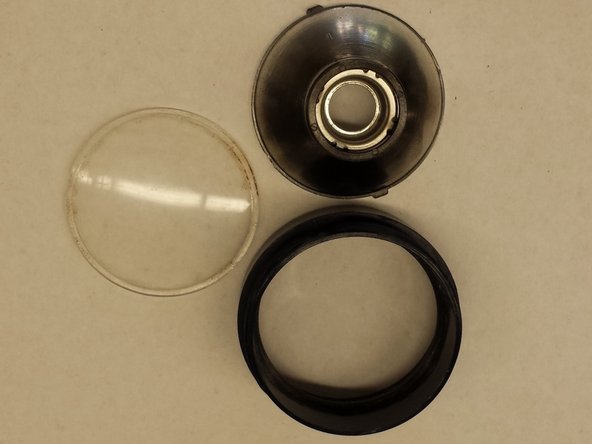
Remove the reflector by applying pressure to one of the two protruding plastic tabs using a small flathead screwdriver while pulling on the reflector.
-
The reflector should pop out; pull gently but firmly to avoid scattering the pieces. Remove the lens.
-
-
Questo passaggio è privo di traduzione. Aiuta a tradurlo
-
Remove the batteries from the flashlight body.
-
-
Questo passaggio è privo di traduzione. Aiuta a tradurlo
-
Insert the metal screwdriver as pictured: oriented vertically, underneath the yellow plastic piece in the switch assembly, between the metal contact of the switch and the gray plastic slider flange.
-
Pry upward to remove the yellow plastic piece; the metal contact piece may pop out with the plastic piece.
-
Once the metal and plastic are unseated from one side, pull out the metal contact and yellow plastic piece with pliers or fingers. Remove these pieces.
-
-
Questo passaggio è privo di traduzione. Aiuta a tradurlo
-
Use pliers to pinch the gray flanges of the switch slider and apply pressure to push the switch out of the flashlight body.
-


Team

Cal Poly, Team 25-26, Garner Spring 2011 Membro di Cal Poly, Team 25-26, Garner Spring 2011
CPSU-GARNER-S11S25G26
3 Membri
12 Guide realizzate