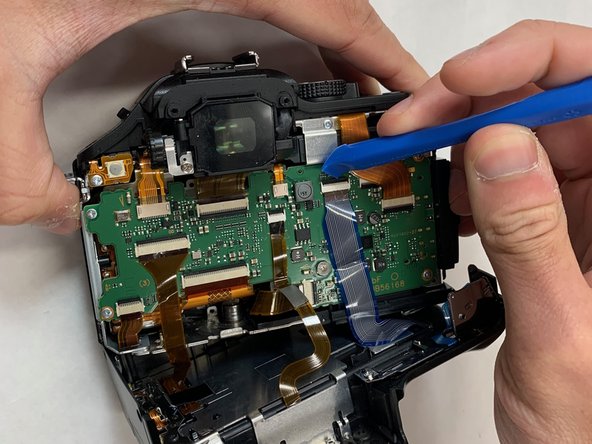
Salta al contenuto principale

Panasonic Lumix DMC-G5 Back Panel Replacement

Cosa ti serve

  1. Panasonic Lumix DMC-G5 Back Panel Replacement, Back Panel: passo 1, immagine 1 di 1
    • Remove four JIS #000 screws from the bottom part of the camera.

  2. Panasonic Lumix DMC-G5 Back Panel Replacement: passo 2, immagine 1 di 2 Panasonic Lumix DMC-G5 Back Panel Replacement: passo 2, immagine 2 di 2
    • Remove two JIS #000 screws from both sides of the camera.

  3. Panasonic Lumix DMC-G5 Back Panel Replacement: passo 3, immagine 1 di 1
    • Remove two JIS #000 screws under the viewfinder.

  4. Panasonic Lumix DMC-G5 Back Panel Replacement: passo 4, immagine 1 di 2 Panasonic Lumix DMC-G5 Back Panel Replacement: passo 4, immagine 2 di 2
    • Remove the viewfinder lid.

    • Then, remove the two JIS #000 screws on the viewfinder.

  5. Panasonic Lumix DMC-G5 Back Panel Replacement: passo 5, immagine 1 di 3 Panasonic Lumix DMC-G5 Back Panel Replacement: passo 5, immagine 2 di 3 Panasonic Lumix DMC-G5 Back Panel Replacement: passo 5, immagine 3 di 3
    • Gently remove the back panel from the camera.

    • Unclip the ribbon cable from the motherboard using Wide Plastic Opening Tools and pull the cable gently.

Conclusione

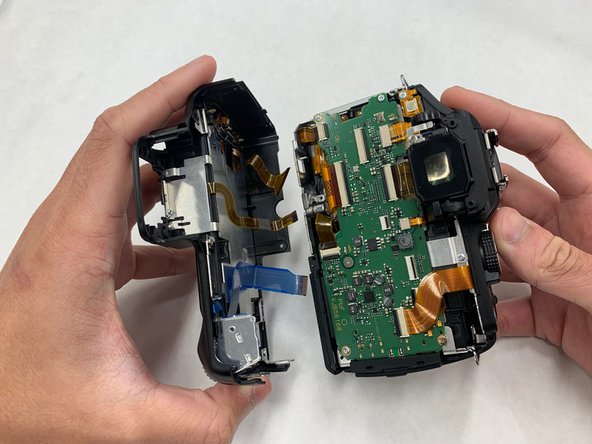
To reassemble your device, follow these instructions in reverse order.

Un'altra persona ha completato questa guida.

Team

IUPUI, Team S1-G4, Harley Summer 2019 Membro di IUPUI, Team S1-G4, Harley Summer 2019

IUPUI-HARLEY-SU19S1G4

3 Membri

8 Guide realizzate

0 Commenti

Aggiungi Commento

Visualizza Statistiche:

Ultime 24 Ore: 1

Ultimi 7 Giorni: 4

Ultimi 30 Giorni: 22

Tutti i Tempi: 665