Questa versione può contenere modifiche errate. Passa all'ultima istantanea verificata.
Cosa ti serve
-
Questo passaggio è privo di traduzione. Aiuta a tradurlo
-
Move the switch on the battery door to the Open position.
-
-
Questo passaggio è privo di traduzione. Aiuta a tradurlo
-
Push the small gray tab on the top right corner to the left. The battery will pop out slightly.
-
Keep your finger clear of the battery when it pops out.
-
-
Questo passaggio è privo di traduzione. Aiuta a tradurlo
-
Push the memory card in and let go.
-
Pull out the memory card.
-
-
-
Questo passaggio è privo di traduzione. Aiuta a tradurlo
-
Unscrew the small screws on the sides of the camera.
-
-
Questo passaggio è privo di traduzione. Aiuta a tradurlo
-
Unscrew the three small screws on the bottom(#00P, 3.3mm).
-
-
Questo passaggio è privo di traduzione. Aiuta a tradurlo
-
Lift up the bottom back cover by prying the bottom edge with the spudger.
-
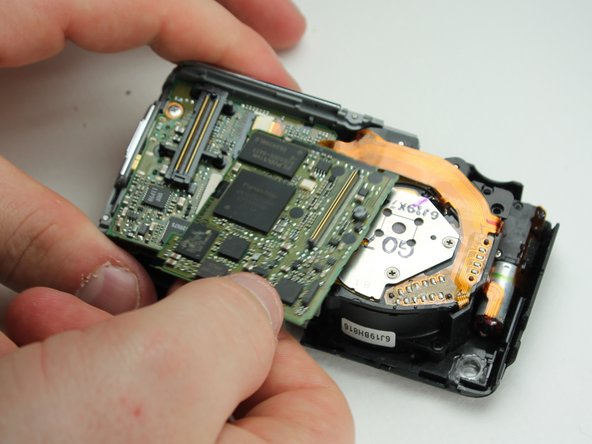
Gently lift up the back cover with your hand from the bottom to the top.
-
-
Questo passaggio è privo di traduzione. Aiuta a tradurlo
-
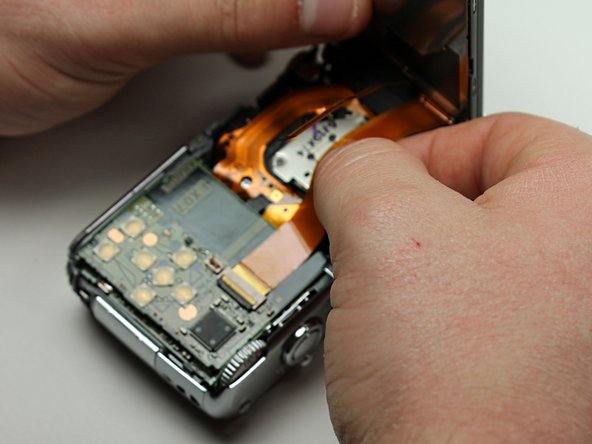
Lift the tabs on the ZIF connectors.
-
The ribbon cables should easily come out of the ZIF connectors.
-


Annulla: non ho completato questa guida.
Un'altra persona ha completato questa guida.
Team

Cal Poly, Team 6-23, Amido Spring 2012 Membro di Cal Poly, Team 6-23, Amido Spring 2012
CPSU-AMIDO-S12S6G23
4 Membri
10 Guide realizzate