Salta al contenuto principale

Panasonic KX-E603 Stepper Motor Replacement

Cosa ti serve

  1. Panasonic KX-E603 Stepper Motor Replacement, Case: passo 1, immagine 1 di 2 Panasonic KX-E603 Stepper Motor Replacement, Case: passo 1, immagine 2 di 2
    • Flip the typewriter to expose the bottom body panel.

    • Be careful to not damage the top surface of the typewriter when you rest it upside-down.

  2. Panasonic KX-E603 Stepper Motor Replacement: passo 2, immagine 1 di 1
    • Remove the three 19 mm screws located in the recessed holes on the edge of the black underside panel using a Phillips #2 screwdriver.

  3. Panasonic KX-E603 Stepper Motor Replacement: passo 3, immagine 1 di 1
    • Flip the typewriter back to its original orientation, then rotate it so that the rear is facing towards you.

    • Remove the three 19 mm screws near the bottom of the tan body panel using a Phillips #2 screwdriver.

  4. Panasonic KX-E603 Stepper Motor Replacement: passo 4, immagine 1 di 2 Panasonic KX-E603 Stepper Motor Replacement: passo 4, immagine 2 di 2
    • Open the typewriter lid and push the carriage away to expose the two screws holding the case to the chassis.

    • Remove the two 19 mm screws using a Phillips #2 screwdriver.

  5. Panasonic KX-E603 Stepper Motor Replacement: passo 5, immagine 1 di 2 Panasonic KX-E603 Stepper Motor Replacement: passo 5, immagine 2 di 2
    • Flip the plastic lever on the right side of the roller wheel to disengage the paper lock.

  6. Panasonic KX-E603 Stepper Motor Replacement: passo 6, immagine 1 di 3 Panasonic KX-E603 Stepper Motor Replacement: passo 6, immagine 2 di 3 Panasonic KX-E603 Stepper Motor Replacement: passo 6, immagine 3 di 3
    • Remove the roller wheel adjustment knobs by pulling firmly outward.

    • Both black knobs must be removed in this step.

  7. Panasonic KX-E603 Stepper Motor Replacement: passo 7, immagine 1 di 2 Panasonic KX-E603 Stepper Motor Replacement: passo 7, immagine 2 di 2
    • Unlock the roller wheel by simultaneously pressing down on the two spring levers on the left and right of the roller ends.

  8. Panasonic KX-E603 Stepper Motor Replacement: passo 8, immagine 1 di 2 Panasonic KX-E603 Stepper Motor Replacement: passo 8, immagine 2 di 2
    • While both spring levers are depressed, lift up with both hands to remove the roller wheel.

  9. Panasonic KX-E603 Stepper Motor Replacement: passo 9, immagine 1 di 3 Panasonic KX-E603 Stepper Motor Replacement: passo 9, immagine 2 di 3 Panasonic KX-E603 Stepper Motor Replacement: passo 9, immagine 3 di 3
    • Flip the top down. Then, with both hands, lift straight up on the tan case to remove it from the chassis.

  10. Panasonic KX-E603 Stepper Motor Replacement, Stepper Motor: passo 10, immagine 1 di 2 Panasonic KX-E603 Stepper Motor Replacement, Stepper Motor: passo 10, immagine 2 di 2
    • Do not remove the screws fully from the stepper motor. Just unscrew them enough to allow the stepper motor to come loose. Removing them all the way can cause damage to the motor.

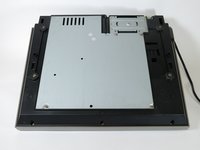
    • The stepper motor is located on the left when looking from the rear of the typewriter. Rotate the typewriter so that the stepper motor is facing you.

    • While loosening the screws, use your finger to brace the corresponding nuts found on the opposite side of the stepper motor mounting bracket.

    • Using a P1 screwdriver, unscrew the top right and bottom right integrated #3 screws from the back of the stepper motor.

  11. Panasonic KX-E603 Stepper Motor Replacement: passo 11, immagine 1 di 1
    • Remove the stepper motor by pulling it straight out.

Conclusione

To reassemble your device, follow these instructions in reverse order using a working stepper motor.

Team

Cal Poly, Team 17-1, Forte Spring 2015 Membro di Cal Poly, Team 17-1, Forte Spring 2015

CPSU-FORTE-S15S17G1

4 Membri

6 Guide realizzate

0 Commenti

Aggiungi Commento

Visualizza Statistiche:

Ultime 24 Ore: 0

Ultimi 7 Giorni: 0

Ultimi 30 Giorni: 1

Tutti i Tempi: 461