Salta al contenuto principale

Questa guida ha delle modifiche più recenti. Passa all'ultima versione non verificata.

Palm Treo 680 Microphone Replacement

Cosa ti serve

  1. Palm Treo 680 Microphone Replacement, Battery: passo 1, immagine 1 di 2 Palm Treo 680 Microphone Replacement, Battery: passo 1, immagine 2 di 2
    • Remove the battery cover by pressing on the small rectangular button located on the back of the phone.

  2. Palm Treo 680 Microphone Replacement: passo 2, immagine 1 di 1
    • Remove the battery by pulling it out towards you.

  3. Palm Treo 680 Microphone Replacement, Back Panel: passo 3, immagine 1 di 2 Palm Treo 680 Microphone Replacement, Back Panel: passo 3, immagine 2 di 2
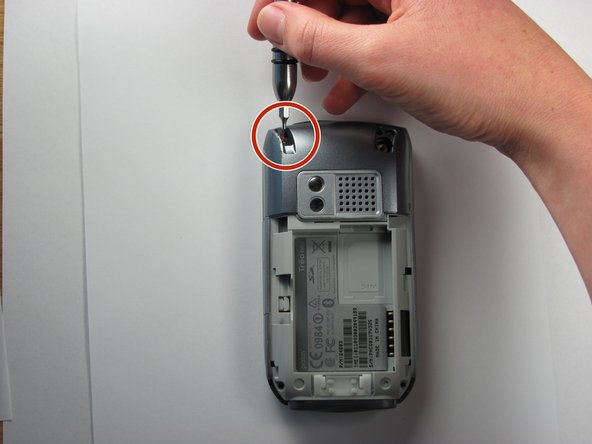
    • Remove the stylus in order to access the screw.

    • Remove the 27mm top-left screw using a T6 Torx screwdriver.

  4. Palm Treo 680 Microphone Replacement: passo 4, immagine 1 di 2 Palm Treo 680 Microphone Replacement: passo 4, immagine 2 di 2
    • Using the spudger, remove the rubber rectangular cover located in the upper rear, right-hand corner.

    • Remove the 27mm screw using the T6 Torx screwdriver.

    • If there is a red Palm sticker covering this screw, puncture it to access the screw.

  5. Palm Treo 680 Microphone Replacement: passo 5, immagine 1 di 1
    • Remove the remaining two 27mm screws from the bottom using the T6 screwdriver.

  6. Palm Treo 680 Microphone Replacement: passo 6, immagine 1 di 3 Palm Treo 680 Microphone Replacement: passo 6, immagine 2 di 3 Palm Treo 680 Microphone Replacement: passo 6, immagine 3 di 3
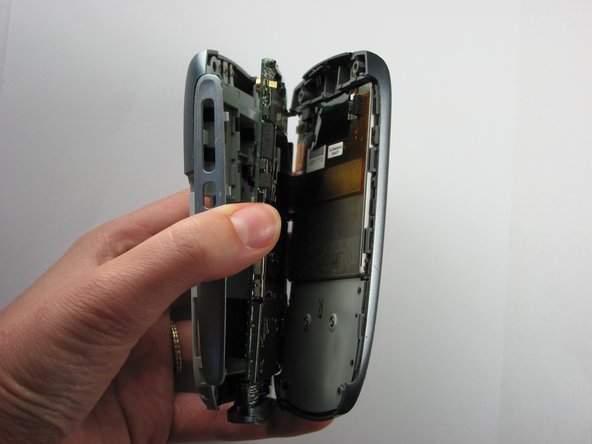
    • Turn the phone so the screen is facing the right side.

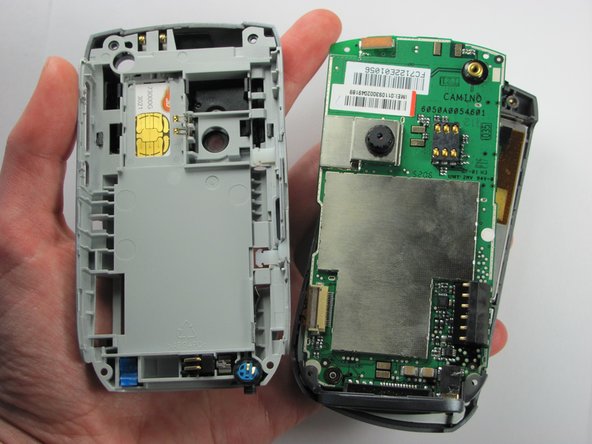
    • Use a spudger to carefully separate the back panel from the front panel to access components inside the phone.

    • Separate the covers from the left side of the device as indicated in the picture.

    • The right side contains orange ribbons that are easily damaged.

  7. Palm Treo 680 Microphone Replacement, Microphone: passo 7, immagine 1 di 2 Palm Treo 680 Microphone Replacement, Microphone: passo 7, immagine 2 di 2
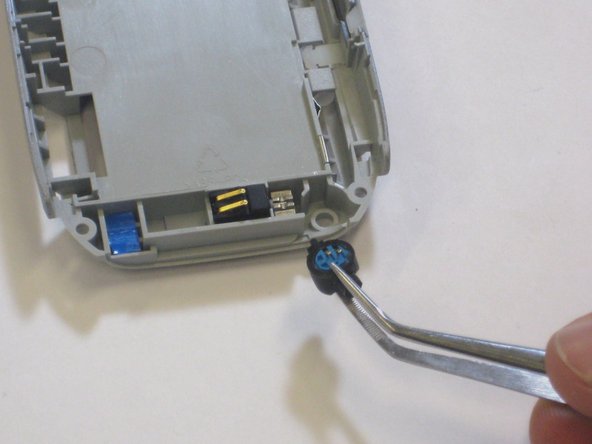
    • Using a pair of tweezers, grasp the blue rubber microphone.

    • Pull the rubber microphone up and back to remove it.

    • Now you have successfully removed the microphone.

Conclusione

To reassemble your device, follow these instructions in reverse order.

Altre 2 persone hanno completato questa guida.

Maiya123

Membro da: 10/22/09

51 Reputazione

6 Guide realizzate

Team

Cal Poly, Team 6-4, Maness Fall 2009 Membro di Cal Poly, Team 6-4, Maness Fall 2009

CPSU-MANESS-F09S6G4

4 Membri

12 Guide realizzate

0 Commenti

Aggiungi Commento

Visualizza Statistiche:

Ultime 24 Ore: 0

Ultimi 7 Giorni: 0

Ultimi 30 Giorni: 1

Tutti i Tempi: 4,133