Questa versione può contenere modifiche errate. Passa all'ultima istantanea verificata.
Cosa ti serve
-
Questo passaggio è privo di traduzione. Aiuta a tradurlo
-
Make sure your Palm Pre is turned off before disassembling the phone.
-
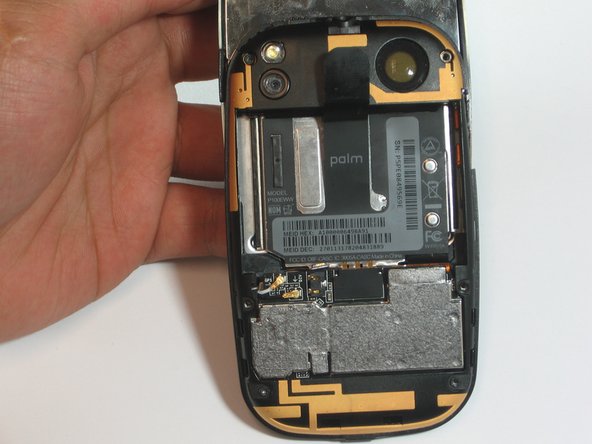
Snap off the back panel to reveal the battery.
-
-
Questo passaggio è privo di traduzione. Aiuta a tradurlo
-
Carefully pull up on the tab to remove the current battery.
-
-
-
Questo passaggio è privo di traduzione. Aiuta a tradurlo
-
Use the t4 screwdriver to remove all 6 of the 3.6mm long screws.
-
-
Questo passaggio è privo di traduzione. Aiuta a tradurlo
-
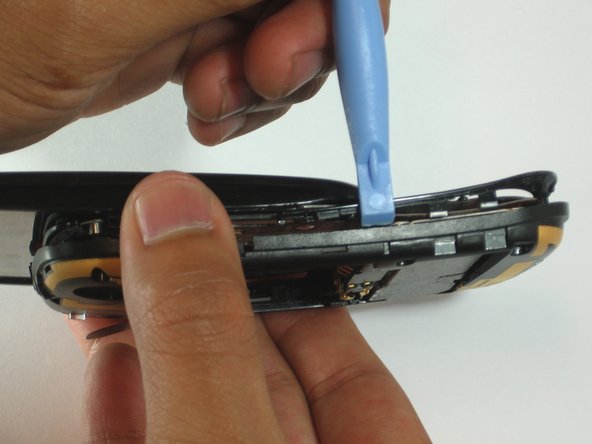
Use the spudger to locate the crease at the bottom of the keyboard.
-
Carefully work your way around the phone separating the back frame from the keyboard.
-
-
Questo passaggio è privo di traduzione. Aiuta a tradurlo
-
Use tweezers to remove the DIV and GPS antennas from the back of the keyboard.
-
-
Questo passaggio è privo di traduzione. Aiuta a tradurlo
-
Use the spuger to pry out the speaker. It is magnetically connected so do not be afraid to use the necessary force.
-
Make sure not the puncture the screen on the outside of the back frame.
-


Team

Cal Poly, Team 7-31, Maness Spring 2012 Membro di Cal Poly, Team 7-31, Maness Spring 2012
CPSU-MANESS-S12S7G31
3 Membri
16 Guide realizzate