Salta al contenuto principale

Palm Pre Screen Assembly Replacement

Guida Archiviata
Questa guida è mantenuta solo per scopi storici. Usa la versione aggiornata della guida per eseguire la riparazione.

Cosa ti serve

  1. Palm Pre Screen Assembly Replacement, Antenna: passo 1, immagine 1 di 2 Palm Pre Screen Assembly Replacement, Antenna: passo 1, immagine 2 di 2
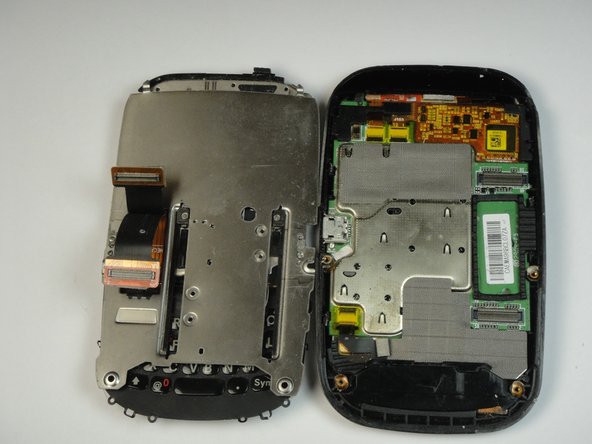
    • First the back panel must be removed to reveal the battery.

    • Remove the battery pack.

  2. Palm Pre Screen Assembly Replacement: passo 2, immagine 1 di 2 Palm Pre Screen Assembly Replacement: passo 2, immagine 2 di 2
    • Remove the six T5 screws necessary to separate the backplate from the phone.

    • There is one screw in the upper right that is concealed by a small sticker labeled "Palm."

    • Additionally, there are interlocking tabs securing the back plate around the edges.

    • Use the opening tool to carefully go around the phone releasing these tabs.

  3. Palm Pre Screen Assembly Replacement: passo 3, immagine 1 di 2 Palm Pre Screen Assembly Replacement: passo 3, immagine 2 di 2
    • Lift the metal flap marked in red to reveal the antenna connectors.

    • Carefully pry these the antennas from their connections, this can be done quite easily.

    • Take note of which colored wire is attached to each connection. The white wire corresponds to GPS, while the black wire corresponds to DIV, or diversity antenna.

  4. Palm Pre Screen Assembly Replacement, PCB (Phone Circuit Board): passo 4, immagine 1 di 3 Palm Pre Screen Assembly Replacement, PCB (Phone Circuit Board): passo 4, immagine 2 di 3 Palm Pre Screen Assembly Replacement, PCB (Phone Circuit Board): passo 4, immagine 3 di 3
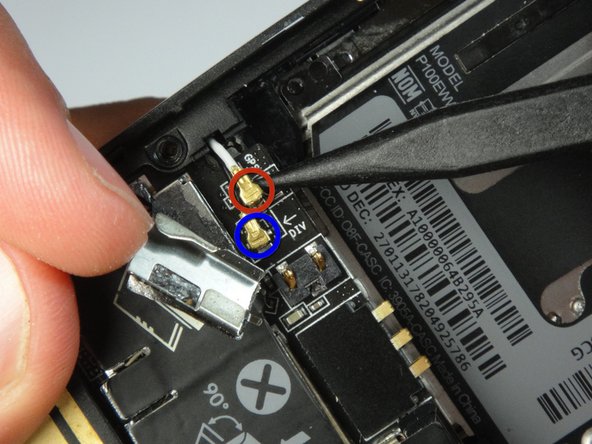
    • With the backplate removed, we have easy access to the PCB.

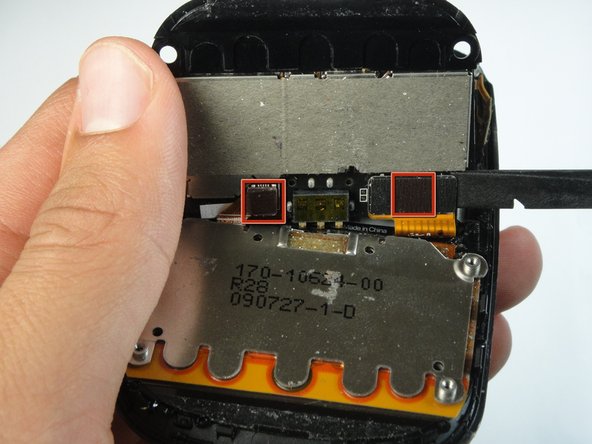
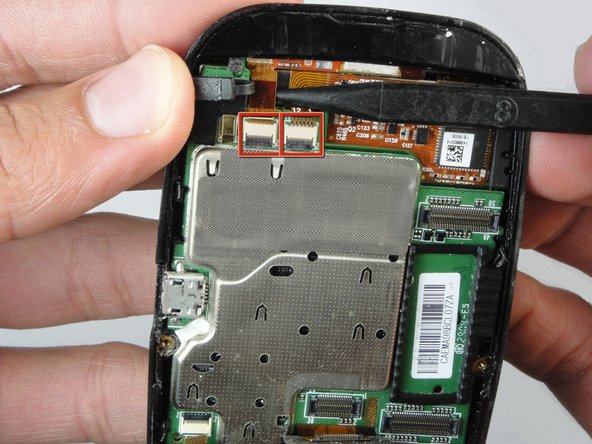
    • Two connectors must be disconnected so that we can remove the PCB.

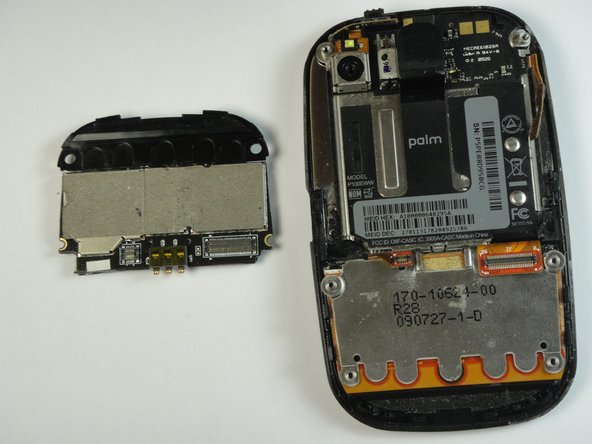
    • Gentle prying with the opening tool should easily separate the glued PCB from the rest of the phone.

  5. Palm Pre Screen Assembly Replacement, Motherboard: passo 5, immagine 1 di 1
    • Once you have removed the PCB, you can proceed to removing the keyboard bezel.

    • To do this, use a spudger to gently lift off the plastic edging as shown. There are small plastic hooks attaching the bezel to the keyboard.

    • Be careful not to rip any of the loops on the keyboard.

  6. Palm Pre Screen Assembly Replacement: passo 6, immagine 1 di 3 Palm Pre Screen Assembly Replacement: passo 6, immagine 2 di 3 Palm Pre Screen Assembly Replacement: passo 6, immagine 3 di 3
    • Now you are ready to pry the slider function from the back of the screen.

    • Remove the four screws. The bottom two screws are easier to see when the phone is slid about half open.

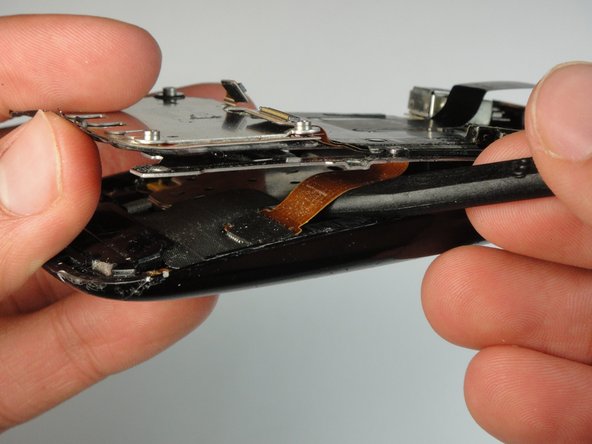
    • Again, use the spudger to pry around the edges loosening it until it comes apart.

    • There are several connectors still attaching these two pieces. Use the spudger to disconnect them on the screen.

  7. Palm Pre Screen Assembly Replacement: passo 7, immagine 1 di 2 Palm Pre Screen Assembly Replacement: passo 7, immagine 2 di 2
    • Next, remove four connectors to remove the mother board.

    • Use a spudger to gently pry the four connectors.

    • There is a yellow film over some of the connectors that must be removed prior to removing the connections.

    • After everything is disconnected, the mother board should lift out easily.

  8. Palm Pre Screen Assembly Replacement, Screen: passo 8, immagine 1 di 1
    • With the mother board removed, you are left with a screen with a metal EMI shield soldered to the back. Therefore, this is your one and only step.

    • The new screen should come with all the chips you could potentially separate from the old one, such as the tracking ball some other various chips required for the phone to function.

Conclusione

To reassemble your device, follow these instructions in reverse order.

Austin

Membro da: 10/09/11

137 Reputazione

1 Guida realizzata

Team

Cal Poly, Team 21-19, Maness Fall 2011 Membro di Cal Poly, Team 21-19, Maness Fall 2011

CPSU-MANESS-F11S21G19

4 Membri

1 Guida realizzata

0 Commenti

Aggiungi Commento

Visualizza Statistiche:

Ultime 24 Ore: 0

Ultimi 7 Giorni: 0

Ultimi 30 Giorni: 0

Tutti i Tempi: 1,336