Salta al contenuto principale

Palm Centro Back Housing Replacement

Cosa ti serve

  1. Palm Centro Back Housing Replacement, Disassembling Palm Centro Battery: passo 1, immagine 1 di 2 Palm Centro Back Housing Replacement, Disassembling Palm Centro Battery: passo 1, immagine 2 di 2
    • Press and slide open the battery cover.

  2. Palm Centro Back Housing Replacement: passo 2, immagine 1 di 1
    • Caution: Turn cell phone off before removing battery!

    • Press battery to the right.

    • Then lift up battery pack to remove.

  3. Palm Centro Back Housing Replacement: passo 3, immagine 1 di 1
    • Phone with battery removed

  4. Palm Centro Back Housing Replacement, Back Housing: passo 4, immagine 1 di 1
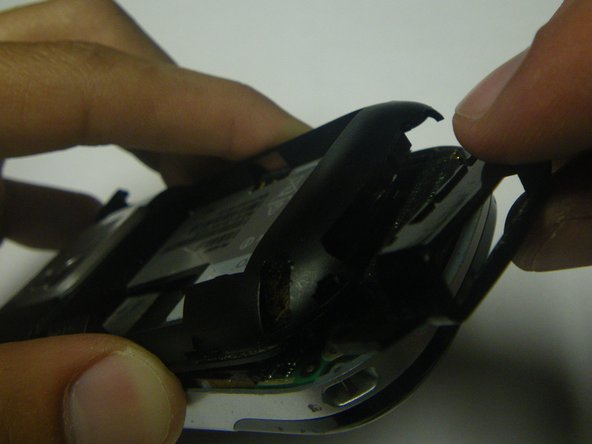
    • Remove the touchpad pen from the top left corner on the back to reveal the last of 6 screws to be removed.

  5. Palm Centro Back Housing Replacement: passo 5, immagine 1 di 1
    • Lift the rubber cap at the top right to reveal the sixth screw.

    • Caution: There is a small Palm sticker under the rubber cap. Tampering with or removing this sticker will void your warranty!

    • Remove the six screws using the T5 Torx screwdriver.

  6. Palm Centro Back Housing Replacement: passo 6, immagine 1 di 2 Palm Centro Back Housing Replacement: passo 6, immagine 2 di 2
    • Remove the SIM card so housing can be separated.

  7. Palm Centro Back Housing Replacement: passo 7, immagine 1 di 2 Palm Centro Back Housing Replacement: passo 7, immagine 2 di 2
    • Use a plastic pry tool to separate the bottom of the case to remove the small plastic insert.

  8. Palm Centro Back Housing Replacement: passo 8, immagine 1 di 2 Palm Centro Back Housing Replacement: passo 8, immagine 2 di 2
    • Remove the small plastic insert at the bottom of the phone.

  9. Palm Centro Back Housing Replacement: passo 9, immagine 1 di 2 Palm Centro Back Housing Replacement: passo 9, immagine 2 di 2
    • Continue with plastic pry tool all the way around the phone to remove the back housing.

Conclusione

To reassemble your device, follow these instructions in reverse order.

Altre 2 persone hanno completato questa guida.

Team

Cal Poly, Team 15-49, Garner Spring 2010 Membro di Cal Poly, Team 15-49, Garner Spring 2010

CPSU-GARNER-S10S15G49

5 Membri

12 Guide realizzate

0 Commenti

Aggiungi Commento

Visualizza Statistiche:

Ultime 24 Ore: 0

Ultimi 7 Giorni: 0

Ultimi 30 Giorni: 0

Tutti i Tempi: 3,759