Salta al contenuto principale

Packard Bell ms-Hera c Disassembly

Cosa ti serve

  1. Packard Bell ms-Hera c Disassembly, Unscrew the lid: passo 1, immagine 1 di 3 Packard Bell ms-Hera c Disassembly, Unscrew the lid: passo 1, immagine 2 di 3 Packard Bell ms-Hera c Disassembly, Unscrew the lid: passo 1, immagine 3 di 3
    • Remove the battery.

    • Unscrew the red marked screws with a Phillips screwdriver.

    • Remove the DVD reader.

  2. Packard Bell ms-Hera c Disassembly, Disconnect the keyboard: passo 2, immagine 1 di 3 Packard Bell ms-Hera c Disassembly, Disconnect the keyboard: passo 2, immagine 2 di 3 Packard Bell ms-Hera c Disassembly, Disconnect the keyboard: passo 2, immagine 3 di 3
    • Pry in the red marked spots to release the keyboard

    • Unplug the keyboard connector.

  3. Packard Bell ms-Hera c Disassembly, Unplug the cables: passo 3, immagine 1 di 3 Packard Bell ms-Hera c Disassembly, Unplug the cables: passo 3, immagine 2 di 3 Packard Bell ms-Hera c Disassembly, Unplug the cables: passo 3, immagine 3 di 3
    • Unplug the 3 connectors on the motherboard

    • Remove the 2 screws holding the display in place

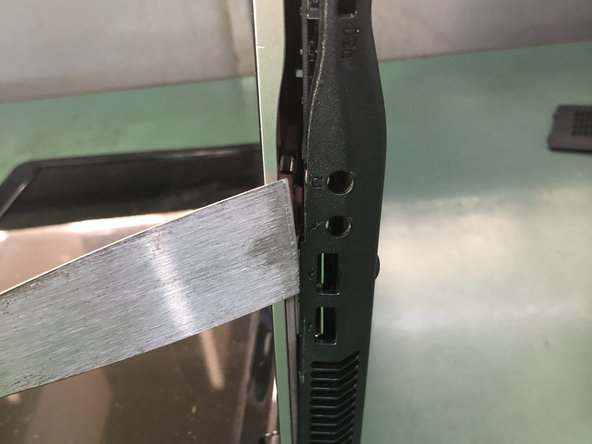
    • Use a thin tool to pry up the back cover of the laptop on the side

  4. Packard Bell ms-Hera c Disassembly, Unscrew the motherboard: passo 4, immagine 1 di 3 Packard Bell ms-Hera c Disassembly, Unscrew the motherboard: passo 4, immagine 2 di 3 Packard Bell ms-Hera c Disassembly, Unscrew the motherboard: passo 4, immagine 3 di 3
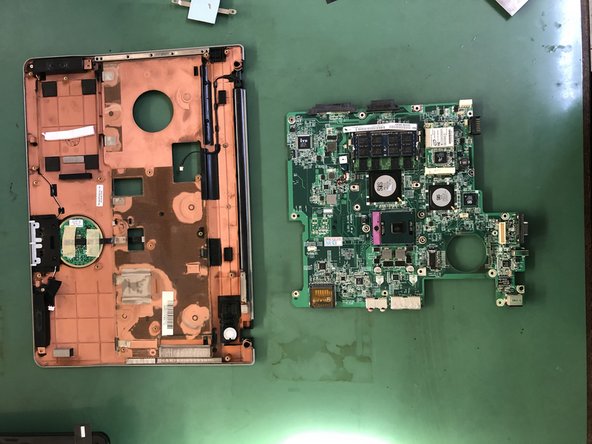
    • Remove the back cover.

    • Remove the HDD.

    • Remove the screws that hold the motherboard.

  5. Packard Bell ms-Hera c Disassembly, Remove the display: passo 5, immagine 1 di 3 Packard Bell ms-Hera c Disassembly, Remove the display: passo 5, immagine 2 di 3 Packard Bell ms-Hera c Disassembly, Remove the display: passo 5, immagine 3 di 3
    • Remove the marked screws and connectors.

    • Disconnect the display connector.

    • Remove the display.

  6. Packard Bell ms-Hera c Disassembly, Remove the heatsink: passo 6, immagine 1 di 3 Packard Bell ms-Hera c Disassembly, Remove the heatsink: passo 6, immagine 2 di 3 Packard Bell ms-Hera c Disassembly, Remove the heatsink: passo 6, immagine 3 di 3
    • Remove the cooling fan.

    • Remove the heatsink.

    • Remove the screws on the connector.

  7. Packard Bell ms-Hera c Disassembly, Remove the motherboard: passo 7, immagine 1 di 2 Packard Bell ms-Hera c Disassembly, Remove the motherboard: passo 7, immagine 2 di 2
    • Remove the screws to remove the motherboard.

Conclusione

To reassemble your device, follow these instructions in reverse order.

Un'altra persona ha completato questa guida.

Un ringraziamento speciale a questi traduttori:

it en

100%

Questi traduttori ci stanno aiutando ad aggiustare il mondo! Vuoi partecipare?
Inizia a tradurre ›

Smilzo

Membro da: 11/09/13

11.267 Reputazione

39 Guide realizzate

0 Commenti

Aggiungi Commento

Visualizza Statistiche:

Ultime 24 Ore: 0

Ultimi 7 Giorni: 4

Ultimi 30 Giorni: 26

Tutti i Tempi: 1,056