Salta al contenuto principale
Unisciti alla Community delle riparazioni - Crea un account
PSP 300xc Trigger Buttons Replacement

Cosa ti serve

  1. PSP 300xc Trigger Buttons Replacement, Battery: passo 1, immagine 1 di 2 PSP 300xc Trigger Buttons Replacement, Battery: passo 1, immagine 2 di 2
    • Press the button securing the battery door to the PSP 300xc, and lift the battery door off.

    • Lift the battery out of the PSP.

    Chiedi a FixBot
  2. PSP 300xc Trigger Buttons Replacement, Front Case: passo 2, immagine 1 di 1
    • Use a spudger or your fingernail to remove the warranty sticker stuck to the inside of the battery tray

    Chiedi a FixBot
  3. PSP 300xc Trigger Buttons Replacement: passo 3, immagine 1 di 2 PSP 300xc Trigger Buttons Replacement: passo 3, immagine 2 di 2
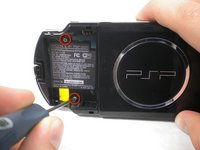
    • Remove four Phillips screws from the back of the PSP.

    Chiedi a FixBot
  4. PSP 300xc Trigger Buttons Replacement: passo 4, immagine 1 di 1
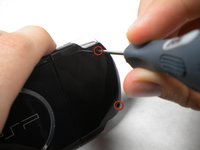
    • Remove two Phillips screws from the top of the PSP.

    Chiedi a FixBot
  5. PSP 300xc Trigger Buttons Replacement: passo 5, immagine 1 di 1
    • Remove a single screw from the bottom edge of the PSP.

    Chiedi a FixBot
  6. PSP 300xc Trigger Buttons Replacement: passo 6, immagine 1 di 2 PSP 300xc Trigger Buttons Replacement: passo 6, immagine 2 di 2
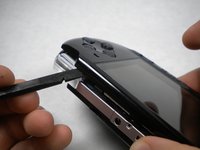
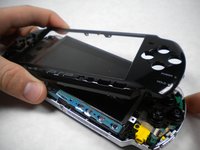
    • Insert a spudger between the front case and PSP, and slide the spudger along the perimeter of the front case to remove it.

    Chiedi a FixBot
  7. PSP 300xc Trigger Buttons Replacement, LCD: passo 7, immagine 1 di 1
    • Remove a single Phillips screw securing the home bar to the PSP 300xc.

    Chiedi a FixBot
  8. PSP 300xc Trigger Buttons Replacement: passo 8, immagine 1 di 2 PSP 300xc Trigger Buttons Replacement: passo 8, immagine 2 di 2
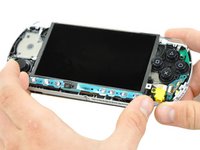
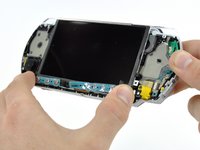
    • Push the home bar to the right about 1cm to release a tab, and begin to lift the right end of the home bar slightly.

    • Do not attempt to remove the home bar yet, it is still attached to the PSP 300xc.

    Chiedi a FixBot
  9. PSP 300xc Trigger Buttons Replacement: passo 9, immagine 1 di 1
    • Insert a spudger under the LCD, beside the black plastic tab.

    • Push the LCD to the left and pry up to release the left edge of the LCD from under the plastic tab.

    Chiedi a FixBot
  10. PSP 300xc Trigger Buttons Replacement: passo 10, immagine 1 di 1
    • Insert a spudger under the LCD, beside the black plastic tab.

    • Push the LCD to the right and pry up to release the right edge of the LCD from under the plastic tab.

    Chiedi a FixBot
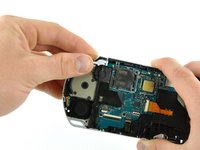
  11. PSP 300xc Trigger Buttons Replacement: passo 11, immagine 1 di 3 PSP 300xc Trigger Buttons Replacement: passo 11, immagine 2 di 3 PSP 300xc Trigger Buttons Replacement: passo 11, immagine 3 di 3
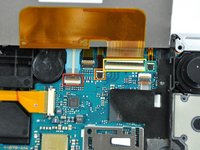
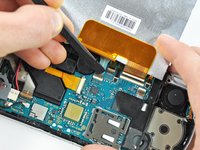
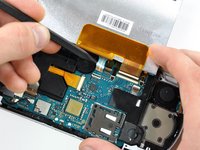
    • Rotate the LCD away from the PSP to reveal the LCD and home bar ribbon cables.

    • Use your fingernail or the edge of a plastic opening tool to flip up the retaining flap on the following four ZIF connectors:

    • Home bar cable

    • Microphone cable

    • LCD display data cable

    • Touchscreen cable

    • Be sure you are prying up on the retaining flap, not the socket itself

    • After flipping up the locking tabs on all four connectors, use your fingers or a spudger to gently pull the cables straight out of the connectors.

    Chiedi a FixBot
  12. PSP 300xc Trigger Buttons Replacement: passo 12, immagine 1 di 1
    • Remove the LCD from the PSP 300xc.

    Chiedi a FixBot
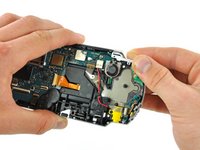
  13. PSP 300xc Trigger Buttons Replacement, Home Bar: passo 13, immagine 1 di 3 PSP 300xc Trigger Buttons Replacement, Home Bar: passo 13, immagine 2 di 3 PSP 300xc Trigger Buttons Replacement, Home Bar: passo 13, immagine 3 di 3
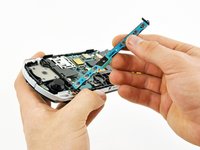
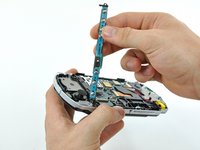
    • Lift the home bar up as high as it will go, but not so high that the wires disconnect.

    • Try to bend the small tab under the silver rim as little as possible it the following steps. The more you bend, the more likely it will snap.

    • Twist the home bar counter clockwise while carefully lifting it further. The left edge has to lift over the black plastic frame to allow it to rotate.

    • The home bar should now lift out of the PSP 300xc.

    Chiedi a FixBot
  14. PSP 300xc Trigger Buttons Replacement, Trigger Buttons: passo 14, immagine 1 di 2 PSP 300xc Trigger Buttons Replacement, Trigger Buttons: passo 14, immagine 2 di 2
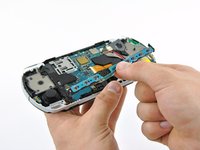
    • Remove both trigger buttons by lifting them off the PSP 300xc.

    Chiedi a FixBot
Conclusione

To reassemble your device, follow these instructions in reverse order.

Un'altra persona ha completato questa guida.

Matthew Newsom

Membro da: 01/05/10

42.700 Reputazione

67 guide realizzate

0Commenti sulla guida

Aggiungi Commento

Visualizza statistiche:

Ultime 24 ore: 5

Ultimi 7 giorni: 23

Ultimi 30 giorni: 96

Tutti i Tempi: 3,257