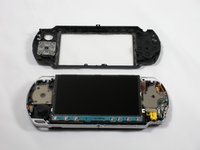
Salta al contenuto principale

PSP 2000 Front Casing Replacement

Cosa ti serve

  1. PSP 2000 Front Casing Replacement, Battery: passo 1, immagine 1 di 3 PSP 2000 Front Casing Replacement, Battery: passo 1, immagine 2 di 3 PSP 2000 Front Casing Replacement, Battery: passo 1, immagine 3 di 3
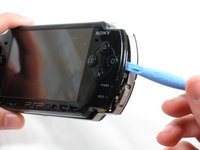
    • Place PSP face down, so that the UMD Drive is facing upwards.

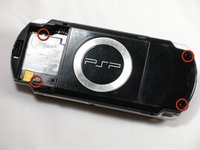
    • Locate the battery door and open.

    • Remove the battery from inside.

  2. PSP 2000 Front Casing Replacement, Front Casing: passo 2, immagine 1 di 1
    • This step requires the removal of the warranty sticker. Removing the sticker will void the warranty. According to the FTC removing this will not void your warranty.

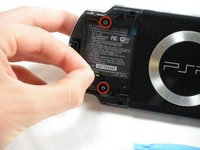
    • Locate the sticker in the battery compartment labeled: "En: Warranty Void if Seal Damaged."

    • Remove the sticker using the PSP Opening Tools.

    • Under the sticker is a 5mm Phillips screw needed in the next step.

  3. PSP 2000 Front Casing Replacement: passo 3, immagine 1 di 2 PSP 2000 Front Casing Replacement: passo 3, immagine 2 di 2
    • Remove four 5 mm Phillips from the case.

    • If the screws stick in the case, you can use a magnetized screwdriver to draw them out.

  4. PSP 2000 Front Casing Replacement: passo 4, immagine 1 di 2 PSP 2000 Front Casing Replacement: passo 4, immagine 2 di 2
    • Remove the following screws from around the bezel:

    • Two 4 mm Phillips

    • One 5 mm Phillips

    • The two shorter 4 mm screws are on the top of the PSP; the longer 5 mm screw is on the bottom.

  5. PSP 2000 Front Casing Replacement: passo 5, immagine 1 di 2 PSP 2000 Front Casing Replacement: passo 5, immagine 2 di 2
    • Gently pry the front bezel away from the casing using a PSP opening tool.

    • Start on the right hand side of the PSP bezel, and carefully work the tool around the side.

    • If you want to clean the control buttons or D-pad, you can easily pop them out once the faceplate is off and wipe them clean.

Conclusione

To reassemble your device, follow these instructions in reverse order.

Altre 13 persone hanno completato questa guida.

pepe32290

Membro da: 10/19/09

1.573 Reputazione

4 Guide realizzate

Team

Cal Poly, Team 6-3, Maness Fall 2009 Membro di Cal Poly, Team 6-3, Maness Fall 2009

CPSU-MANESS-F09S6G3

5 Membri

35 Guide realizzate

Un commento

Does the front casing also have the plastic glass screen on it as well? Or is that separate?

Arthur - Replica

Aggiungi Commento

Visualizza Statistiche:

Ultime 24 Ore: 7

Ultimi 7 Giorni: 34

Ultimi 30 Giorni: 4,025

Tutti i Tempi: 26,049