Salta al contenuto principale
Unisciti alla Community delle riparazioni - Crea un account
PDP Rematch Advanced Triggers Replacement

PDP Rematch Advanced Triggers Replacement

Kevin Crawford

Kevin Crawford e un altro collaboratore

Ultimo aggiornamento il 7 gen 2025

25 minuti
Moderato

Introduzione

Vai al passo 1

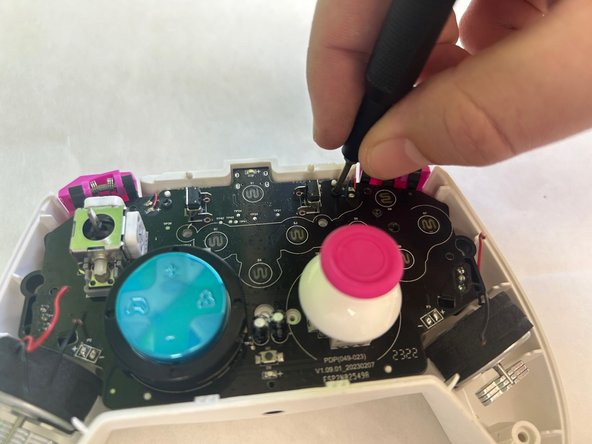
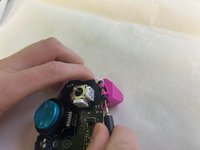
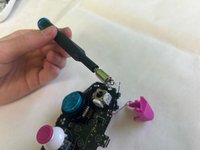
Triggers may need to be replaced if they become worn out or too sensitive. If you need to replace the triggers on your PDP Rematch Advanced controller, follow this guide. The triggers can be taken out by unscrewing them from the motherboard.

Cosa ti serve

Strumenti

Mostra di più…

  1. PDP Rematch Advanced Triggers Replacement, Triggers: passo 1, immagine 1 di 2 PDP Rematch Advanced Triggers Replacement, Triggers: passo 1, immagine 2 di 2
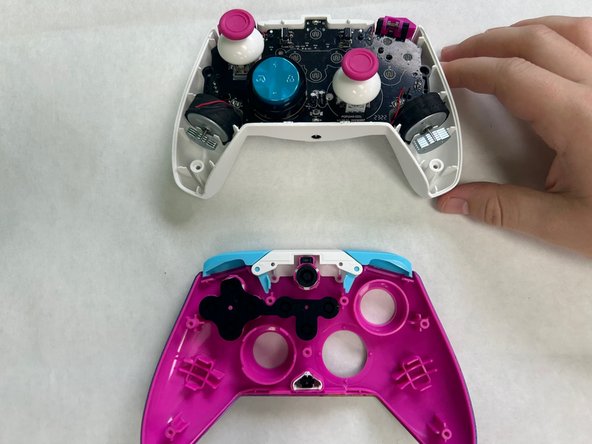
    • Orient the controller so the back side is facing you.

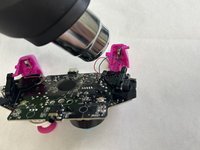
    • Use a Phillips #000 screwdriver to remove the seven 9 mm screws that secure the back shell.

  2. PDP Rematch Advanced Triggers Replacement: passo 2, immagine 1 di 2 PDP Rematch Advanced Triggers Replacement: passo 2, immagine 2 di 2
    • Pull apart the controller's front and back shells with moderate force.

    • Orient the controller so that the front shell is facing the floor to prevent the face buttons from falling out.

  3. PDP Rematch Advanced Triggers Replacement: passo 3, immagine 1 di 2 PDP Rematch Advanced Triggers Replacement: passo 3, immagine 2 di 2
    • Use a Phillips #00 screwdriver to remove the two 5 mm screws that secure the motherboard.

  4. PDP Rematch Advanced Triggers Replacement: passo 4, immagine 1 di 1
    • Remove the motherboard from the back shell using moderate force.

  5. PDP Rematch Advanced Triggers Replacement: passo 5, immagine 1 di 2 PDP Rematch Advanced Triggers Replacement: passo 5, immagine 2 di 2
    • Use a Phillips #00 screwdriver to remove the two trigger springs from the motherboard.

  6. PDP Rematch Advanced Triggers Replacement: passo 6, immagine 1 di 2 PDP Rematch Advanced Triggers Replacement: passo 6, immagine 2 di 2
    • Use a hair dryer to remove the trigger from the motherboard.

Conclusione

To reassemble your device, follow these instructions in reverse order.

Kevin Crawford

Membro da: 09/23/24

133 Reputazione

1 Guida realizzata

0Commenti sulla guida

Aggiungi Commento

Visualizza Statistiche:

Ultime 24 Ore: 0

Ultimi 7 Giorni: 1

Ultimi 30 Giorni: 24

Tutti i Tempi: 162