Salta al contenuto principale

Orbic Wonder Battery Replacement

Cosa ti serve

  1. Orbic Wonder Battery Replacement, Battery: passo 1, immagine 1 di 3 Orbic Wonder Battery Replacement, Battery: passo 1, immagine 2 di 3 Orbic Wonder Battery Replacement, Battery: passo 1, immagine 3 di 3
    • Remove two 2mm TR9 Torx screws from the bottoms of the device.

  2. Orbic Wonder Battery Replacement: passo 2, immagine 1 di 3 Orbic Wonder Battery Replacement: passo 2, immagine 2 di 3 Orbic Wonder Battery Replacement: passo 2, immagine 3 di 3
    • There is a border between the black phone backing and the silver screen.

    • Place the Jimmy in this border, and cautiously torque it back and forth to part the two halves.

    • When the halves are parted correctly, the gap should look like this.

    • Be careful to avoid damaging any connecting circuitry between the two halves.

  3. Orbic Wonder Battery Replacement: passo 3, immagine 1 di 3 Orbic Wonder Battery Replacement: passo 3, immagine 2 di 3 Orbic Wonder Battery Replacement: passo 3, immagine 3 di 3
    Attrezzo utilizzato in questo passaggio:
    Anti-Static Wrist Strap
    $7.95
    Compra
    • Before continuing, tighten the anti-static wrist strap around your wrist and connect the alligator clips to a metal portion of the phone.

    • On the upper right side, there is a black ribbon cable in the shape of an ā€œLā€. Remove the single 1 mm Phillips #000 screw on the left side of the ribbon cable.

  4. Orbic Wonder Battery Replacement: passo 4, immagine 1 di 3 Orbic Wonder Battery Replacement: passo 4, immagine 2 di 3 Orbic Wonder Battery Replacement: passo 4, immagine 3 di 3
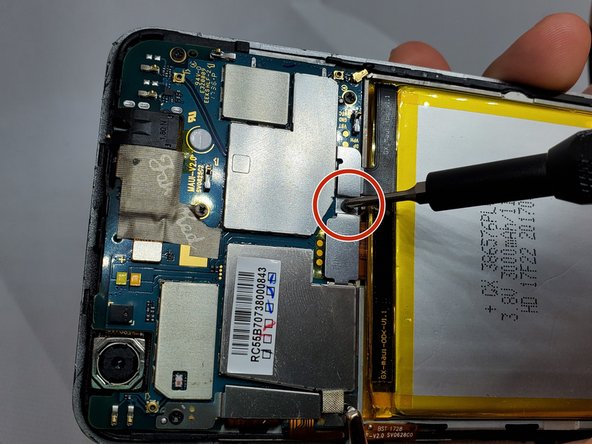
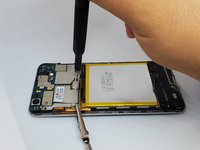
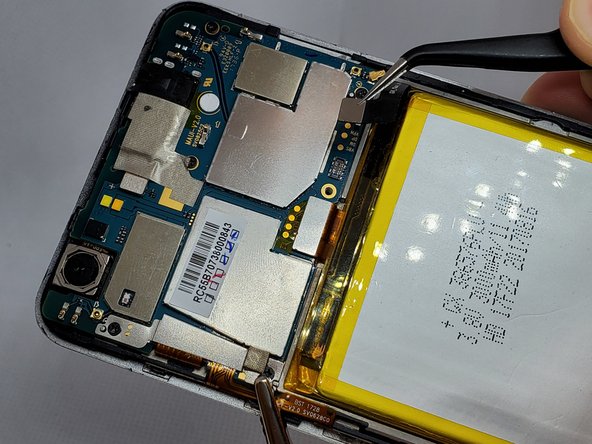
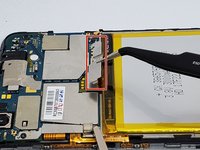
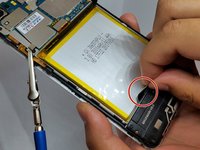
    • Use a pair of angled tweezers to carefully remove the metal casing of the ribbon cable.

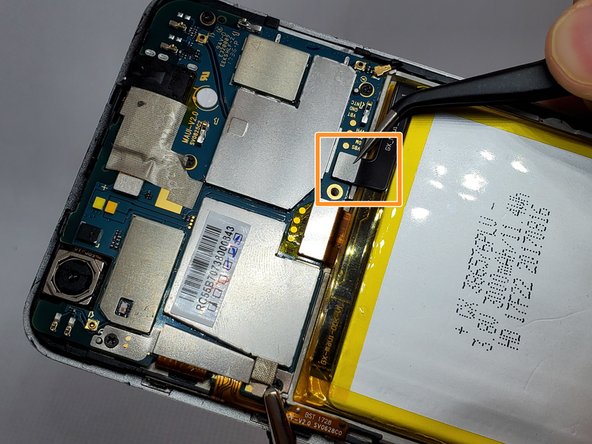
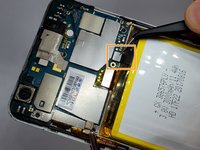
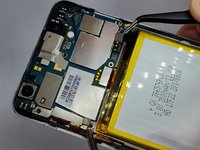
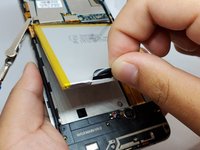
    • Use a pair of angled tweezers to detach the black ribbon cable. This is done to unplug the battery.

  5. Orbic Wonder Battery Replacement: passo 5, immagine 1 di 3 Orbic Wonder Battery Replacement: passo 5, immagine 2 di 3 Orbic Wonder Battery Replacement: passo 5, immagine 3 di 3
    • There is a black flap on the bottom of the battery.

    • Using your fingers, pinch this flap and carefully pull the battery up and out of the phone.

Conclusione

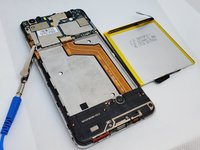
To reassemble your device, follow these instructions in reverse order.

Altre 2 persone hanno completato questa guida.

3 Commenti

where do you buy the replacement battery at ?

ricotoomo - Replica

Where can I buy a replacement battery

Robert Smith -

Thank you big help your smart

gansterms123 - Replica

Aggiungi Commento

Visualizza Statistiche:

Ultime 24 Ore: 5

Ultimi 7 Giorni: 16

Ultimi 30 Giorni: 58

Tutti i Tempi: 7,068