Questa versione può contenere modifiche errate. Passa all'ultima istantanea verificata.
Cosa ti serve
-
Questo passaggio è privo di traduzione. Aiuta a tradurlo
-
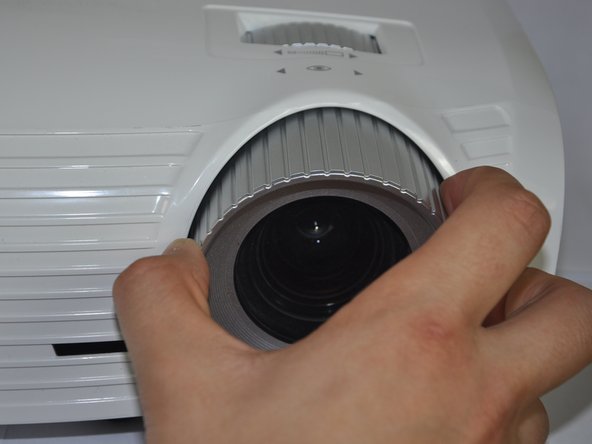
Twist the focal cap clockwise until it is fully extended.
-
Remove the focal cap by pulling it straight out.
-
-
Questo passaggio è privo di traduzione. Aiuta a tradurlo
-
Use a Phillips #1 screwdriver to remove the three 7.5mm screws on the bottom of the device.
-
-
Questo passaggio è privo di traduzione. Aiuta a tradurlo
-
Use a plastic opening tool to gently pry the top cover off of the device.
-
-
-
Questo passaggio è privo di traduzione. Aiuta a tradurlo
-
Remove the ribbon by disconnecting it from the main circuit board.
-
Lift up the clip holding it down and pull the ribbon out.
-
-
Questo passaggio è privo di traduzione. Aiuta a tradurlo
-
Use the plastic opening tool to remove the wiring.
-
-
Questo passaggio è privo di traduzione. Aiuta a tradurlo
-
Use a Phillips #1 screwdriver to remove the 5.5 mm screws around the pin wheel.
-
-
Questo passaggio è privo di traduzione. Aiuta a tradurlo
-
Use a Phillips #1 screwdriver to remove 1 more 5.5 mm screw.
-
-
Questo passaggio è privo di traduzione. Aiuta a tradurlo
-
Using a flat head screw driver unscrew the back part to release the color wheel.
-
-
Questo passaggio è privo di traduzione. Aiuta a tradurlo
-
Once unscrewed, remove the color wheel, and replace the part.
-
Annulla: non ho completato questa guida.
Altre 6 persone hanno completato questa guida.
3 Commenti
I've seen 5 guides say that the lens adjustment cover just pulls straight out, but even with significant force, it doesn't budge. Are there two different versions of the HD20 with two different designs for the cover?
I couldn't get the shroud off until I had the plastic top of the projector mostly off.
dlwalter -
The shroud has clips on it that attach to some bolts coming off the lense so yeah, it will take some force to pop the clips.
dlwalter -


