Salta al contenuto principale

OnePlus Nord N200 Sub Board Replacement

Cosa ti serve

  1. OnePlus Nord N200 Sub Board Replacement, Sub/Charger Board: passo 1, immagine 1 di 3 OnePlus Nord N200 Sub Board Replacement, Sub/Charger Board: passo 1, immagine 2 di 3 OnePlus Nord N200 Sub Board Replacement, Sub/Charger Board: passo 1, immagine 3 di 3
    • Take sim tray out prior to beginning repair.

    • Heat back of phone to make the adhesion more pliable

    • Insert a slim prying tool to begin removing the back cover, move in a counterclockwise direction

    • Add IPA as you work to detatch the adhesion layer

    • When approaching the volume button, be cautious, as the ribbon cable is exposed and can easilyt be cut
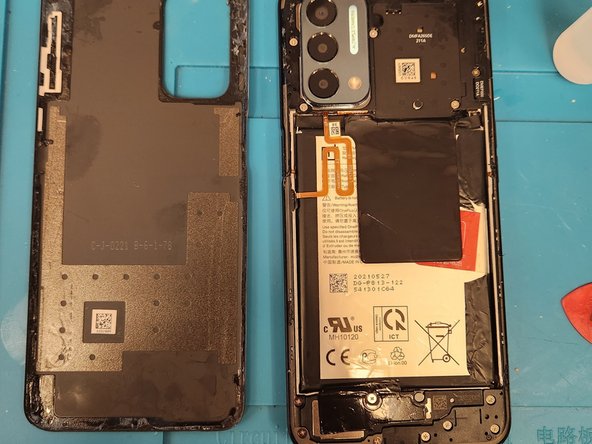
    • Remove back cover

  2. OnePlus Nord N200 Sub Board Replacement: passo 2, immagine 1 di 3 OnePlus Nord N200 Sub Board Replacement: passo 2, immagine 2 di 3 OnePlus Nord N200 Sub Board Replacement: passo 2, immagine 3 di 3
    • Using a J000 screwdriver, remove the Screws holding the edge casing to the screen (19 Total)

    • Using a pry tool, seperate the edge plastic from the screen

    • Once you have attained suitable lift, disconnect the power button cable.

    • Remove the edge plastic and set aside.

  3. OnePlus Nord N200 Sub Board Replacement: passo 3, immagine 1 di 1
    • Remove the plastic speaker piece

    • Disconnect the antenna cables and main board connector

    • Remove the board and insert new component

    • reconnect connectors

  4. OnePlus Nord N200 Sub Board Replacement: passo 4, immagine 1 di 3 OnePlus Nord N200 Sub Board Replacement: passo 4, immagine 2 di 3 OnePlus Nord N200 Sub Board Replacement: passo 4, immagine 3 di 3
    • Reconnect the antenna and main board

    • Reconnect the power cable, and reattach the plastic edge

    • Using J000, screw the 19 screws back in

  5. OnePlus Nord N200 Sub Board Replacement: passo 5, immagine 1 di 2 OnePlus Nord N200 Sub Board Replacement: passo 5, immagine 2 di 2
    • Reconnect the back plastic, and set on heat to adhere

    • You can also use tesa tape to increase the adhesion.

Conclusione

This order can be used for charger, headphone jack, or water damage to sub board.

Jesse Smith

Membro da: 10/16/23

121 Reputazione

1 Guida realizzata

0 Commenti

Aggiungi Commento

Visualizza Statistiche:

Ultime 24 Ore: 7

Ultimi 7 Giorni: 17

Ultimi 30 Giorni: 73

Tutti i Tempi: 361