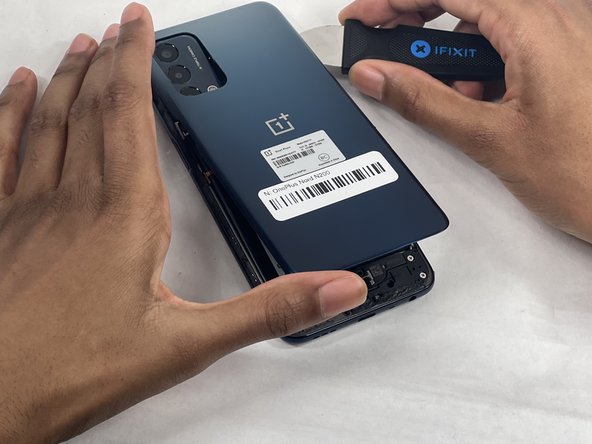
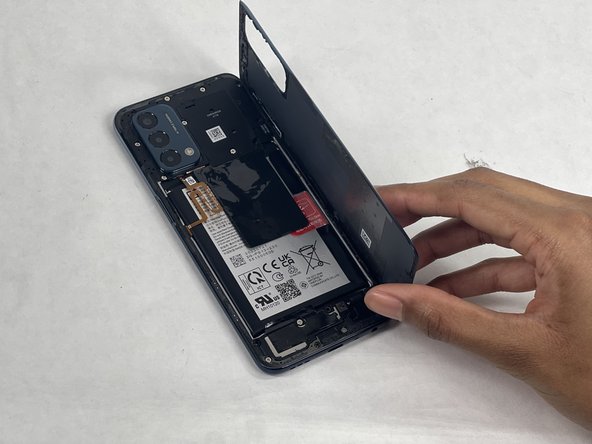
Salta al contenuto principale

OnePlus Nord N200 Back Cover Replacement

Cosa ti serve

  1. OnePlus Nord N200 Back Cover Replacement, Back Cover: passo 1, immagine 1 di 3 OnePlus Nord N200 Back Cover Replacement, Back Cover: passo 1, immagine 2 di 3 OnePlus Nord N200 Back Cover Replacement, Back Cover: passo 1, immagine 3 di 3
    • Due to its surface, the suction tool won't hold onto the phone's rear glass. A thin slicing tool is required.

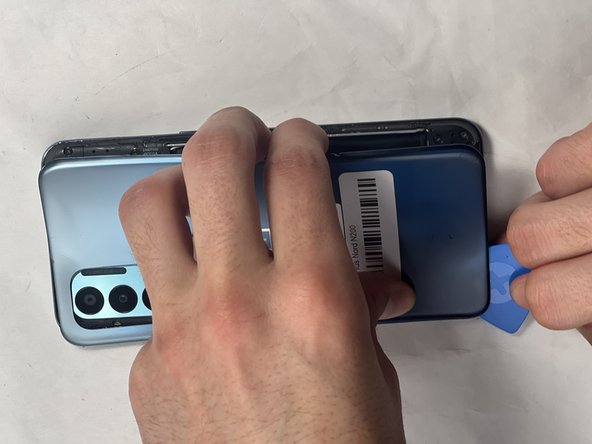
    • Insert the Jimmy into the seam between the rear glass and the midframe at the bottom edge of the phone to create a gap.

    • This may require some force.

    • Leave the Jimmy in place for a few seconds to prevent the adhesive from resealing.

  2. OnePlus Nord N200 Back Cover Replacement: passo 2, immagine 1 di 3 OnePlus Nord N200 Back Cover Replacement: passo 2, immagine 2 di 3 OnePlus Nord N200 Back Cover Replacement: passo 2, immagine 3 di 3
    • Insert an iFixit opening pick into the gap you created with the Jimmy.

    • Slide the Jimmy around the phone to slice the adhesive.

    • Insert a second iFixit opening pick at the spot you have sliced open to keep it open.

  3. OnePlus Nord N200 Back Cover Replacement: passo 3, immagine 1 di 3 OnePlus Nord N200 Back Cover Replacement: passo 3, immagine 2 di 3 OnePlus Nord N200 Back Cover Replacement: passo 3, immagine 3 di 3
    • Slide the iFixit opening pick along the top edge to slice the adhesive.

    • Start prying the back plate off the phone.

  4. OnePlus Nord N200 Back Cover Replacement: passo 4, immagine 1 di 3 OnePlus Nord N200 Back Cover Replacement: passo 4, immagine 2 di 3 OnePlus Nord N200 Back Cover Replacement: passo 4, immagine 3 di 3
    • Remove the back cover.

Conclusione

To reassemble your device, follow these instructions in reverse order.

Un'altra persona ha completato questa guida.

Team

0 Commenti

Aggiungi Commento

Visualizza Statistiche:

Ultime 24 Ore: 0

Ultimi 7 Giorni: 5

Ultimi 30 Giorni: 24

Tutti i Tempi: 66