Salta al contenuto principale

Questa guida ha delle modifiche più recenti. Passa all'ultima versione non verificata.

Olympus Stylus 1030 SW LCD Replacement

Cosa ti serve

  1. Olympus Stylus 1030 SW LCD Replacement, Olympus Stylus 1030 SW Camera Disassembly: passo 1, immagine 1 di 3 Olympus Stylus 1030 SW LCD Replacement, Olympus Stylus 1030 SW Camera Disassembly: passo 1, immagine 2 di 3 Olympus Stylus 1030 SW LCD Replacement, Olympus Stylus 1030 SW Camera Disassembly: passo 1, immagine 3 di 3
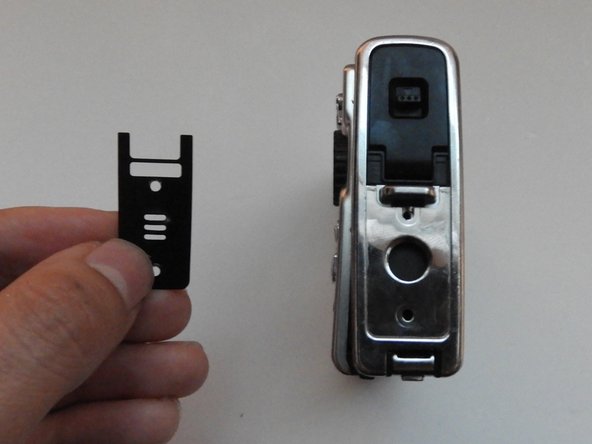
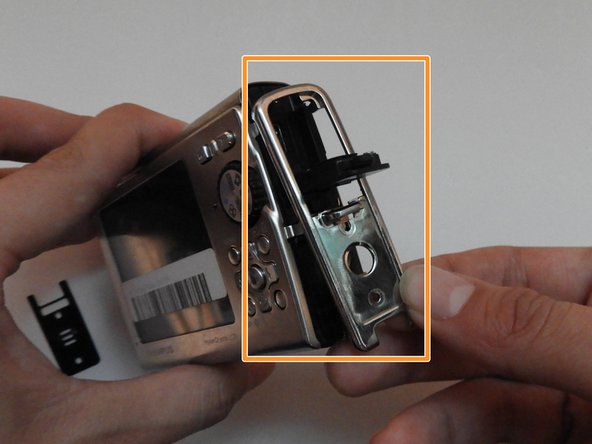
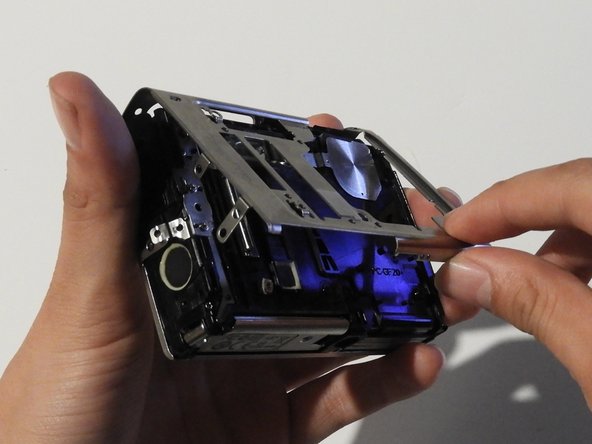
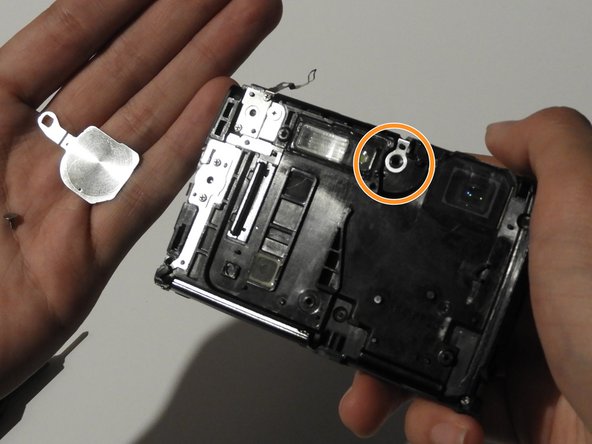
    • Using the iFixit Opening Tool, pry off the plastic part of the lens.

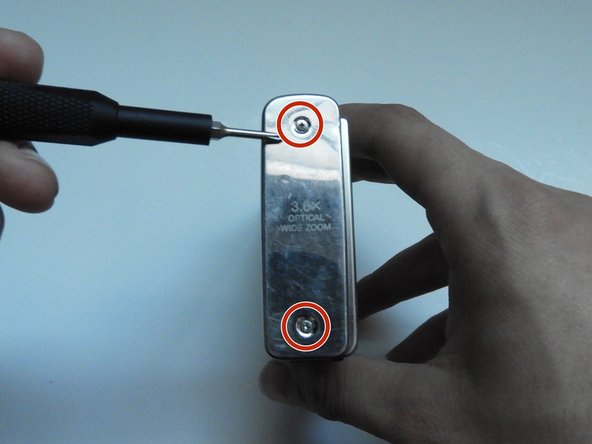
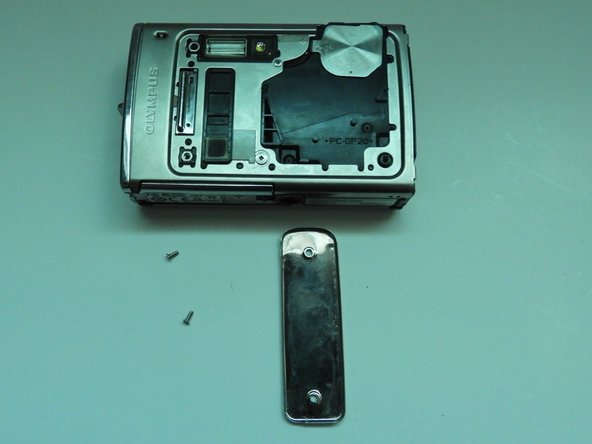
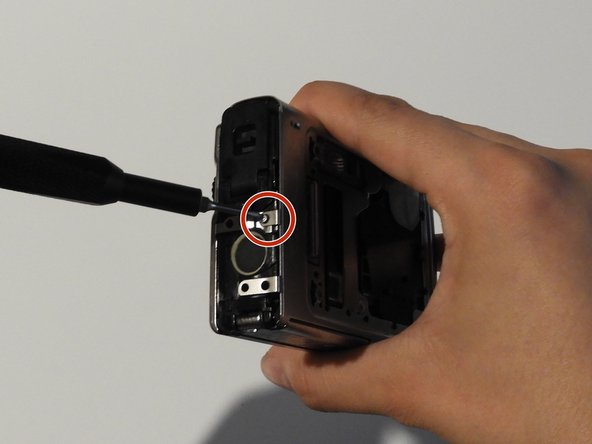
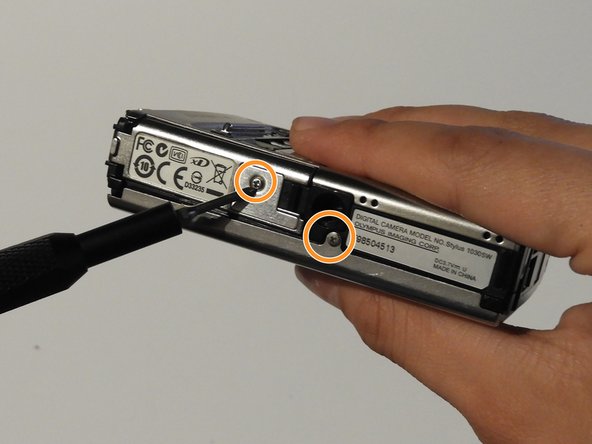
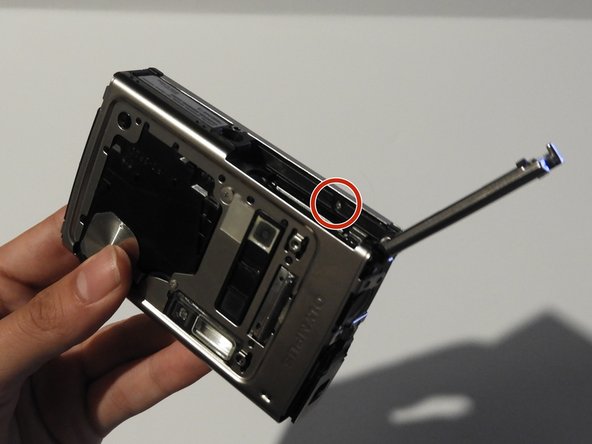
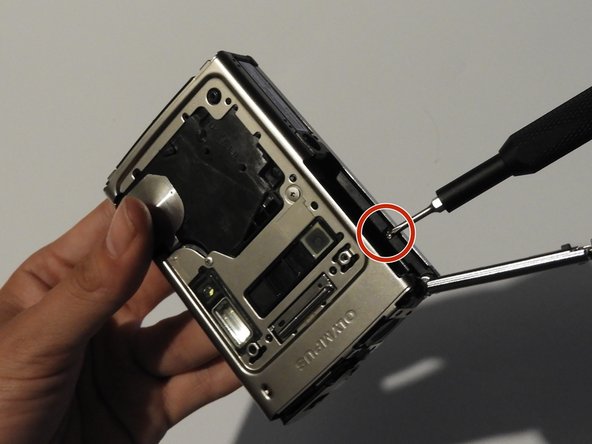
    • Using the T6 Torx screwdriver, unscrew the three screws.

  2. Olympus Stylus 1030 SW LCD Replacement: passo 2, immagine 1 di 3 Olympus Stylus 1030 SW LCD Replacement: passo 2, immagine 2 di 3 Olympus Stylus 1030 SW LCD Replacement: passo 2, immagine 3 di 3
    • Using the Phillips #00 screwdriver, unscrew the three screws.

    • Carefully swivel the metal cover out towards you.

    • Using tweezers, remove the metal washer.

  3. Olympus Stylus 1030 SW LCD Replacement: passo 3, immagine 1 di 2 Olympus Stylus 1030 SW LCD Replacement: passo 3, immagine 2 di 2
    • Using the tweezers, slowly peel off the plate.

  4. Olympus Stylus 1030 SW LCD Replacement: passo 4, immagine 1 di 3 Olympus Stylus 1030 SW LCD Replacement: passo 4, immagine 2 di 3 Olympus Stylus 1030 SW LCD Replacement: passo 4, immagine 3 di 3
    • Using the Phillips #00 screwdriver, unscrew the two screws on the side of the camera.

  5. Olympus Stylus 1030 SW LCD Replacement: passo 5, immagine 1 di 3 Olympus Stylus 1030 SW LCD Replacement: passo 5, immagine 2 di 3 Olympus Stylus 1030 SW LCD Replacement: passo 5, immagine 3 di 3
    • On the opposite side, use the Phillips #00 screwdriver to unscrew both screws.

    • Take out the speaker plate.

    • Open the multi-connector cover and slide off the side panel.

  6. Olympus Stylus 1030 SW LCD Replacement: passo 6, immagine 1 di 3 Olympus Stylus 1030 SW LCD Replacement: passo 6, immagine 2 di 3 Olympus Stylus 1030 SW LCD Replacement: passo 6, immagine 3 di 3
    • Using the Phillips #00 screwdriver, unscrew the screw above the speaker.

    • On the bottom side of the camera, unscrew the two screws.

  7. Olympus Stylus 1030 SW LCD Replacement: passo 7, immagine 1 di 3 Olympus Stylus 1030 SW LCD Replacement: passo 7, immagine 2 di 3 Olympus Stylus 1030 SW LCD Replacement: passo 7, immagine 3 di 3
    • Open the battery compartment cover.

    • Use the Phillips #00 screwdriver to unscrew the screw in the battery compartment.

  8. Olympus Stylus 1030 SW LCD Replacement: passo 8, immagine 1 di 3 Olympus Stylus 1030 SW LCD Replacement: passo 8, immagine 2 di 3 Olympus Stylus 1030 SW LCD Replacement: passo 8, immagine 3 di 3
    • On the front of the camera, unscrew the two screws shown.

    • Gently pull on the side until the camera is separated from the back panel.

    • Remove the shutter and power button.

  9. Olympus Stylus 1030 SW LCD Replacement: passo 9, immagine 1 di 3 Olympus Stylus 1030 SW LCD Replacement: passo 9, immagine 2 di 3 Olympus Stylus 1030 SW LCD Replacement: passo 9, immagine 3 di 3
    • Use the Phillips #00 screwdriver to unscrew the four screws on the front of the camera.

    • Unscrew the shutter using the Phillips #00 screwdriver.

  10. Olympus Stylus 1030 SW LCD Replacement: passo 10, immagine 1 di 2 Olympus Stylus 1030 SW LCD Replacement: passo 10, immagine 2 di 2
    • Release the top holding using a spudger.

    • Slowly and carefully separate the front and back of the camera, exposing the electrical ribbons.

  11. Olympus Stylus 1030 SW LCD Replacement: passo 11, immagine 1 di 3 Olympus Stylus 1030 SW LCD Replacement: passo 11, immagine 2 di 3 Olympus Stylus 1030 SW LCD Replacement: passo 11, immagine 3 di 3
    • Using the spudger and tweezers if needed, remove the ribbons from the computer chips.

  12. Olympus Stylus 1030 SW LCD Replacement, LCD: passo 12, immagine 1 di 1
    • Peel back tape & remove 2 screws (PH00)

  13. Olympus Stylus 1030 SW LCD Replacement: passo 13, immagine 1 di 1
    • Carefully pry it out from its left side

Conclusione

To reassemble your device, follow these instructions in reverse order.

0 Commenti

Aggiungi Commento

Visualizza Statistiche:

Ultime 24 Ore: 1

Ultimi 7 Giorni: 3

Ultimi 30 Giorni: 4

Tutti i Tempi: 1,240