Salta al contenuto principale

Olympus Pen E-PL7 LCD Screen Replacement

Cosa ti serve

  1. Olympus Pen E-PL7 LCD Screen Replacement, Battery: passo 1, immagine 1 di 2 Olympus Pen E-PL7 LCD Screen Replacement, Battery: passo 1, immagine 2 di 2
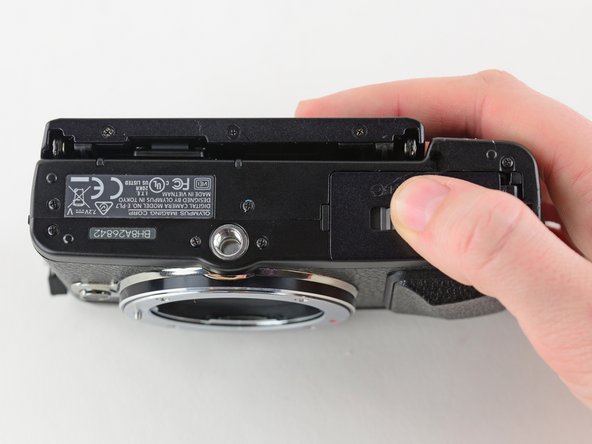
    • Turn the camera upside down.

    • Push the grey tab to the right to open the battery compartment.

    • Pull out the battery.

    • The battery is not shown in these photos.

  2. Olympus Pen E-PL7 LCD Screen Replacement, LCD Screen: passo 2, immagine 1 di 1
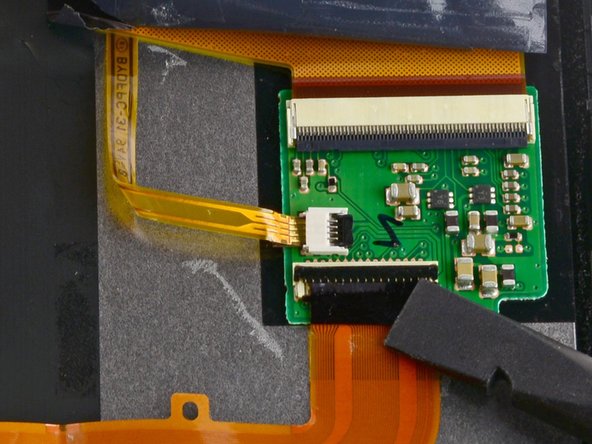
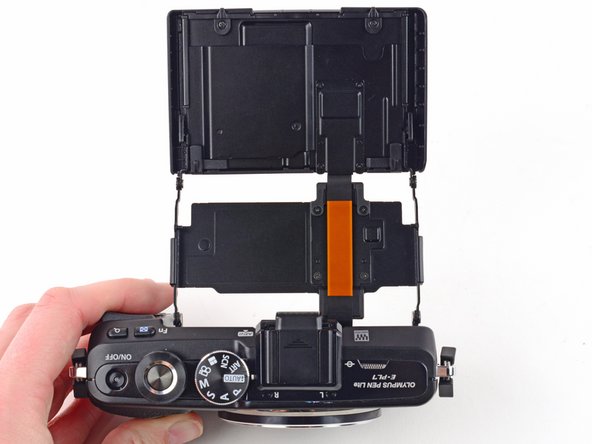
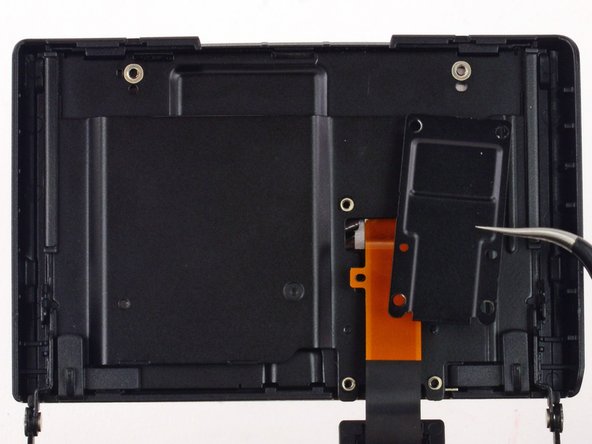
    • Use a Phillips #00 screwdriver to remove the three 2.3 mm screws from the base of the LCD screen.

  3. Olympus Pen E-PL7 LCD Screen Replacement: passo 3, immagine 1 di 2 Olympus Pen E-PL7 LCD Screen Replacement: passo 3, immagine 2 di 2
    • Fully extend the LCD assembly.

  4. Olympus Pen E-PL7 LCD Screen Replacement: passo 4, immagine 1 di 3 Olympus Pen E-PL7 LCD Screen Replacement: passo 4, immagine 2 di 3 Olympus Pen E-PL7 LCD Screen Replacement: passo 4, immagine 3 di 3
    • Remove the two 2.2 mm Phillips screws located on the back of the LCD screen.

    • Use tweezers to remove the top LCD bracket.

  5. Olympus Pen E-PL7 LCD Screen Replacement: passo 5, immagine 1 di 3 Olympus Pen E-PL7 LCD Screen Replacement: passo 5, immagine 2 di 3 Olympus Pen E-PL7 LCD Screen Replacement: passo 5, immagine 3 di 3
    • Use a Phillips #00 screwdriver to remove the four 1.4 mm screws from the back of the LCD screen.

    • Remove the LCD ribbon cable with a pair of tweezers.

    • The cover may fall off after the screws have been removed.

  6. Olympus Pen E-PL7 LCD Screen Replacement: passo 6, immagine 1 di 3 Olympus Pen E-PL7 LCD Screen Replacement: passo 6, immagine 2 di 3 Olympus Pen E-PL7 LCD Screen Replacement: passo 6, immagine 3 di 3
    • Carefully lift the LCD screen up and away from the assembly.

    • Do not attempt to fully remove the screen, as it is attached to the assembly by a ribbon cable.

  7. Olympus Pen E-PL7 LCD Screen Replacement: passo 7, immagine 1 di 2 Olympus Pen E-PL7 LCD Screen Replacement: passo 7, immagine 2 di 2
    • Use tweezers to peel back the plastic cover.

  8. Olympus Pen E-PL7 LCD Screen Replacement: passo 8, immagine 1 di 3 Olympus Pen E-PL7 LCD Screen Replacement: passo 8, immagine 2 di 3 Olympus Pen E-PL7 LCD Screen Replacement: passo 8, immagine 3 di 3
    • Use a spudger to flip back the black bar on the LCD Ribbon ZIF connector.

  9. Olympus Pen E-PL7 LCD Screen Replacement: passo 9, immagine 1 di 2 Olympus Pen E-PL7 LCD Screen Replacement: passo 9, immagine 2 di 2
    • Gently pull the ribbon cable out with tweezers.

  10. Olympus Pen E-PL7 LCD Screen Replacement: passo 10, immagine 1 di 1
    • Remove the LCD Screen.

Conclusione

To reassemble your device, follow these instructions in reverse order.

Altre 6 persone hanno completato questa guida.

Kelsea Weber

Membro da: 11/12/15

19.857 Reputazione

32 Guide realizzate

Team

iFixit Membro di iFixit

Staff

135 Membri

16.732 Guide realizzate

7 Commenti

Magnifico

Great Work!!

apuntotres - Replica

Where can I buy a replacement LCD screen?

Joshua Almeida - Replica

You don't show the final part taking the glass away from outer and the board, as the screen replacements don't come with connector board

josollis - Replica

@josollis: Thanks for the hint! I got the missing info from the E-P5 LCD exchange instructions (on ifixit).

Stephan Fagerer - Replica

I have reassembled the unit after replacing the broken Ribbon, however my LCD images are inverted in normal mode not selfie mode. Do anyone know why ?

Thanks in advance

ah to lee - Replica

Aggiungi Commento

Visualizza Statistiche:

Ultime 24 Ore: 6

Ultimi 7 Giorni: 24

Ultimi 30 Giorni: 73

Tutti i Tempi: 9,821