Introduzione
It is apparently a common problem with the Olevia LT23HVX that the power supply fails. The condenser on the power supply PCB are very frequently failing.
Cosa ti serve
-
-
Okay, so I read about the Olevia LT23HVX after I purchased one for a very decent price on an auction site. After all, as a member of the ifixit forum, I can fix almost anything. I have the support....
-
-
-
The first thing to do is to remove the screws that hold the back on. There are arrows on the plastic that show which screws to remove. Word of wisdom, if you have some screws missing, it is because somebody already opened it. This was the case with my TV monitor. So, you never know what surprise is going to await you.
-
Also remove the 4 small bolts that hold the stand to the back.
-
-
-
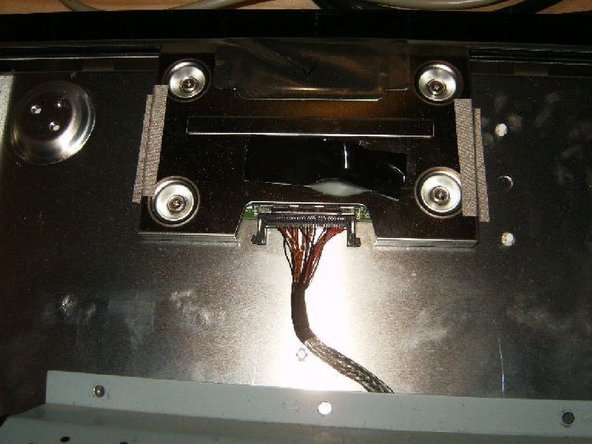
Once the back is unscrewed it can be separated. It is only pressed to the front part slightly and should come off pretty easy. There is now a grey metal box that holds the printed circuit boards.
-
At the top left and right, are two sets of cables that enter the metal box.Those are the speaker wires. Unclip the connectors.
-
-
-
-
Tilt the gray metal box from the left to the right. Do not try to pull it off.
-
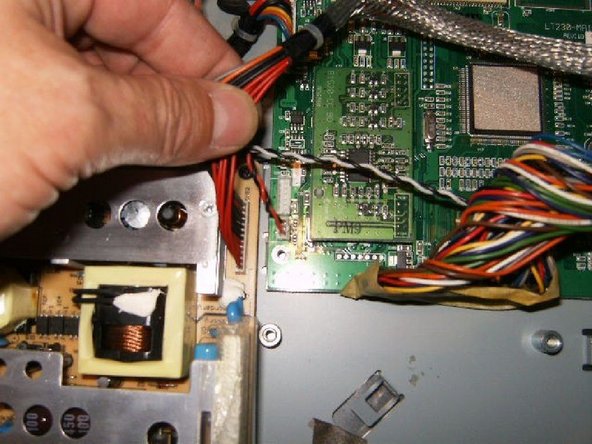
Once you tilt it, you will see a wiring harness that is connected to the box via some tabs. Pull those gently apart, remove the shielded cable.
-
The harness is terminated via a connector to the side. Unplug the connector by GENTLY pulling on the side of the plastic. Do not pull on the wires.
-
-
-
The next wiring to remove terminates to the top to another connector. This one is a little trickier and must be removed by squeezing the tabs on the side while pulling the connector.
-
In my case, do to a broken clip on the side of this connector I opted to leave it connected. That way, I can not totally remove the metal cover, but will have to turn it over.
-
Once the wiring harnesses are disconnected and they are off the metal tabs, tilt the metal cover to the left. Check continously that all the wires are off and nothing gets hung up.
-
-
-
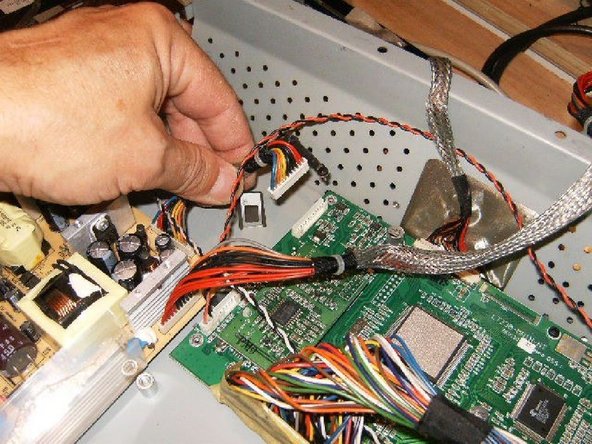
You should now be looking at the PCB's The power board is the one that has the switch on it, as well as two heatsinks.
-
Remove the wiring harness on the top right side.
-
Remove the connector from the inverter board, as well as the ground wire.
-
Remove the green cable from the power board to the housing.
-
Remove the connector from the top right and top side. They will only fit one way. No reason to mark the location.
-
The two heatsinks can be removed either now or later.
-
-
-
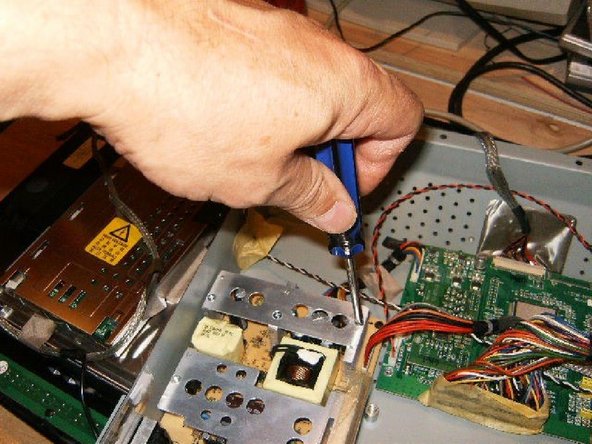
Once all wiring harnesses are remove, and the green ground cable is off the chassis, remove the powerboard. It is held in place with four small screws, one on each corner.
-
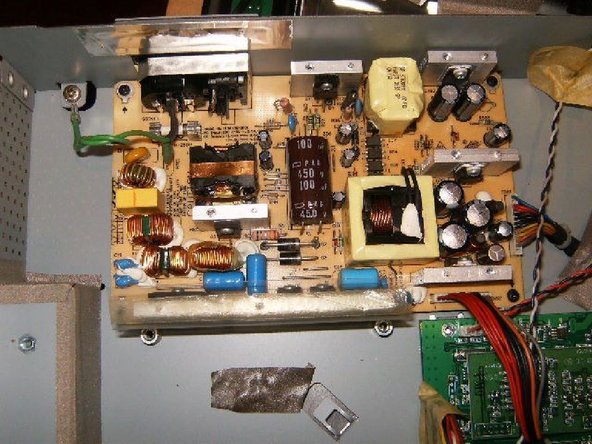
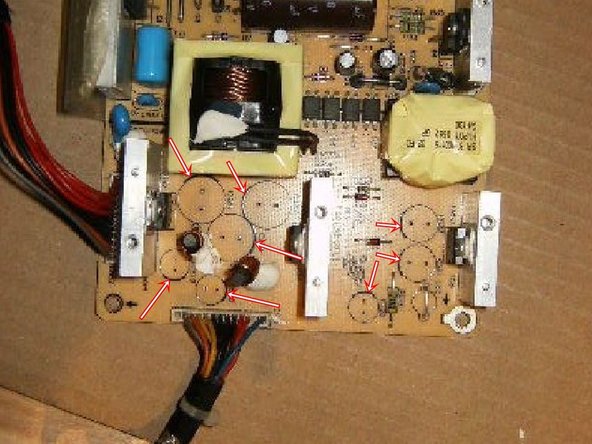
The power board should now be disconnected from the monitor. On the side furthest ways from the switch, is a transformer. Next to it, there are a total of 7 condensers and 3 heatsinks. It is those condensers that are failing due to heat.
-
-
-
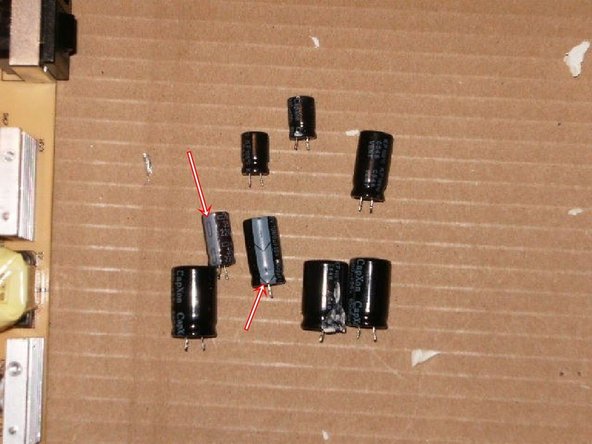
Take a closer look at the tops of the condensers (here is the view of one that was removed) The tops are most likely bulging on at least 5 of them. Plan to replace all 7 on that side.
-
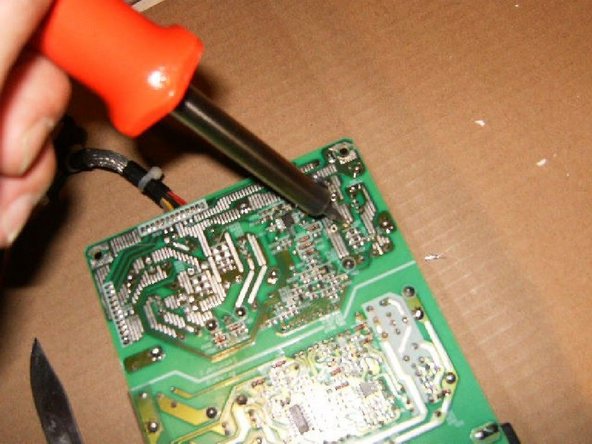
Unsolder the condensers from the board. In this repair a 30watt soldering iron and solder sucker was used. The solder sucker can be substituted with soldering wick.
-
-
-
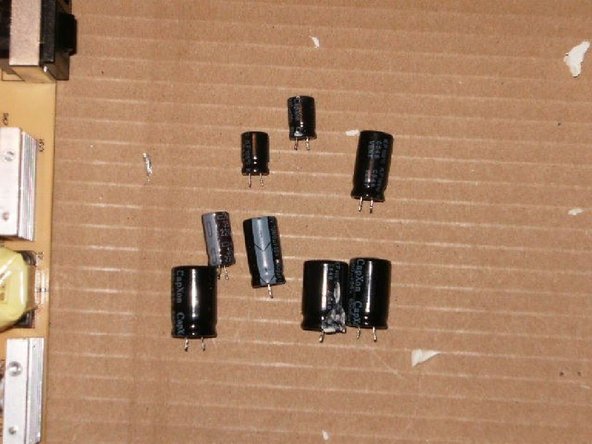
This is what the board looks like with the faulty condensers removed.
-
Here are the faulty condensers. Replace those with new ones. For this repair, new ones where obtained through Mouser..com.
-
CS19 = 220uF 35V CS20 = 220UF 25V CS21 = 1000uF 16V CS22 = 1000uF 16V CS23 = 1000uF 25V CS24 = 680uF 35V CS25 = 680uF 35V All are radial lead electrolytic capacitors.
-
-
-
Solder all the capacitors in their respective places. On the logic board, where the capacitors a re located, is an outline of a circle with one part of the circle being heavier. It corresponds with the negative lead of the condenser.
-
There is a heavy stripe on the condenser, pointing to the negative lead. Polarity will be maintained by matching those.
-
Once all the capacitors are replaced, double check the board to make sure everything is properly mounted.
-
Now reassemble the Olevia following the instructions in reverse order.
-


To reassemble your device, follow these instructions in reverse order.
To reassemble your device, follow these instructions in reverse order.
Annulla: non ho completato questa guida.
Altre 5 persone hanno completato questa guida.

Team

2 Commenti
Very helpful thanks for the information save me 60 for a new one.
Thanks for sharing this post.
Quikfixsupport provides the best '''Mobile Repair Dubai''' at an affordable rate. We believe in 100% customer satisfaction and the best quality services. The following are the perks that you can have with us. Quick Response to queries, Pocket-friendly repair service, Qualified Technicians for assistance. Guidance of highly expert technicians.