Salta al contenuto principale

Questa guida ha delle modifiche più recenti. Passa all'ultima versione non verificata.

Nvidia Shield Logic Board Replacement

Cosa ti serve

  1. Nvidia Shield Logic Board Replacement, Remove Front Panel: passo 1, immagine 1 di 3 Nvidia Shield Logic Board Replacement, Remove Front Panel: passo 1, immagine 2 di 3 Nvidia Shield Logic Board Replacement, Remove Front Panel: passo 1, immagine 3 di 3
    • Remove the seven 6.4mm T5 Torx screws from the back panel.

    • Use the spudger to separate the front and back panels.

  2. Nvidia Shield Logic Board Replacement, Remove Green Grill: passo 2, immagine 1 di 2 Nvidia Shield Logic Board Replacement, Remove Green Grill: passo 2, immagine 2 di 2
    • The green grill is not screwed in so it can be pulled right out.

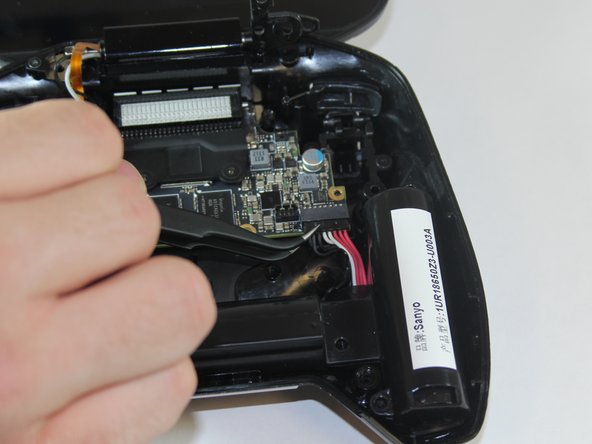
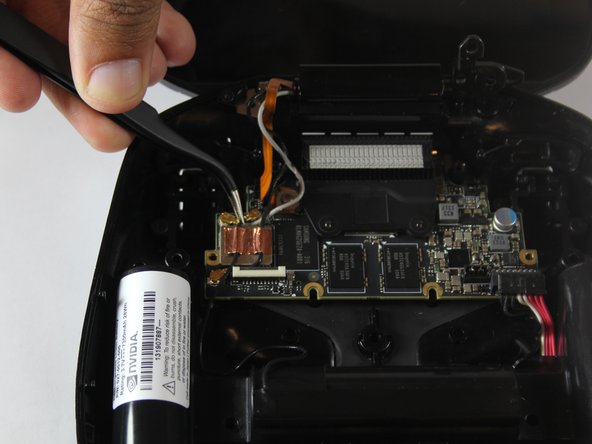
  3. Nvidia Shield Logic Board Replacement, Remove Battery Cables: passo 3, immagine 1 di 3 Nvidia Shield Logic Board Replacement, Remove Battery Cables: passo 3, immagine 2 di 3 Nvidia Shield Logic Board Replacement, Remove Battery Cables: passo 3, immagine 3 di 3
    • Remove the six 6.5mm T5 Torx screws.

    • Disconnect the power wires.

    • Peel back the copper tape and disconnect the black and white wires.

  4. Nvidia Shield Logic Board Replacement, Remove Battery Apparatus: passo 4, immagine 1 di 1
    • Pull the battery apparatus out once all cables are removed.

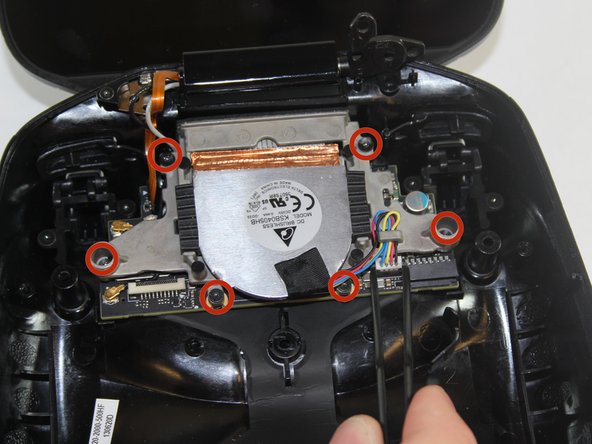
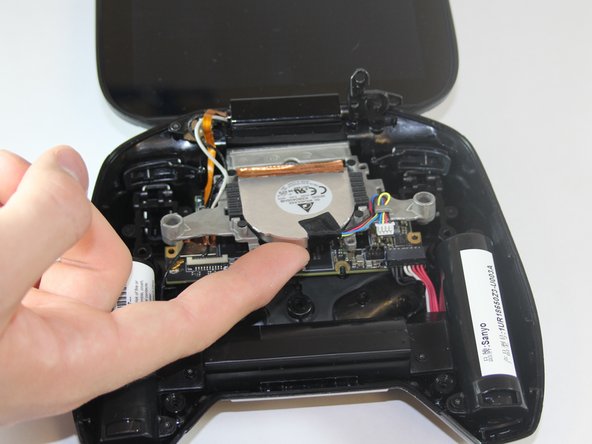
  5. Nvidia Shield Logic Board Replacement, Removing Fan: passo 5, immagine 1 di 3 Nvidia Shield Logic Board Replacement, Removing Fan: passo 5, immagine 2 di 3 Nvidia Shield Logic Board Replacement, Removing Fan: passo 5, immagine 3 di 3
    • Cooling is important for electronics, the last thing they want is to overheat.

    • Remove the two 7.3mm and four 8.4mm T5 Torx screws and disconnect the power cable.

    • Lift the fan free after the screws and cable are removed.

  6. Nvidia Shield Logic Board Replacement, Removing Logic Board: passo 6, immagine 1 di 3 Nvidia Shield Logic Board Replacement, Removing Logic Board: passo 6, immagine 2 di 3 Nvidia Shield Logic Board Replacement, Removing Logic Board: passo 6, immagine 3 di 3
    • The large board under everything is the logic board.

    • Removing this requires unscrewing 6 screws, 2 7.3mm T5 Torx and 4 8.4mm T5 Torx located around the edges of the logic board, which should have already been taken out when removing the fan.

    • Once all the screws are gone, be careful with the ports on top of the logic board. Gently wiggling helps.

Conclusione

To reassemble your device, follow these instructions in reverse order.

Altre 3 persone hanno completato questa guida.

Marc Perez

Membro da: 09/29/14

545 Reputazione

2 Guide realizzate

Team

USF Tampa, Team 1-1, Hickman Fall 2014 Membro di USF Tampa, Team 1-1, Hickman Fall 2014

USFT-HICKMAN-F14S1G1

4 Membri

18 Guide realizzate

Un commento

Hay ich suche Ersatzteile für Nvidia shield Portable ich suche Board da wo kühler drauf ist , weil mein ist kaput gegangen :(

Konstantin Styngu - Replica

Aggiungi Commento

Visualizza Statistiche:

Ultime 24 Ore: 0

Ultimi 7 Giorni: 0

Ultimi 30 Giorni: 3

Tutti i Tempi: 1,801