Salta al contenuto principale

Questa guida ha delle modifiche più recenti. Passa all'ultima versione non verificata.

Nortel Networks i2004 IP Back Cover Replacement

Cosa ti serve

  1. Nortel Networks i2004 IP Back Cover Replacement, Back Cover: passo 1, immagine 1 di 3 Nortel Networks i2004 IP Back Cover Replacement, Back Cover: passo 1, immagine 2 di 3 Nortel Networks i2004 IP Back Cover Replacement, Back Cover: passo 1, immagine 3 di 3
    • Flip the phone over to view the back.

    • Remove the power and phone cords.

  2. Nortel Networks i2004 IP Back Cover Replacement: passo 2, immagine 1 di 1
    • Remove the seven 8mm Phillips #2 screws.

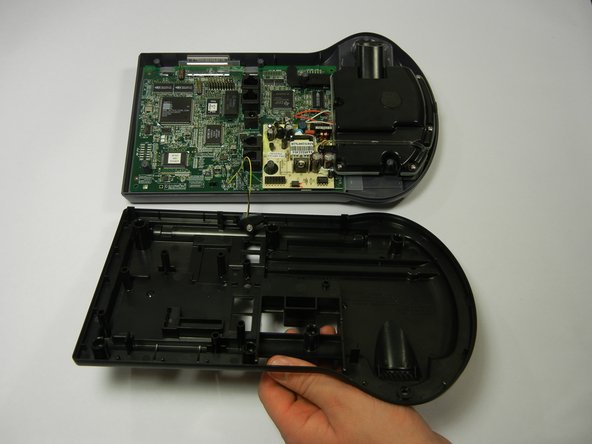
  3. Nortel Networks i2004 IP Back Cover Replacement: passo 3, immagine 1 di 2 Nortel Networks i2004 IP Back Cover Replacement: passo 3, immagine 2 di 2
    • Lift up the back cover slowly because there are still wires attached to the circuit board.

    • Lifting the back cover should not require a lot of force; simply lift with your fingertips.

  4. Nortel Networks i2004 IP Back Cover Replacement: passo 4, immagine 1 di 1
    • Disconnect the rubber piece by pulling it out of the slot, freeing the back cover completely.

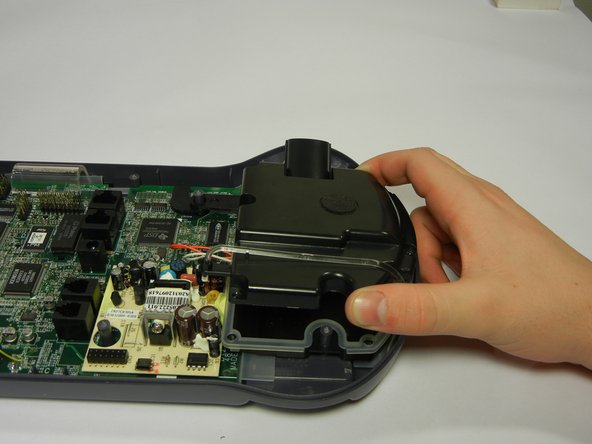
  5. Nortel Networks i2004 IP Back Cover Replacement: passo 5, immagine 1 di 2 Nortel Networks i2004 IP Back Cover Replacement: passo 5, immagine 2 di 2
    • Remove the six 8mm Phillips #2 screws.

    • Pull the speaker phone cover straight up.

Conclusione

To reassemble your device, follow these instructions in reverse order.

Un'altra persona ha completato questa guida.

Elizabeth

Membro da: 01/21/12

160 Reputazione

3 Guide realizzate

Team

Cal Poly, Team 10-35, Amido Winter 2012 Membro di Cal Poly, Team 10-35, Amido Winter 2012

CPSU-AMIDO-W12S10G35

4 Membri

10 Guide realizzate

0 Commenti

Aggiungi Commento

Visualizza Statistiche:

Ultime 24 Ore: 0

Ultimi 7 Giorni: 4

Ultimi 30 Giorni: 12

Tutti i Tempi: 1,213