Questa versione può contenere modifiche errate. Passa all'ultima istantanea verificata.
Cosa ti serve
-
Questo passaggio è privo di traduzione. Aiuta a tradurlo
-
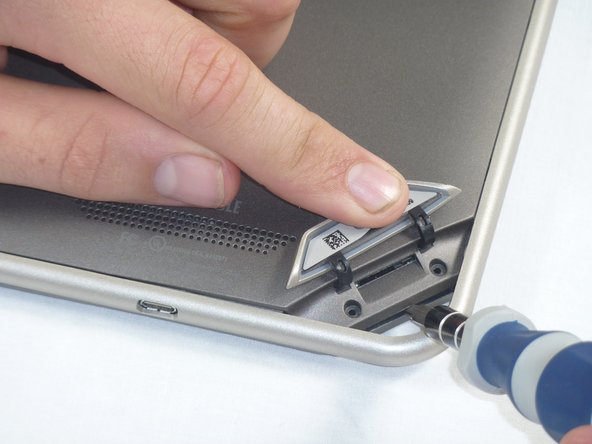
Lift the flap that reads "Nook" to reveal the tape that is underneath. Remove the memory card if one is present.
-
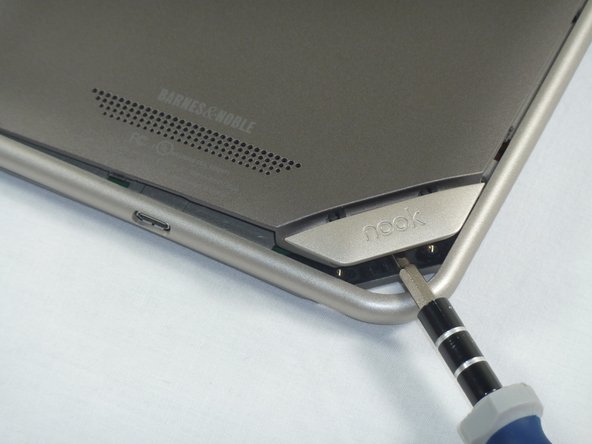
Remove the tape covering the round holes to reveal two T5 Torx screws.
-
Remove the two T5 Torx screws securing the back cover.
-
-
-
Questo passaggio è privo di traduzione. Aiuta a tradurlo
-
Insert the flat end of a spudger between the front panel and the rear assembly.
-
Use a spudger to lift the the back panel from the rest of the Nook.
-
-
Questo passaggio è privo di traduzione. Aiuta a tradurlo
-
Slide the spudger around the edges of the Nook to loosen the back panel.
-


Annulla: non ho completato questa guida.
Altre 5 persone hanno completato questa guida.
Team

Cal Poly, Team 1-4, Propen Fall 2012 Membro di Cal Poly, Team 1-4, Propen Fall 2012
CPSU-PROPEN-F12S1G4
4 Membri
14 Guide realizzate