Introduzione
This guide will describe how to remove the charging port of your Nokia Lumia 1020.
This replacement will be useful if you want to replace a damaged charging port. Most commonly, charging ports can be damaged from accumulating debris or water damage. If you are having issues charging your device, you may want to consider replacing the charging port.
Cosa ti serve
-
-
Use a SIM door key to remove the SIM card and SIM card tray from the device.
-
Use a T4 screwdriver to loosen the captured torx screw to the right of the SIM card tray (the screw will not come out).
-
-
-
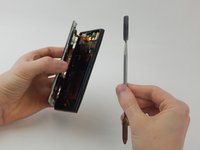
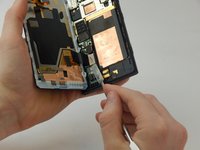
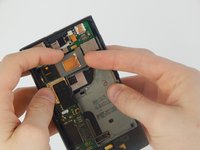
Wedge a spudger in between the screen and the back of the device, starting from the top left corner of the phone.
-
Gently pry the screen away from the back of the device using slight upward pressure.
-
Slide the spudger down towards the bottom left corner of the device, continuing to gently pry upwards. The screen will now be slightly separated from the back of the phone.
-
-
Attrezzo utilizzato in questo passaggio:Tweezers$4.99
-
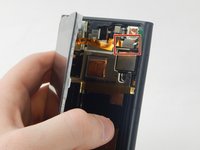
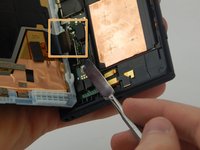
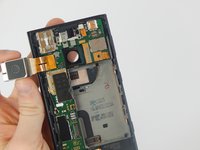
Unscrew the two 4 mm torx screws on the top silver strip with a T4 screwdriver.
-
Unscrew the 4.5 mm torx screw above the gold bar with a T6 screwdriver.
-
Grab the edges of the gold strip with gripped tweezers to remove. The gold and silver metal will come off together.
-
-
-
-
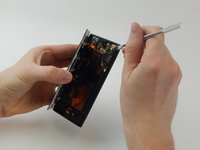
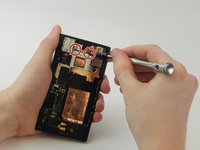
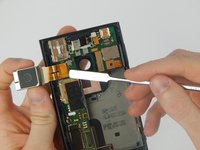
Use the T4 screwdriver to remove the 4 mm torx screw.
-
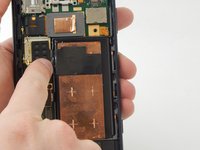
Remove the headphone jack by pulling back on the silver plate with your fingernail.
-
-
-
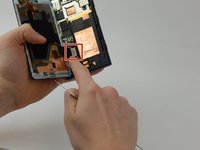
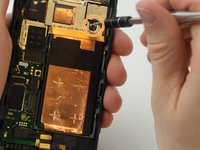
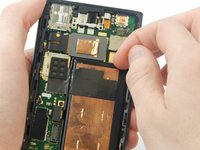
Use your fingernail to grip the rear-facing camera on the upper middle part of the back of the phone. Pry until it pops off to the left.
-
Remove the camera by wedging a spudger underneath the attached gold foil.
-
-
-
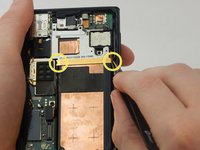
Disconnect the two gold connectors from the motherboard using a spudger.
-
-
-
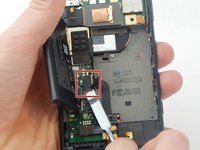
Using a T4 screwdriver, unscrew four 4.60 mm screws to disconnect the rear camera casing from the rest of the device.
-


To reassemble your device, follow these instructions in reverse order.
To reassemble your device, follow these instructions in reverse order.
Team

IUPUI, Team S1-G5, Henning Fall 2019 Membro di IUPUI, Team S1-G5, Henning Fall 2019
IUPUI-HENNING-F19S1G5
3 Membri
6 Guide realizzate