Salta al contenuto principale

Nokia 8290 LCD Screen Replacement

Cosa ti serve

  1. Nokia 8290 LCD Screen Replacement, Front Cover: passo 1, immagine 1 di 3 Nokia 8290 LCD Screen Replacement, Front Cover: passo 1, immagine 2 di 3 Nokia 8290 LCD Screen Replacement, Front Cover: passo 1, immagine 3 di 3
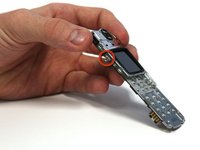
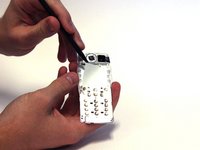
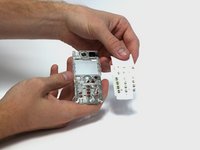
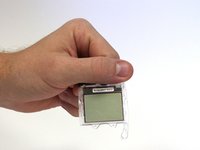
    • Locate the small button on the top of the phone.

    • Depress the button.

    • With your other hand, pull the front cover away from the phone.

  2. Nokia 8290 LCD Screen Replacement, Circuit Board: passo 2, immagine 1 di 3 Nokia 8290 LCD Screen Replacement, Circuit Board: passo 2, immagine 2 di 3 Nokia 8290 LCD Screen Replacement, Circuit Board: passo 2, immagine 3 di 3
    • Remove all six 5.3 mm long T6 screws.

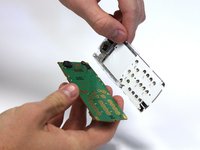
    • Remove the circuit board/faceplate sub-assembly from the back of the phone.

    • Take care to place screws in a safe location.

  3. Nokia 8290 LCD Screen Replacement: passo 3, immagine 1 di 3 Nokia 8290 LCD Screen Replacement: passo 3, immagine 2 di 3 Nokia 8290 LCD Screen Replacement: passo 3, immagine 3 di 3
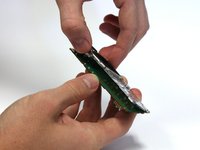
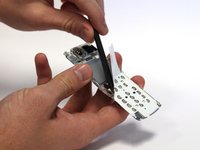
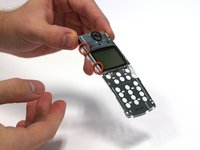
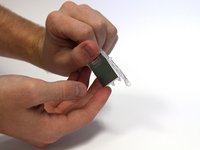
    • Using your fingers, pull the small plastic tab away from the circuit board/faceplate sub-assembly.

    • Rotate the faceplate away from the circuit board.

    • Gently remove the faceplate from the circuit board, taking care to not break the small plastic tab on the other side of the sub-assembly.

  4. Nokia 8290 LCD Screen Replacement, Adhesive White Film: passo 4, immagine 1 di 3 Nokia 8290 LCD Screen Replacement, Adhesive White Film: passo 4, immagine 2 di 3 Nokia 8290 LCD Screen Replacement, Adhesive White Film: passo 4, immagine 3 di 3
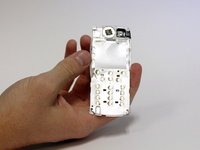
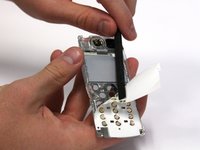
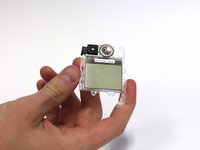
    • Hold the faceplate with the adhesive film facing upwards.

    • Use the spudger to pry the adhesive film away. This can be done by working the tool back and forth underneath the film.

    • It is easiest to begin in the upper left corner.

  5. Nokia 8290 LCD Screen Replacement: passo 5, immagine 1 di 3 Nokia 8290 LCD Screen Replacement: passo 5, immagine 2 di 3 Nokia 8290 LCD Screen Replacement: passo 5, immagine 3 di 3
    • Continue to loosen the film with the spudger.

    • Once the film has been mostly loosened, you can peel away the film.

    • Once the film has been removed, the microphone may fall out, if so, place it aside until all other repairs are finished.

  6. Nokia 8290 LCD Screen Replacement, LCD Screen: passo 6, immagine 1 di 3 Nokia 8290 LCD Screen Replacement, LCD Screen: passo 6, immagine 2 di 3 Nokia 8290 LCD Screen Replacement, LCD Screen: passo 6, immagine 3 di 3
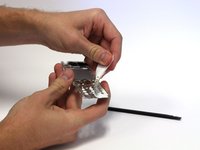
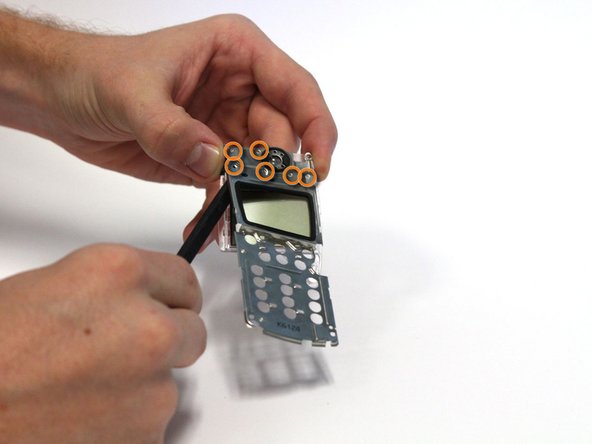
    • Using your fingers or a probe, loosen the four small tabs located on the side of the faceplate sub-assembly by gently bending up the metal cover. (Two are shown in the picture while the other two are on the other side of the screen.)

    • Using the spudger, loosen the metal cover by prying it away from the six small plastic tabs. This can be done by gently working the spudger underneath the cover and pressing up on the cover around the tabs.

    • Remove the metal cover.

  7. Nokia 8290 LCD Screen Replacement: passo 7, immagine 1 di 3 Nokia 8290 LCD Screen Replacement: passo 7, immagine 2 di 3 Nokia 8290 LCD Screen Replacement: passo 7, immagine 3 di 3
    • Hold the remaining component tray face up.

    • Firmly place your fingers over the speaker and rubber tray to insure they are secured.

    • Turn the component tray over, allowing the LCD screen to fall away.

Conclusione

To reassemble your device, follow these instructions in reverse order.

Un'altra persona ha completato questa guida.

Team

Clemson, Team 15-3, Benson Fall 2012 Membro di Clemson, Team 15-3, Benson Fall 2012

CLEM-BENSON-F12S15G3

3 Membri

21 Guide realizzate

0 Commenti

Aggiungi Commento

Visualizza Statistiche:

Ultime 24 Ore: 0

Ultimi 7 Giorni: 0

Ultimi 30 Giorni: 1

Tutti i Tempi: 1,469