Questa versione può contenere modifiche errate. Passa all'ultima istantanea verificata.
Cosa ti serve
-
Questo passaggio è privo di traduzione. Aiuta a tradurlo
-
Pull down on the battery cover release lever and pull back to remove the cover.
-
-
Questo passaggio è privo di traduzione. Aiuta a tradurlo
-
Remove the eight 9 mm screws from the back panel using the Tri-point Y1 screwdriver.
-
-
Questo passaggio è privo di traduzione. Aiuta a tradurlo
-
Carefully turn over the controller and place it on a flat surface.
-
Slowly separate the top panel from the bottom panel.
-
Once separated, set aside the top panel.
-
-
-
Questo passaggio è privo di traduzione. Aiuta a tradurlo
-
Using tweezers remove the three grey button pads from the motherboard.
-
-
Questo passaggio è privo di traduzione. Aiuta a tradurlo
-
With your fingers gently grip the motherboard on both sides and lift it away from the back panel.
-
-
Questo passaggio è privo di traduzione. Aiuta a tradurlo
-
Remove the four 9-mm Phillips head screws with the Phillips #1 screwdriver.
-
Lift off the black plastic covers that secure the shoulder buttons.
-
-
Questo passaggio è privo di traduzione. Aiuta a tradurlo
-
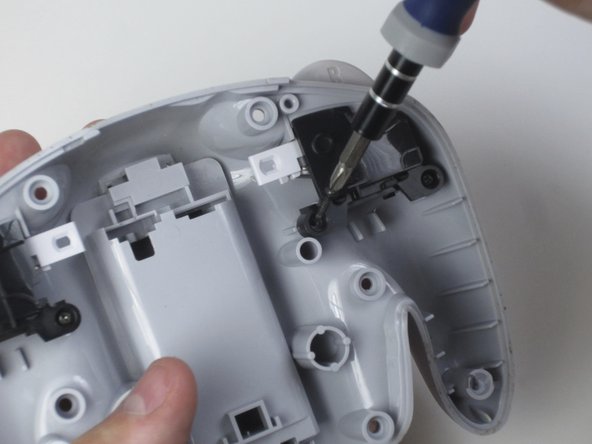
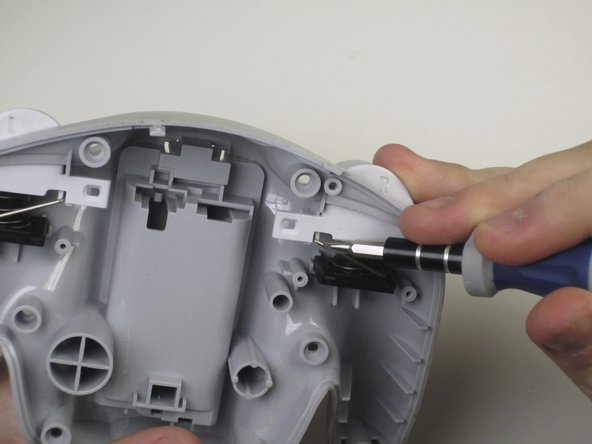
Using the screwdriver, carefully unlock the spring clip from its holder.
-
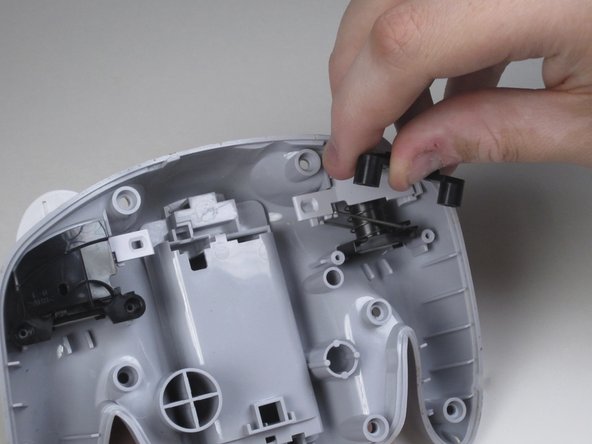
Once unlocked, use tweezers to pull springs out of its holster.
-
-
Questo passaggio è privo di traduzione. Aiuta a tradurlo
-
Once the spring is removed, take out the shoulder buttons by pulling down and out.
-


Annulla: non ho completato questa guida.
Altre 4 persone hanno completato questa guida.
Team

Cal Poly, Team 10-40, Amido Spring 2013 Membro di Cal Poly, Team 10-40, Amido Spring 2013
CPSU-AMIDO-S13S10G40
4 Membri
37 Guide realizzate
Un commento
Where can I buy replacement shoulder buttons? Mine are starting to get sticky and don't spring back as well as they used to. I've been looking but I can't seem to find them anywhere.