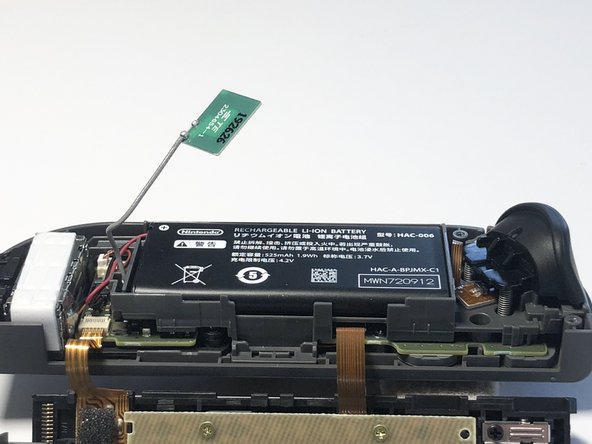
Salta al contenuto principale

Nintendo Switch Right Joy-Con Buttons Replacement

Cosa ti serve

  1. Nintendo Switch Right Joy-Con Buttons Replacement, Right Joy-Con Buttons: passo 1, immagine 1 di 3 Nintendo Switch Right Joy-Con Buttons Replacement, Right Joy-Con Buttons: passo 1, immagine 2 di 3 Nintendo Switch Right Joy-Con Buttons Replacement, Right Joy-Con Buttons: passo 1, immagine 3 di 3
    • Use a Tri-wing Y00 screwdriver to remove the four 5mm screws holding the back panel in place.

  2. Nintendo Switch Right Joy-Con Buttons Replacement: passo 2, immagine 1 di 3 Nintendo Switch Right Joy-Con Buttons Replacement: passo 2, immagine 2 di 3 Nintendo Switch Right Joy-Con Buttons Replacement: passo 2, immagine 3 di 3
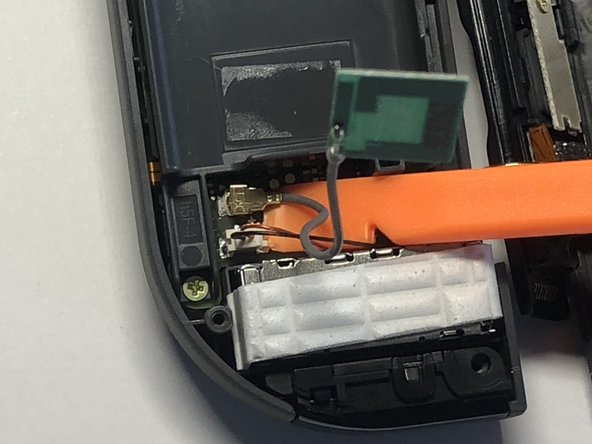
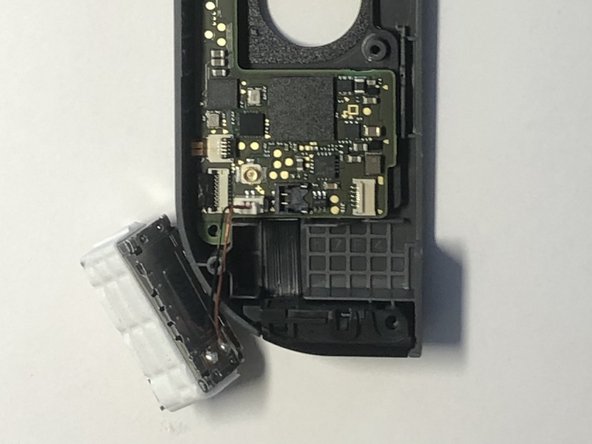
    • Insert the end of a plastic opening pick between the IR sensor and the back panel.

    • Run the tool along the edge, gently applying pressure downwards, to release the back panel from the clips holding it in place.

    • Do not use any metal tools for this step as you will risk damaging the plastic clips holding the back panel in place.

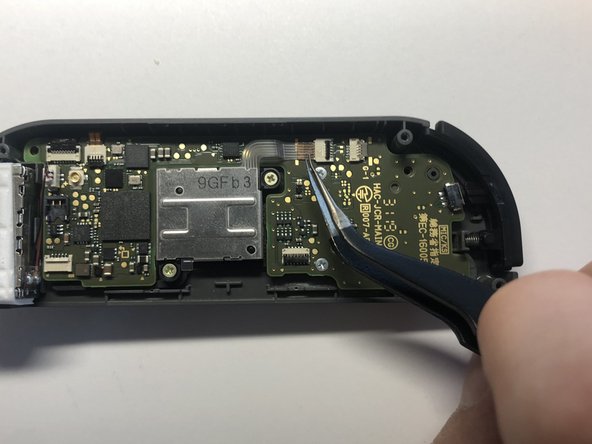
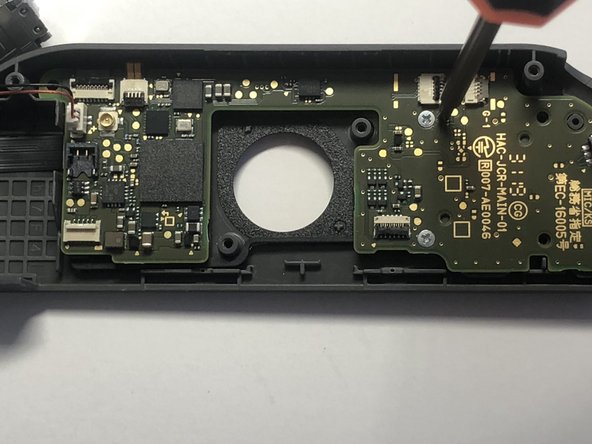
    • Open the Joy-Con as if it was a book, rotating around the black guide rail.

  3. Nintendo Switch Right Joy-Con Buttons Replacement: passo 3, immagine 1 di 3 Nintendo Switch Right Joy-Con Buttons Replacement: passo 3, immagine 2 di 3 Nintendo Switch Right Joy-Con Buttons Replacement: passo 3, immagine 3 di 3
    • Pull the Bluetooth antenna out of its compartment and out of the way of the battery.

    • Using a plastic opening tool, lift the battery up and out of its compartment from the right edge.

    • The battery is held in place by adhesive tape and may take a bit of force to remove.

    • Be careful not to pull the battery or antenna out completely as they are still connected to the motherboard.

  4. Nintendo Switch Right Joy-Con Buttons Replacement: passo 4, immagine 1 di 2 Nintendo Switch Right Joy-Con Buttons Replacement: passo 4, immagine 2 di 2
    • Disconnect the battery by using a plastic spudger to gently apply pressure upwards to the base of the connector.

    • Repeat the same process with the Bluetooth antenna connector.

  5. Nintendo Switch Right Joy-Con Buttons Replacement: passo 5, immagine 1 di 3 Nintendo Switch Right Joy-Con Buttons Replacement: passo 5, immagine 2 di 3 Nintendo Switch Right Joy-Con Buttons Replacement: passo 5, immagine 3 di 3
    • Using a Phillips #00 screwdriver, remove the three 2mm screws holding the battery compartment in place.

    • Lift and rotate the battery compartment away from the motherboard.

    • Be very cautious of the fragile ribbon cable that connects the compartment to the motherboard.

  6. Nintendo Switch Right Joy-Con Buttons Replacement: passo 6, immagine 1 di 1
    • Using a pair of tweezers, gently lift the grey clasp holding down the ribbon cable and slide it out from its connector.

  7. Nintendo Switch Right Joy-Con Buttons Replacement: passo 7, immagine 1 di 1
    • Using tweezers, gently lift the black and white clasps holding the two ribbon cables.

    • Slide the two ribbon cables out from their connectors to release the back panel and guide rail assembly.

  8. Nintendo Switch Right Joy-Con Buttons Replacement: passo 8, immagine 1 di 3 Nintendo Switch Right Joy-Con Buttons Replacement: passo 8, immagine 2 di 3 Nintendo Switch Right Joy-Con Buttons Replacement: passo 8, immagine 3 di 3
    • Using tweezers, gently lift the black clasp holding the joystick ribbon cable in place.

    • Slide the ribbon cable out from its connector.

    • Using a Phillips #00 screwdriver, remove the two screws holding the joystick assembly in place.

  9. Nintendo Switch Right Joy-Con Buttons Replacement: passo 9, immagine 1 di 1
    • Gently lift the joystick up and out of its holder.

  10. Nintendo Switch Right Joy-Con Buttons Replacement: passo 10, immagine 1 di 1
    • Remove the right shoulder button from its holder.

    • Note that the button has a spring attached which will need to be fitted back into place when reinstalling.

  11. Nintendo Switch Right Joy-Con Buttons Replacement: passo 11, immagine 1 di 2 Nintendo Switch Right Joy-Con Buttons Replacement: passo 11, immagine 2 di 2
    • Using a spudger, gently pry upwards on both the left and right sides of the vibrator.

    • The vibrator is held in place with adhesive so it may take a bit of force to remove.

    • Once the vibrator is removed from its holder do not disconnect the cable. Instead, just move it to the side.

  12. Nintendo Switch Right Joy-Con Buttons Replacement: passo 12, immagine 1 di 2 Nintendo Switch Right Joy-Con Buttons Replacement: passo 12, immagine 2 di 2
    • Using a Phillips #2 screwdriver, remove the two 1.5 mm screws holding the motherboard in place.

    • Be careful as this is the only thing holding the buttons down and they will become loose once the screws are removed.

  13. Nintendo Switch Right Joy-Con Buttons Replacement: passo 13, immagine 1 di 2 Nintendo Switch Right Joy-Con Buttons Replacement: passo 13, immagine 2 di 2
    • Carefully lift the motherboard up and away from the casing.

    • Be cautious of the two remaining ribbon cables. If you pull too hard you will risk damaging the cables.

    • Using tweezers, gently lift the clasps holding the ribbon cables in place.

    • Slide the ribbon cables out of their connectors to release the motherboard from the casing.

  14. Nintendo Switch Right Joy-Con Buttons Replacement: passo 14, immagine 1 di 1
    • Remove the rubber covers from the buttons.

  15. Nintendo Switch Right Joy-Con Buttons Replacement: passo 15, immagine 1 di 1
    • Using tweezers, lift the buttons out from their holders.

    • Note that the buttons have notches to ensure the right orientation when replacing. If you do not line up the notches properly the buttons may be unresponsive.

Conclusione

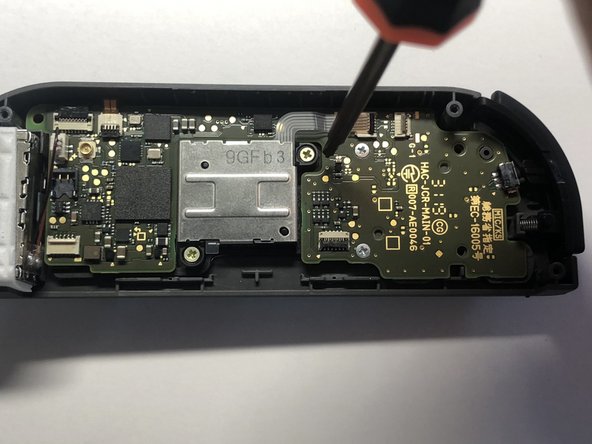
To reassemble your device, follow these instructions in reverse order. Be sure not to screw the motherboard in too tight as this may affect the responsiveness of the buttons. Always apply even pressure to screws when reinstalling the components; one side should not be tighter than the other.

Altre 37 persone hanno completato questa guida.

7 Commenti

Thank you. The guide from the company I bought the replacement buttons from on Amazon was extremely lacking. This was on point.

Drew B - Replica

How do I take the black inner part of the home button out of it’s holding thing?

Martin Drkoš - Replica

I need help with this as well. In the last picture you can see how the home button sits in a clear plastic ring and I cant get it out of there to place my new colorful home button

Zachary Reeves -

Doesn’t include how to change the trigger button…. :/

Harmony Petersen - Replica

Super guide as always. Succesfully replaced the sl and sr buttons. Thanks!!

Richard Kroon - Replica

Aggiungi Commento

Visualizza Statistiche:

Ultime 24 Ore: 41

Ultimi 7 Giorni: 418

Ultimi 30 Giorni: 2,213

Tutti i Tempi: 50,039