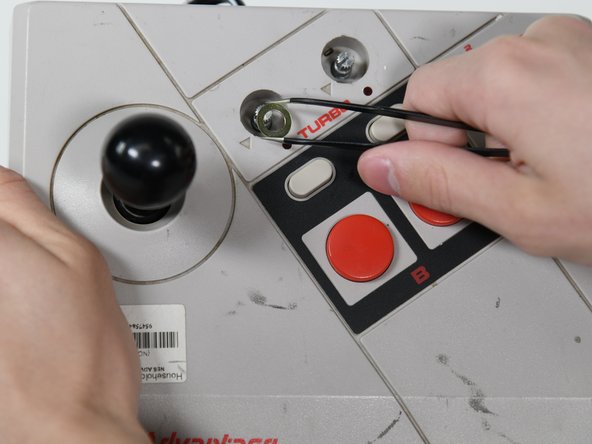
Salta al contenuto principale

Nintendo NES Advantage B Button Replacement

Cosa ti serve

  1. Nintendo NES Advantage B Button Replacement, Back Panel: passo 1, immagine 1 di 1
    • Remove the four sticky pads from the bottom of the device.

    • If the pads are stuck, use a spudger to remove them.

  2. Nintendo NES Advantage B Button Replacement: passo 2, immagine 1 di 2 Nintendo NES Advantage B Button Replacement: passo 2, immagine 2 di 2
    • Remove the six 8 mm screws from the bottom of the device with a Phillips #0 screwdriver.

    • Use your hands to pull the back panel away from the controller.

  3. Nintendo NES Advantage B Button Replacement, Circuit Board: passo 3, immagine 1 di 2 Nintendo NES Advantage B Button Replacement, Circuit Board: passo 3, immagine 2 di 2
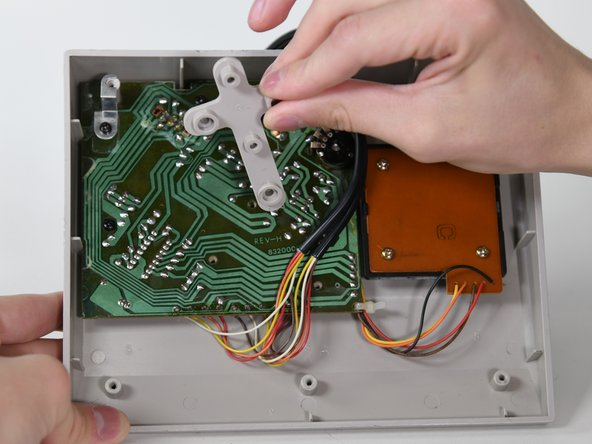
    • Remove the three 14 mm screws from the gray cross with a Phillips #0 screwdriver.

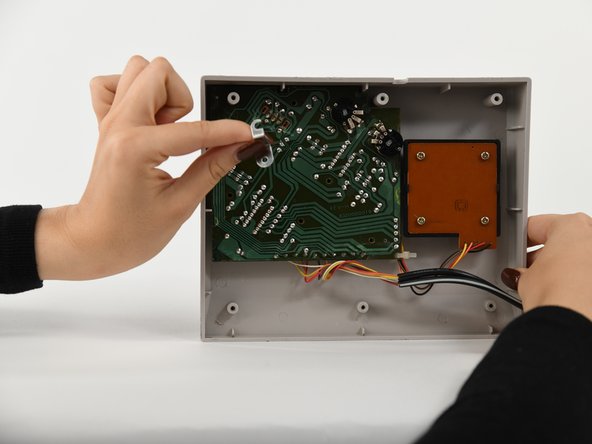
    • Lift the gray component away from the device.

  4. Nintendo NES Advantage B Button Replacement: passo 4, immagine 1 di 1
    • Lift up the black wire and move it to the side.

  5. Nintendo NES Advantage B Button Replacement: passo 5, immagine 1 di 3 Nintendo NES Advantage B Button Replacement: passo 5, immagine 2 di 3 Nintendo NES Advantage B Button Replacement: passo 5, immagine 3 di 3
    Attrezzo utilizzato in questo passaggio:
    Tweezers
    $4.99
    Compra
    • Remove the two silver knobs on the front of the device.

    • Unscrew the two silver nuts using a flathead screwdriver.

    • Remove each silver nut and silver washer using a pair of tweezers.

  6. Nintendo NES Advantage B Button Replacement: passo 6, immagine 1 di 2 Nintendo NES Advantage B Button Replacement: passo 6, immagine 2 di 2
    • Remove the remaining three 8 mm screws on the circuit board with a Phillips #0 screwdriver.

    • Remove the silver bracket from the top of the circuit board.

  7. Nintendo NES Advantage B Button Replacement: passo 7, immagine 1 di 1
    • Remove the circuit board from the controller.

  8. Nintendo NES Advantage B Button Replacement, B Button: passo 8, immagine 1 di 1
    • Remove the B button from the case (or the circuit board if it got stuck).

Conclusione

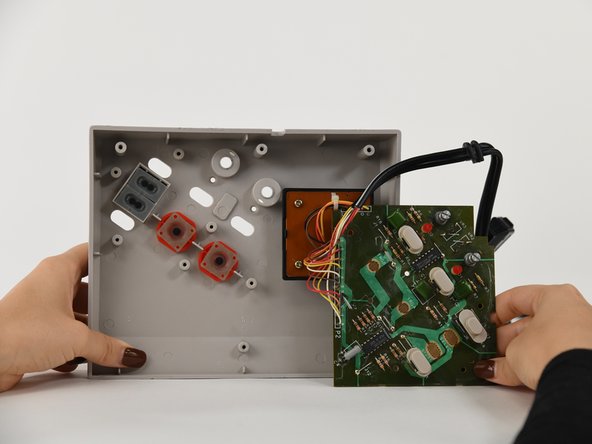
To reassemble your device, follow these instructions in reverse order.

0 Commenti

Aggiungi Commento

Visualizza Statistiche:

Ultime 24 Ore: 3

Ultimi 7 Giorni: 5

Ultimi 30 Giorni: 6

Tutti i Tempi: 153