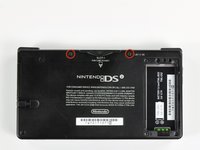
Introduzione
Usa questa guida per rimuovere il display LCD inferiore e il touchscreen inferiore come se fossero un'unica unità.
Cosa ti serve
-
-
Svita le due viti a croce Philips che fissano il copribatteria al case inferiore.
-
Prendi il copribatteria e sollevalo dal case inferiore.
-
-
-
Usando uno spudger (o un'unghia), solleva la batteria dalla parte superiore.
-
Prendi la batteria e rimuovila dal DSi.
-
-
-
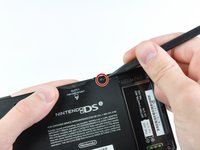
Ci sono due viti nascoste sotto i due gommini cerchiati in rosso.
-
Usa la punta dello spudger per estrarre i due gommini dal case inferiore.
-
-
-
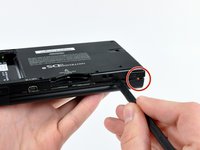
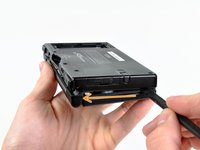
Inserisci lo spudger tra il case inferiore e il pannello inferiore vicino all'angolo in alto a destra del DSi.
-
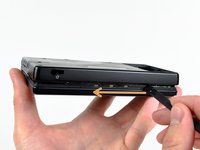
Passa delicatamente lo spudger lungo il margine del case esterno, creando uno spazio tra il case e il dispositivo.
-
Continua a passare lo spudger intorno al dispositivo fino a separare il case inferiore quasi del tutto.
-
-
-
-
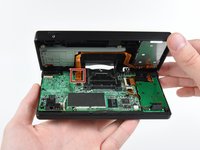
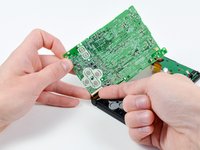
Stacca la scheda del Wi-Fi dalla scheda madre prendendola dal bordo più vicino al jack cuffie.
-
-
-
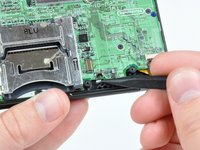
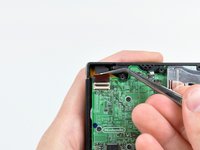
Usa la punta di uno spudger per staccare il connettore della scheda di alimentazione dal suo posto sulla scheda madre.
-
-
-
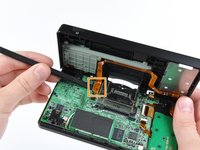
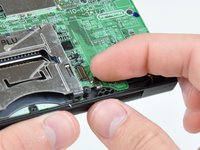
Usa l'unghia o il bordo di uno strumento di apertura in plastica per sollevare la linguetta di fissaggio sulle seguenti tre prese ZIF:
-
Cavo touchscreen inferiore
-
Cavo LCD inferiore
-
Cavo scheda di alimentazione
-
Dopo aver sollevato le linguette di bloccaggio su tutti e tre i socket, usa le dita o un paio di pinzette per estrarre delicatamente i cavi dai rispettivi socket.
-
-
-
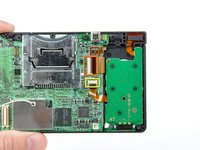
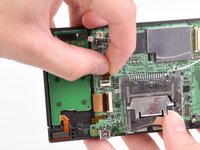
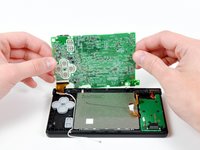
Solleva leggermente la scheda madre verso l'alto per rivelare il cavo a nastro LCD superiore sopra i pulsanti ABXY.
-
Usa l'unghia o il bordo di uno strumento di apertura in plastica per sollevare con cautela l'aletta di fissaggio del cavo a nastro LCD superiore.
-
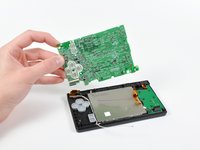
Rimuovi la scheda madre del DSi.
-
-
-
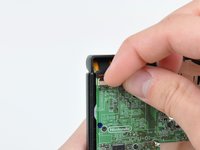
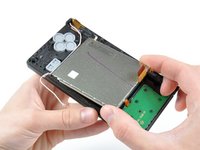
Usa la punta di uno spudger per sollevare il supporto metallico del display LCD inferiore dal telaio del DSi.
-
Solleva il pannello LCD inferiore dal DSi.
-


Per riassemblare il tuo dispositivo, segui questa guida al contrario.
Annulla: non ho completato questa guida.
Altre 9 persone hanno completato questa guida.
Un ringraziamento speciale a questi traduttori:
100%
Azzurra Spano' ci sta aiutando ad aggiustare il mondo! Vuoi partecipare?
Inizia a tradurre ›
