Questa versione può contenere modifiche errate. Passa all'ultima istantanea verificata.
Cosa ti serve
-
-
Posiziona il tuo dispositivo sottosopra e individua il compartimento della batteria.
-
Trova la vite Phillips che tiene ferma la cover della batteria sull'angolo in basso a destra del dispositivo.
-
-
-
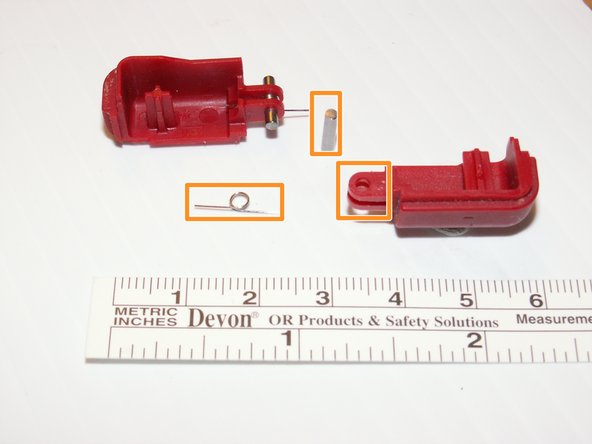
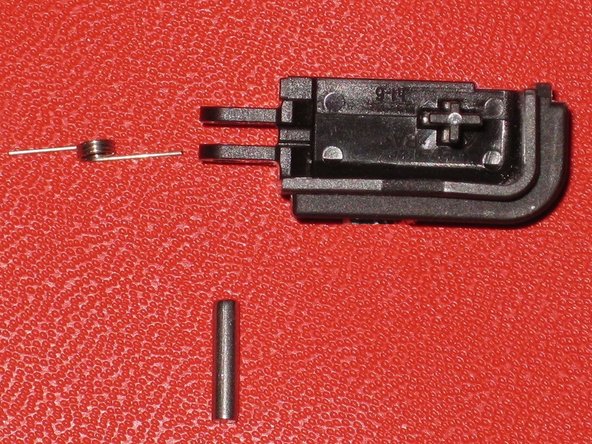
Rimuovi le sette viti che fissano la custodia inferiore del DS Lite:
-
Tre viti a tri-wing argentate (lunghe 5 mm)
-
Una vite tri-wing nera (4 mm)
-
Due viti a croce Phillips dorate (4 mm)
-
Una vite a croce Phillips argentata (3 mm)
-
Non rimuovere ancora la vite PH argentata (3 mm) nel vano batteria. Mantiene il PCB principale in posizione.
-
-
-
Capovolgi l’unità in modo che sia rivolta verso l’alto.
-
Usa uno spudger per aprire la fessura tra il case inferiore e il pannello frontale. Lavora tutto intorno al case fino a quando il pannello non sarà libero.
-
Evita di toccare i pulsanti L e R, perché sono facilmente staccabili e sono difficili da rimontare. Mantieni la parte inferiore piatta contro il banco da lavoro per mantenere in posizione i pulsanti.
-
-
-
Questo passaggio è privo di traduzione. Aiuta a tradurlo
-
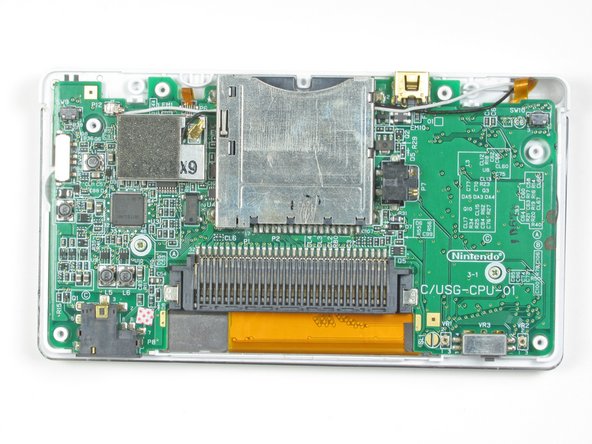
Locate the two screws that attach the logic board to the device.
-
Unscrew the two Phillips head screws.
-
-
Questo passaggio è privo di traduzione. Aiuta a tradurlo
-
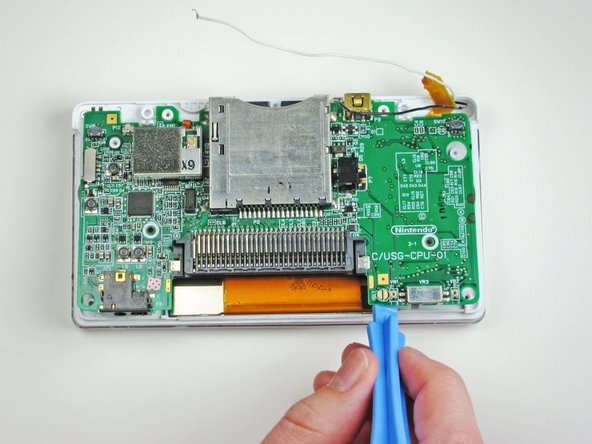
With a plastic opening tool, gently separate the logic board from the device base.
-
-
Questo passaggio è privo di traduzione. Aiuta a tradurlo
-
Flip the logic board over so that the touch screen is facing up.
-
Using metal tweezers, carefully disconnect the other ribbon cable that connects the touch screen with the logic board.
-
-
Questo passaggio è privo di traduzione. Aiuta a tradurlo
-
Using one finger nail or the plastic opening tool, carefully lift the brown securing flap of the connector. Then disconnect the ribbon cable that connects the logic board to the upper screen.
-
-
Questo passaggio è privo di traduzione. Aiuta a tradurlo
-
Remove the two Phillips-head screws that hold the hinge in place.
-
Open the system up (just like if you were about to use it normally).
-
-
Questo passaggio è privo di traduzione. Aiuta a tradurlo
-
After opening it, carefully unhinge them from each other by sliding the bottom piece to the left and the top piece to the right.
-
-
Questo passaggio è privo di traduzione. Aiuta a tradurlo
-
Using a push pin, remove the four rubber bumpers located at the corners of the top screen.
-
After removing the LEDs and pulling apart the hinge, remove the round hinge shaft. This should be in the top screen piece.
-
-
Questo passaggio è privo di traduzione. Aiuta a tradurlo
-
Unscrew the four Phillips-head screws and remove the top panel.
-
-
Questo passaggio è privo di traduzione. Aiuta a tradurlo
-
Carefully remove the two speakers and the green wireless card from the top panel.
-
-
Questo passaggio è privo di traduzione. Aiuta a tradurlo
-
Remove the screen by orienting it face down and pushing up on the screen from underneath.
-
-
Questo passaggio è privo di traduzione. Aiuta a tradurlo
-
Carefully slide the ribbon cable through the clip.
-


Annulla: non ho completato questa guida.
Altre 21 persone hanno completato questa guida.
Team

Cal Poly, Team 16-30, Maness Winter 2010 Membro di Cal Poly, Team 16-30, Maness Winter 2010
CPSU-MANESS-W10S16G30
4 Membri
25 Guide realizzate
6 Commenti
This guide is extremely poor. Please do not follow if you wish to repair your DS top screen. The steps finish before you get the end probably due to the fact the author blatantly doesn't want to mention the fact you need to solder the speakers on.
There should also be more warnings about the power switch broke on both the examples I tried to repair.
iFixit will be creating new DS Lite guides very soon. Give the authors credit though, because it's not easy to create a full set of repair guides!
no im with neil this is just bad
Yeah, this guide really sucks. I ripped one of the tips of the orange tapes trying to remove the old screen. I don’t think it’ll work now. Thanks a whole lot, @%^$$@$#.
Honestly, thats a mistake on your end.