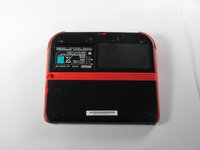
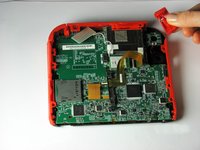
Salta al contenuto principale

Nintendo 2DS Trigger Button Replacement

Cosa ti serve

  1. Nintendo 2DS Trigger Button Replacement, Battery: passo 1, immagine 1 di 1
    • Remove the two Phillips captive screws securing the upper rear panel.

    • The captive screws will not completely detach from the back panel.

  2. Nintendo 2DS Trigger Button Replacement: passo 2, immagine 1 di 2 Nintendo 2DS Trigger Button Replacement: passo 2, immagine 2 di 2
    • Hinge the upper rear panel upwards and outwards to remove it.

  3. Nintendo 2DS Trigger Button Replacement: passo 3, immagine 1 di 3 Nintendo 2DS Trigger Button Replacement: passo 3, immagine 2 di 3 Nintendo 2DS Trigger Button Replacement: passo 3, immagine 3 di 3
    • Remove the battery from its housing by lifting it up from the side closest to the outside edge.

  4. Nintendo 2DS Trigger Button Replacement, Rear Panel: passo 4, immagine 1 di 1
    • Remove the ten Phillips screws attaching the rear panel.

  5. Nintendo 2DS Trigger Button Replacement: passo 5, immagine 1 di 1
    • The rear panel is attached to the motherboard by a ribbon cable, so be careful not to lift the rear panel too far from the device.

    • Carefully pull the rear panel straight up from the device.

  6. Nintendo 2DS Trigger Button Replacement: passo 6, immagine 1 di 1
    • Use your fingernail or the flat end of a spudger to flip up the connector securing the ribbon cable to the motherboard

    • Remove the cable from the connector

    • Take the opportunity to remove the Left and Right triggers, they have hinges that may break and springs that may jump away.

  7. Nintendo 2DS Trigger Button Replacement, Remove trigger button: passo 7, immagine 1 di 2 Nintendo 2DS Trigger Button Replacement, Remove trigger button: passo 7, immagine 2 di 2
    • The trigger buttons have small springs attached to them, so be careful when removing the buttons from the device.

    • Pull the trigger button away from the device to remove it.

Conclusione

To reassemble your device, follow these instructions in reverse order.

Altre 21 persone hanno completato questa guida.

Fina Beauchamp

Membro da: 01/12/15

2.988 Reputazione

6 Guide realizzate

Team

Cal Poly, Team 70-1, Forte Winter 2015 Membro di Cal Poly, Team 70-1, Forte Winter 2015

CPSU-FORTE-W15S70G1

4 Membri

35 Guide realizzate

3 Commenti

Nice job! My right button was jammed for at least two years. Now I can finally demolish my friends in Mariokart.

Minecrafter Pig - Replica

Can’t seem to get the second set of screws to budge at all.

Zom baygal - Replica

Aggiungi Commento

Visualizza Statistiche:

Ultime 24 Ore: 7

Ultimi 7 Giorni: 51

Ultimi 30 Giorni: 234

Tutti i Tempi: 27,396