Questa versione può contenere modifiche errate. Passa all'ultima istantanea verificata.
Cosa ti serve
-
Questo passaggio è privo di traduzione. Aiuta a tradurlo
-
Remove all 4 screws from the bottom face of the camera using a Phillips #00 head screwdriver (found in iFixit tool kit).
-
-
Questo passaggio è privo di traduzione. Aiuta a tradurlo
-
Using a plastic tool, pry open the back panel of the camera. Be careful not to apply too much force and damage the camera.
-
-
Questo passaggio è privo di traduzione. Aiuta a tradurlo
-
Unscrew all 6 visible screws that secure the motherboard into place using a Phillips head screwdriver (found in iFixit tool kit).
-
-
-
Questo passaggio è privo di traduzione. Aiuta a tradurlo
-
Pull the shown panel off of the motherboard to expose the Image sensor connection
-
-
Questo passaggio è privo di traduzione. Aiuta a tradurlo
-
Lift tab up to remove the Image sensor connection strip.
-
-
Questo passaggio è privo di traduzione. Aiuta a tradurlo
-
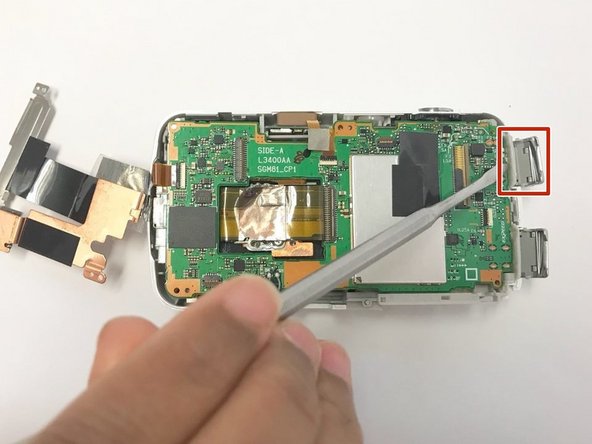
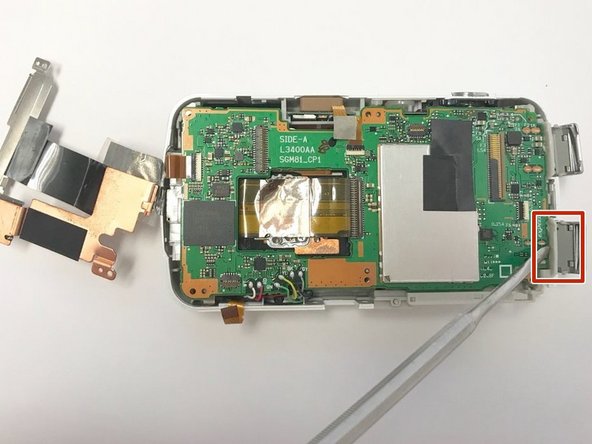
Pull the gray panels back to allow the hidden micro usb and hdmi insert connectors to come free.
-
Use a Metal Spudger to help with the process to get these connectors free from the frame.
-
-
Questo passaggio è privo di traduzione. Aiuta a tradurlo
-
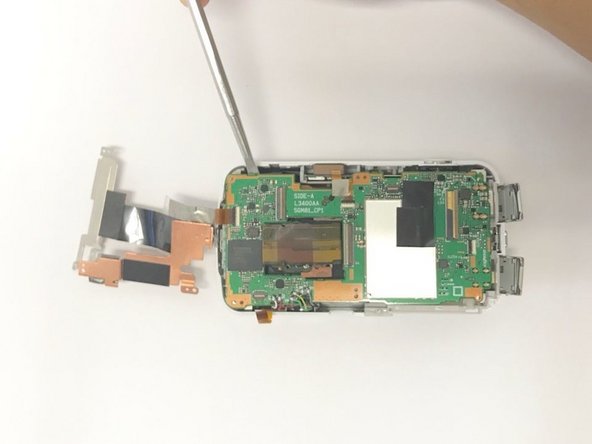
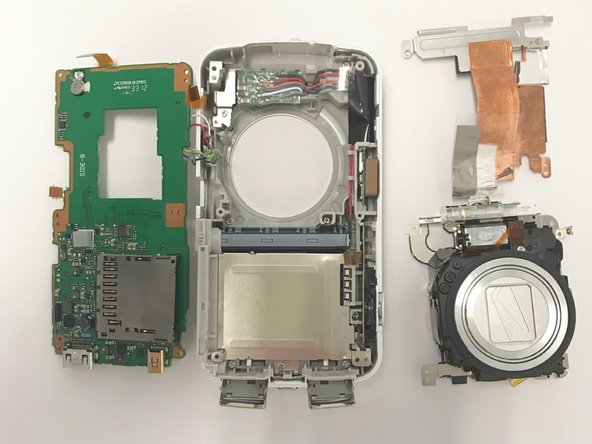
Using a Metal Spudger, lift the motherboard up from the body of the camera.
-
-
Questo passaggio è privo di traduzione. Aiuta a tradurlo
-
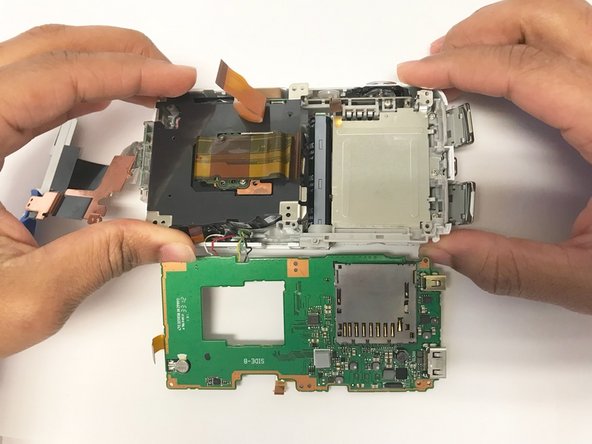
Pull the motherboard off of the main body of the camera.
-
-
Questo passaggio è privo di traduzione. Aiuta a tradurlo
-
Use a plastic opening tool of your choice to loosen and pry up the zoom unit/shutter component.
-
Use your hands to manually lift the zoom unit/shutter component up and out of the main body of the camera.
-


Team

Baylor, Team S2-G6, Johnson Spring 2018 Membro di Baylor, Team S2-G6, Johnson Spring 2018
BU-JOHNSON-S18S2G6
3 Membri
10 Guide realizzate