Questa versione può contenere modifiche errate. Passa all'ultima istantanea verificata.
Cosa ti serve
-
Questo passaggio è privo di traduzione. Aiuta a tradurlo
-
Remove two 5 mm Phillips #000 screws on the right hand side of the camera located near the power button.
-
-
Questo passaggio è privo di traduzione. Aiuta a tradurlo
-
Remove two 5 mm Phillips #000 screws near the audio/video inputs on the opposite side near the flash component.
-
-
Questo passaggio è privo di traduzione. Aiuta a tradurlo
-
Remove three 5 mm Phillips #000 screws on the bottom end of the camera.
-
-
-
Questo passaggio è privo di traduzione. Aiuta a tradurlo
-
Carefully detach the back side of the camera by lifting both ends, with moderate force wobble until loosened enough to remove.
-
-
Questo passaggio è privo di traduzione. Aiuta a tradurlo
-
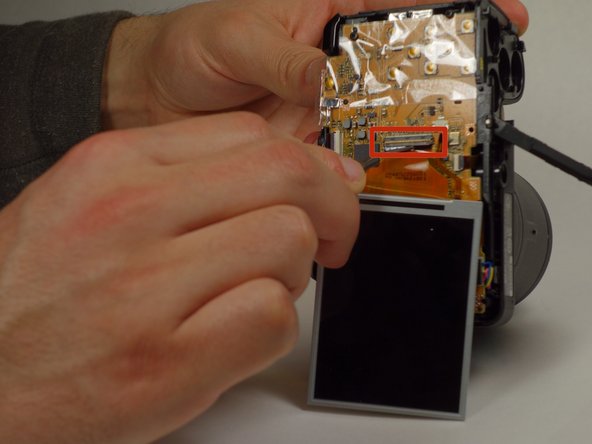
With the LCD screen facing towards you, flip the screen to the right.
-
-
Questo passaggio è privo di traduzione. Aiuta a tradurlo
-
Remove three 5 mm Phillips #000 screws located on the bracket.
-
-
Questo passaggio è privo di traduzione. Aiuta a tradurlo
-
Disconnect the ribbons that connect the LCD screen to the camera gently using precision tweezers or fingers.
-


Annulla: non ho completato questa guida.
Altre 3 persone hanno completato questa guida.

Team

UW Tacoma, Team 3-1, Rose Winter 2015 Membro di UW Tacoma, Team 3-1, Rose Winter 2015
UWT-ROSE-W15S3G1
4 Membri
8 Guide realizzate
2 Commenti
Congratulations! Perfect lesson !
I need HELP presentation abowt desassembler / remove motherboard and other parts to repair the lenz move mechanism. Unfortunately NIKON left Brazil and the resident Suport tecnician besides not being good, stay in quarentine (corona virus)! Special Thanks for you help! Best regards