Salta al contenuto principale

Nikon Coolpix B700 Button Assembly Replacement

Cosa ti serve

  1. Nikon Coolpix B700 Button Assembly Replacement, Back Frame Assembly: passo 1, immagine 1 di 1
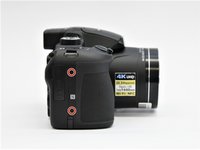
    • Use the Phillips screwdriver to remove the two 5.5 mm screws on the left side of the camera.

  2. Nikon Coolpix B700 Button Assembly Replacement: passo 2, immagine 1 di 1
    • Use the Phillips screwdriver to remove seven 5.5 mm screws from the bottom of the camera.

  3. Nikon Coolpix B700 Button Assembly Replacement: passo 3, immagine 1 di 2 Nikon Coolpix B700 Button Assembly Replacement: passo 3, immagine 2 di 2
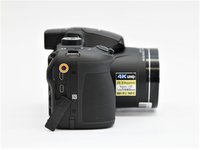
    • Use the Phillips screwdriver to remove the two 5.5mm screws on the right side of the camera.

    • Open the HDMI flap to remove a 5.5mm screw.

    • Don't forget to replace the hidden screw under the HDMI flap during reassembly.

  4. Nikon Coolpix B700 Button Assembly Replacement: passo 4, immagine 1 di 1
    • Use the Phillips screwdriver to remove the two 5.5mm screws under the LCD panel.

  5. Nikon Coolpix B700 Button Assembly Replacement: passo 5, immagine 1 di 3 Nikon Coolpix B700 Button Assembly Replacement: passo 5, immagine 2 di 3 Nikon Coolpix B700 Button Assembly Replacement: passo 5, immagine 3 di 3
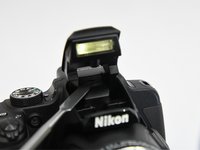
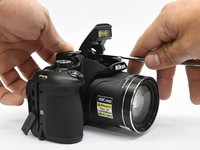
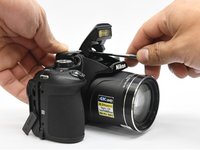
    • Open the flash assembly and insert the spudger into the slot under the flash unit and twist.

    • While twisting, pry apart the shell to split the camera in half.

  6. Nikon Coolpix B700 Button Assembly Replacement: passo 6, immagine 1 di 1
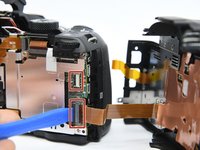
    • Be careful not to damage the ribbons that connect the halves together.

  7. Nikon Coolpix B700 Button Assembly Replacement: passo 7, immagine 1 di 2 Nikon Coolpix B700 Button Assembly Replacement: passo 7, immagine 2 di 2
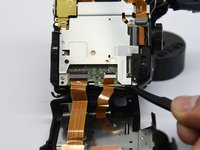
    • Place the pry tool under the black latch. Lift gently until the latch flips up.

    • Gently pull the ribbon away from the latch.

    • Be gentle when taking ribbons out and apart because they are fragile.

  8. Nikon Coolpix B700 Button Assembly Replacement, Button Assembly: passo 8, immagine 1 di 1
    • Lift the corner under the power button up.

    • While at the same time pushing the selector knob back.

  9. Nikon Coolpix B700 Button Assembly Replacement: passo 9, immagine 1 di 1
    • This should remove the entire assembly from the camera housing.

Conclusione

To reassemble your device, follow these instructions in reverse order.

Altre 3 persone hanno completato questa guida.

0 Commenti

Aggiungi Commento

Visualizza Statistiche:

Ultime 24 Ore: 1

Ultimi 7 Giorni: 1

Ultimi 30 Giorni: 2

Tutti i Tempi: 422