Salta al contenuto principale

Nexus 6P Daughterboard/Charging Port Replacement

Cosa ti serve

Panoramica Video

  1. Nexus 6P Daughterboard/Charging Port Replacement, Daughterboard/Charging Port: passo 1, immagine 1 di 2 Nexus 6P Daughterboard/Charging Port Replacement, Daughterboard/Charging Port: passo 1, immagine 2 di 2
    • Remove SIM card tray.

  2. Nexus 6P Daughterboard/Charging Port Replacement: passo 2, immagine 1 di 3 Nexus 6P Daughterboard/Charging Port Replacement: passo 2, immagine 2 di 3 Nexus 6P Daughterboard/Charging Port Replacement: passo 2, immagine 3 di 3
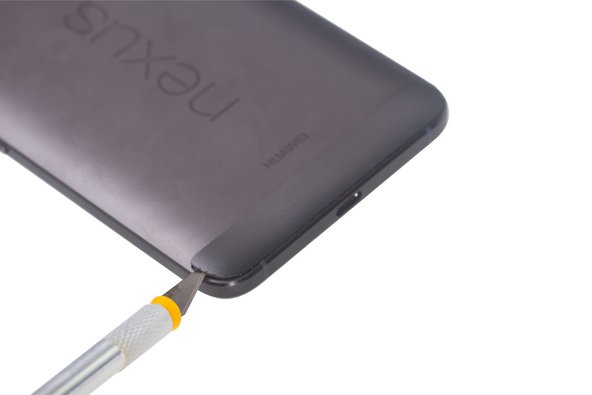
    • Heat up back glass panel.

    • Use hobby knife to open a gap and cut the fierce sticker underneath rear glass panel.

    • The back glass panel is easily shattered and the adhesive underneath is fierce. So be careful to pry this part.

  3. Nexus 6P Daughterboard/Charging Port Replacement: passo 3, immagine 1 di 3 Nexus 6P Daughterboard/Charging Port Replacement: passo 3, immagine 2 di 3 Nexus 6P Daughterboard/Charging Port Replacement: passo 3, immagine 3 di 3
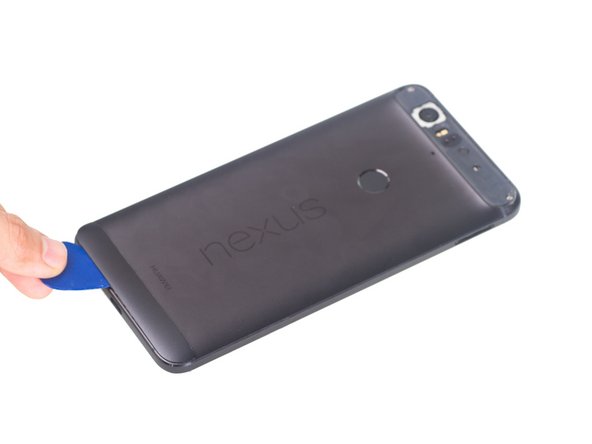
    • Heat up bottom plastic panel.

    • Use hobby knife to open a gap and insert guitar picks to cut adhesive underneath.

  4. Nexus 6P Daughterboard/Charging Port Replacement: passo 4, immagine 1 di 3 Nexus 6P Daughterboard/Charging Port Replacement: passo 4, immagine 2 di 3 Nexus 6P Daughterboard/Charging Port Replacement: passo 4, immagine 3 di 3
    Attrezzo utilizzato in questo passaggio:
    Heavy-Duty Suction Cups (Pair)
    $14.95
    Compra
    • Twist off 6 Phillips screws together.

    • Insert guitar picks and plastic opening tool to separate front assembly from back cover.

    • Attention: These two parts fit tightly.It is the toughest part to separate. You can also try using heavy-duty suction cup to disassemble them.

  5. Nexus 6P Daughterboard/Charging Port Replacement: passo 5, immagine 1 di 3 Nexus 6P Daughterboard/Charging Port Replacement: passo 5, immagine 2 di 3 Nexus 6P Daughterboard/Charging Port Replacement: passo 5, immagine 3 di 3
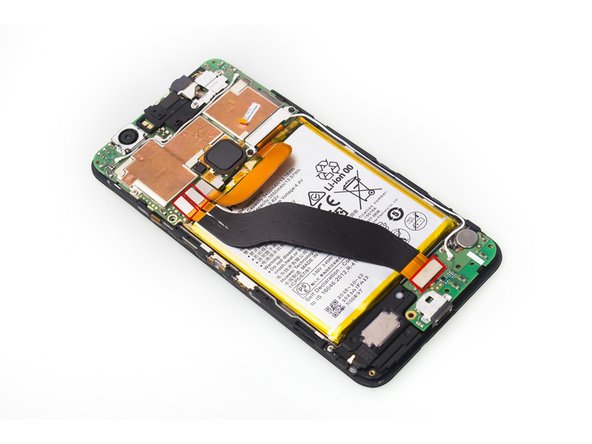
    • Unscrew one Phillips screw.

    • Remove metal bracket securing flex contactors.

    • Release 3 flex contactors and remove it .

    • This flex is used to connect motherboard and daughterboard.

  6. Nexus 6P Daughterboard/Charging Port Replacement: passo 6, immagine 1 di 3 Nexus 6P Daughterboard/Charging Port Replacement: passo 6, immagine 2 di 3 Nexus 6P Daughterboard/Charging Port Replacement: passo 6, immagine 3 di 3
    • Disconnect signal cable contactor and twist off one Phillips screw.

    • Remove daughterboard.

  7. Nexus 6P Daughterboard/Charging Port Replacement: passo 7, immagine 1 di 1
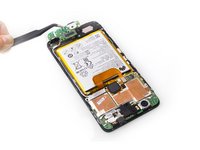
    • Here is the daughterboard. The charging port is attached here.

Conclusione

To reassemble your device, follow these instructions in reverse order.

Altre 23 persone hanno completato questa guida.

Witrigs

Membro da: 11/24/15

69.454 Reputazione

378 Guide realizzate

13 Commenti

Do you know the part number of the daughterboard, or where I can buy a replacement?

Ezequiel Arneodo - Replica

Global Direct Parts seems to have OEM parts. Don't go with eBay and stuff. The ones I saw are cheap knockoffs that don't work right (even when they say OEM).

Sunny Wu -

Do we need more adhesive or everything will stick back with heat?

Will Taylor - Replica

I have replaced my battery. You most likely will need more adhesive. I just plan on using some double sided tape as the original glue was too tough in case I have to open it again. You can just buy a case for it after. It will keep everything nice and tight on there.

Sunny Wu -

To replace the daugherboard, step #5 can largely be skipped - just remove the cable from the daugherboard and move on to step #6. This phone is a true PITA to take apart.

ashlux - Replica

Aggiungi Commento

Visualizza Statistiche:

Ultime 24 Ore: 2

Ultimi 7 Giorni: 6

Ultimi 30 Giorni: 11

Tutti i Tempi: 18,191