Salta al contenuto principale

Neato BOTVAC D5 Wheels & Drive Motor Replacement

Cosa ti serve

  1. Neato BOTVAC D5 Wheels & Drive Motor Replacement, Side Brush: passo 1, immagine 1 di 1
    • Turn the Neato Botvac upside down so the brushes and wheels are facing upward.

  2. Neato BOTVAC D5 Wheels & Drive Motor Replacement: passo 2, immagine 1 di 2 Neato BOTVAC D5 Wheels & Drive Motor Replacement: passo 2, immagine 2 di 2
    • Firmly grasp and pull on the side brush and it will pop right off

  3. Neato BOTVAC D5 Wheels & Drive Motor Replacement, Main Roller Brush: passo 3, immagine 1 di 2 Neato BOTVAC D5 Wheels & Drive Motor Replacement, Main Roller Brush: passo 3, immagine 2 di 2
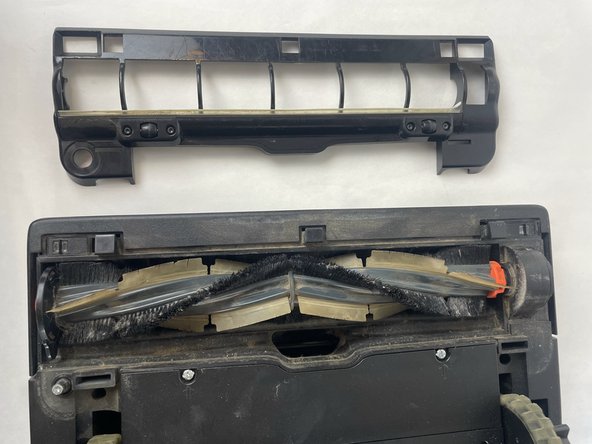
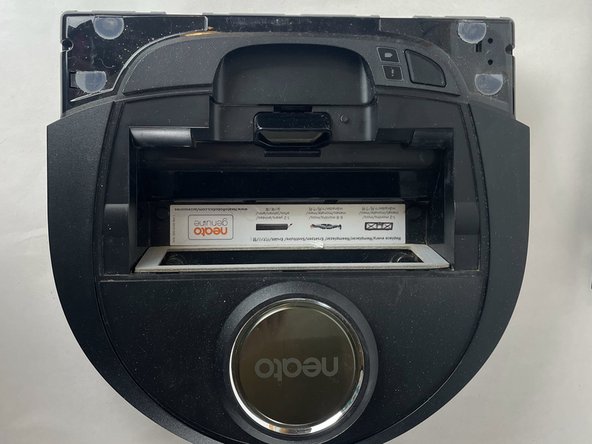
    • Pop the tabs shown on the main brush cover, and then pull. It should come right off. You can put it aside for now.

  4. Neato BOTVAC D5 Wheels & Drive Motor Replacement: passo 4, immagine 1 di 2 Neato BOTVAC D5 Wheels & Drive Motor Replacement: passo 4, immagine 2 di 2
    • The Main brush will pop right out when you attempt to remove it.

    • When replacing the main brush make sure to orient it correctly.

  5. Neato BOTVAC D5 Wheels & Drive Motor Replacement, Wheel & Main Drive Motor: passo 5, immagine 1 di 2 Neato BOTVAC D5 Wheels & Drive Motor Replacement, Wheel & Main Drive Motor: passo 5, immagine 2 di 2
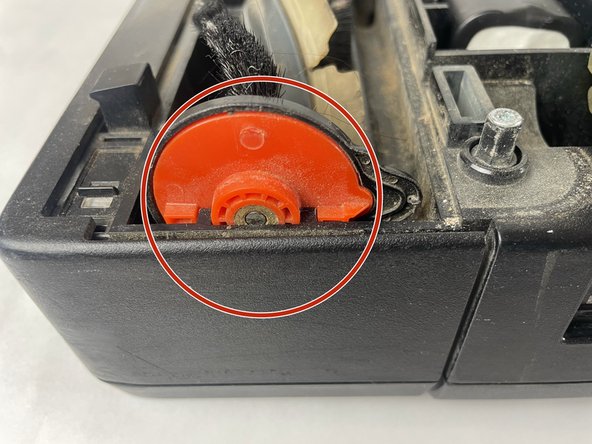
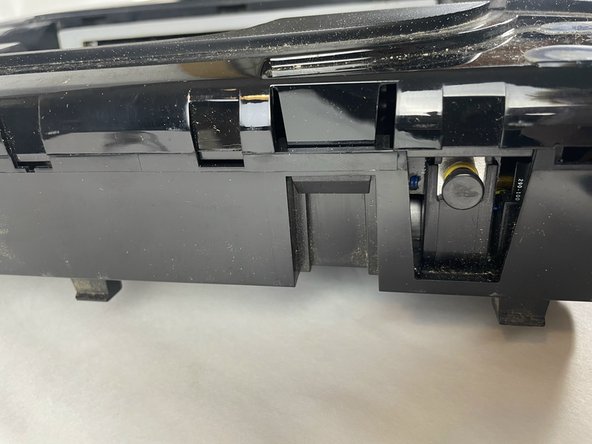
    • The bumper bar needs to come off next. There are two tabs that are holding it on either side of the brush housing.

    • Pull one side away from the brush bar. Keep in mind while this plastic is strong it is not invincible.

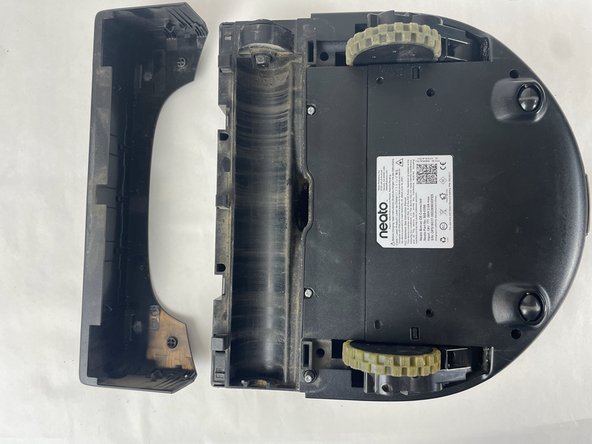
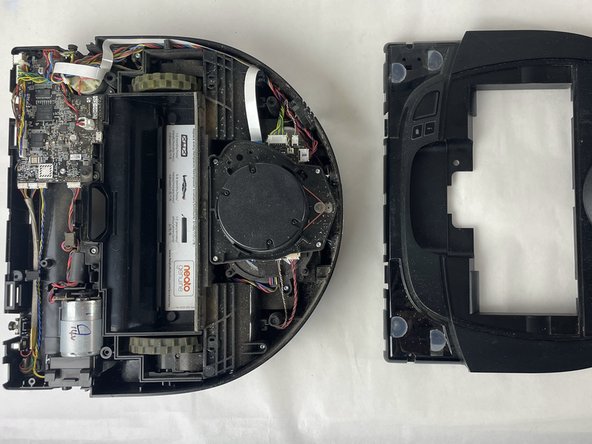
    • After dislodging the bumper bar from the main housing, pull it towards the front of the BOTVAC.

    • Once this is complete the other side should come out very easily.

  6. Neato BOTVAC D5 Wheels & Drive Motor Replacement: passo 6, immagine 1 di 2 Neato BOTVAC D5 Wheels & Drive Motor Replacement: passo 6, immagine 2 di 2
    • There are eight 12 mm screws on the bottom that you will need to remove in order to get the top panel off. All of these screws use the TR10 screwdriver bit.

    • Now flip over your BOTVAC. Remove the two 12 mm TR10 screws that are there.

  7. Neato BOTVAC D5 Wheels & Drive Motor Replacement: passo 7, immagine 1 di 2 Neato BOTVAC D5 Wheels & Drive Motor Replacement: passo 7, immagine 2 di 2
    • Once all the screws are gone remove the filter.

  8. Neato BOTVAC D5 Wheels & Drive Motor Replacement: passo 8, immagine 1 di 3 Neato BOTVAC D5 Wheels & Drive Motor Replacement: passo 8, immagine 2 di 3 Neato BOTVAC D5 Wheels & Drive Motor Replacement: passo 8, immagine 3 di 3
    • There are some more plastic clips you will need to push in, in order to be able to remove the top cover.

    • After the top should pop right off.

  9. Neato BOTVAC D5 Wheels & Drive Motor Replacement: passo 9, immagine 1 di 2 Neato BOTVAC D5 Wheels & Drive Motor Replacement: passo 9, immagine 2 di 2
    • There are two more 12 mm TR10 screws that must be removed in order to remove the vacuum module.

  10. Neato BOTVAC D5 Wheels & Drive Motor Replacement: passo 10, immagine 1 di 3 Neato BOTVAC D5 Wheels & Drive Motor Replacement: passo 10, immagine 2 di 3 Neato BOTVAC D5 Wheels & Drive Motor Replacement: passo 10, immagine 3 di 3
    • You must unplug the majority of cables in order to safely remove the vacuum module. This is in the way of the wheels and needs to not be.

    • The circled cables need to be unplugged while any others do not NEED to be. You can remove them if you like though.

  11. Neato BOTVAC D5 Wheels & Drive Motor Replacement: passo 11, immagine 1 di 2 Neato BOTVAC D5 Wheels & Drive Motor Replacement: passo 11, immagine 2 di 2
    • Flip the BOTVAC back over, and push these two tabs in. Now these are VERY difficult to push in I would advise using a spudger to help dislodge them.

    • After the vacuum unit is dislodged. MAKE SURE YOU DO NOT LOSE THESE SPRINGS!

  12. Neato BOTVAC D5 Wheels & Drive Motor Replacement: passo 12, immagine 1 di 1
    • This is how it should look in order to remove the wheels.

    • Don't forget about the springs when replacing the wheels.

Conclusione

To reassemble your device, follow these instructions in reverse order.

Laurent Kwan

Membro da: 10/30/23

337 Reputazione

3 Guide realizzate

Team

UMass Dartmouth, Team 3-3, Konn Fall 2023 Membro di UMass Dartmouth, Team 3-3, Konn Fall 2023

UMASSD-KONN-F23S3G3

4 Membri

5 Guide realizzate

0 Commenti

Aggiungi Commento

Visualizza Statistiche:

Ultime 24 Ore: 1

Ultimi 7 Giorni: 2

Ultimi 30 Giorni: 18

Tutti i Tempi: 158