Questa versione può contenere modifiche errate. Passa all'ultima istantanea verificata.
Cosa ti serve
-
Questo passaggio è privo di traduzione. Aiuta a tradurlo
-
Position the Nabi DreamTab onto a non-metallic surface so that the screen is facing towards the ceiling, and the DreamTab logo appears closest to you.
-
Remove the red silicone case from the Nabi DreamTab HD8.
-
-
Questo passaggio è privo di traduzione. Aiuta a tradurlo
-
Turn it upside down, ensuring the small black circular camera is in the upper left hand corner.
-
-
Questo passaggio è privo di traduzione. Aiuta a tradurlo
-
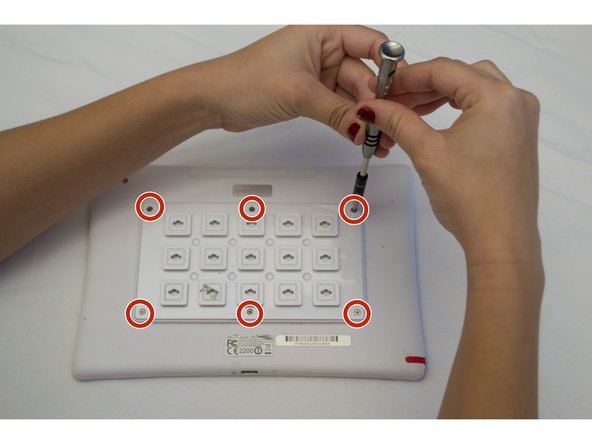
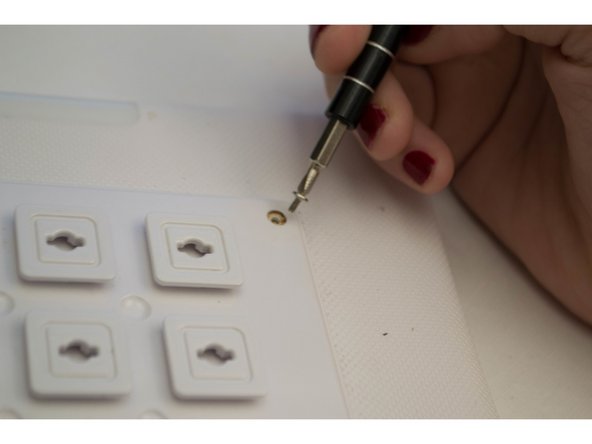
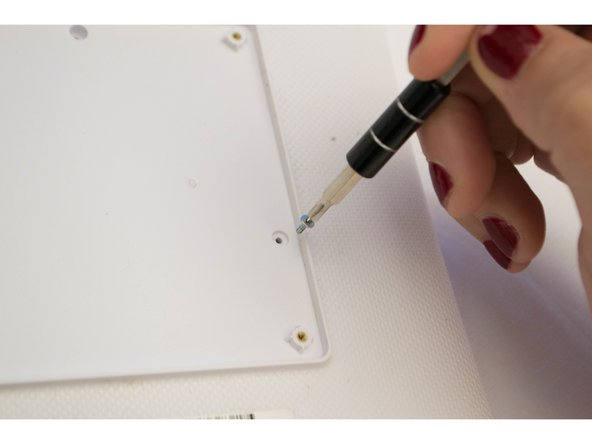
Remove the six 2.5 mm JIS #000 screws attaching the custom grid to the back panel.
-
-
Questo passaggio è privo di traduzione. Aiuta a tradurlo
-
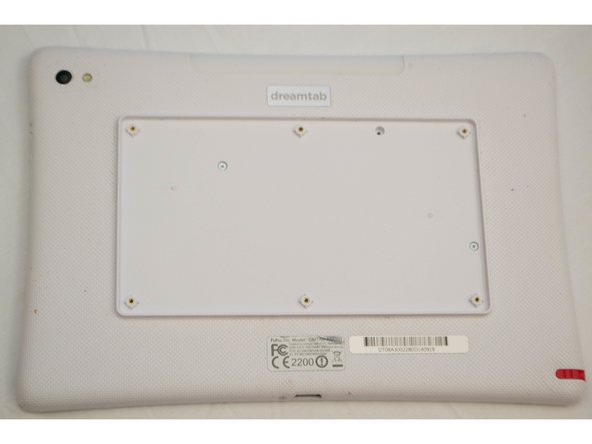
Grasp one of the protruding squares and gently lift off the back plate. Place it aside for later reassembly.
-
-
-
Questo passaggio è privo di traduzione. Aiuta a tradurlo
-
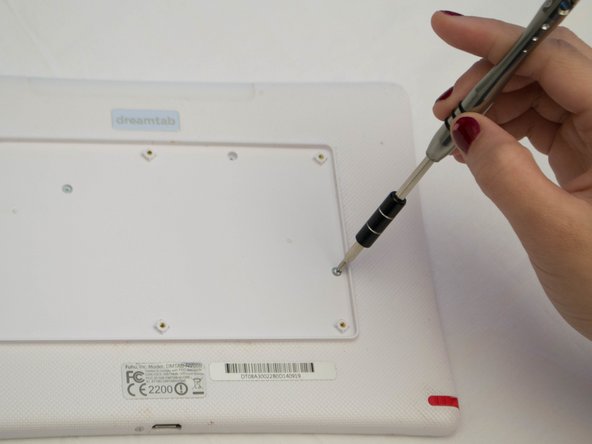
Remove the three 3.5mm screws using the J-0 screwdriver attaching the back panel to the device.
-
-
Questo passaggio è privo di traduzione. Aiuta a tradurlo
-
Rotate the top of the device towards you so that the audio jack appears on the right side of the device.
-
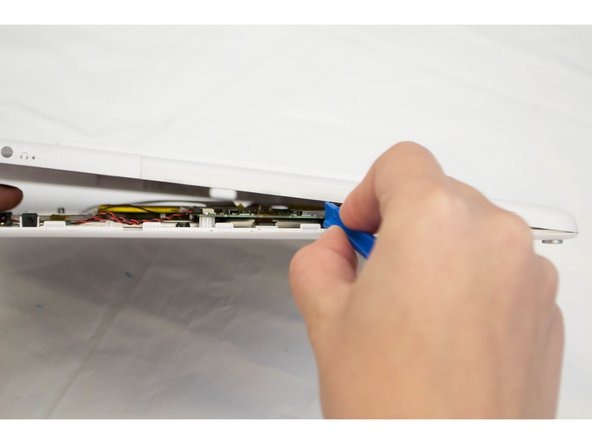
Wedge the plastic opening tool between where the front and back case panels meet near the audio jack.
-
Pry the device open using moderate force until you hear a clicking sound. This is the sound of the clips unlocking.
-
Move along the perimeter of the entire device using the same prying motion to gradually separate the front and back panels.
-
Once the edges are open return to the same starting position next to the audio jack.
-
-
Questo passaggio è privo di traduzione. Aiuta a tradurlo
-
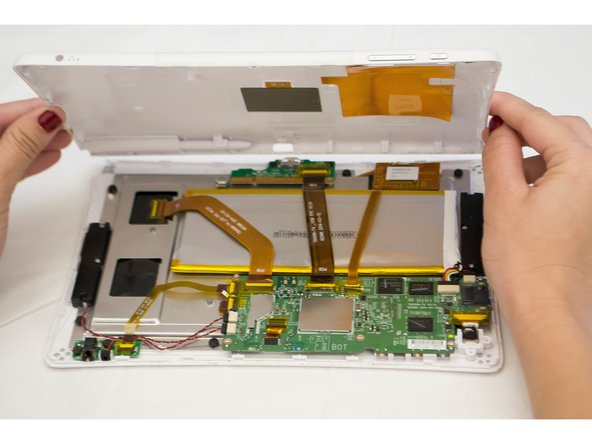
Once you've completed separating the front and back panels, place the device back onto the table, display facing downward and camera at the top left.
-
Lift off the back panel and rotate the device 180 degrees while the screen is facing down.
-
-
Questo passaggio è privo di traduzione. Aiuta a tradurlo
-
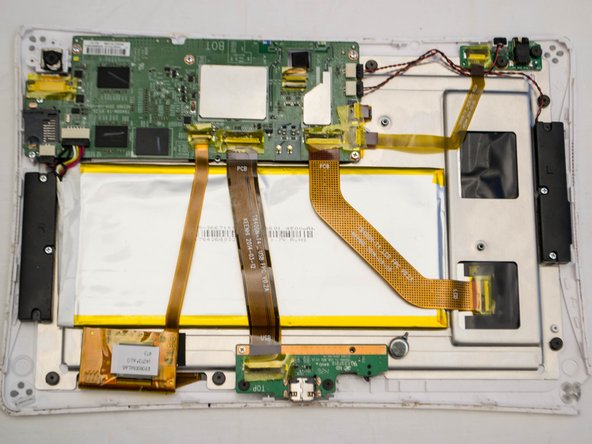
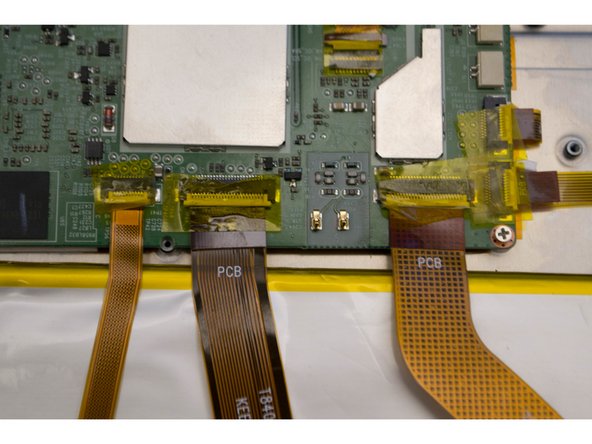
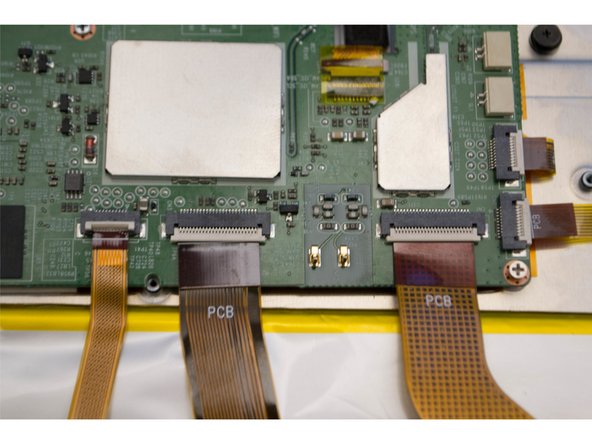
Remove the remaining yellow plastic film from the surrounding connectors so that the battery can be easily removed.
-
-
Questo passaggio è privo di traduzione. Aiuta a tradurlo
-
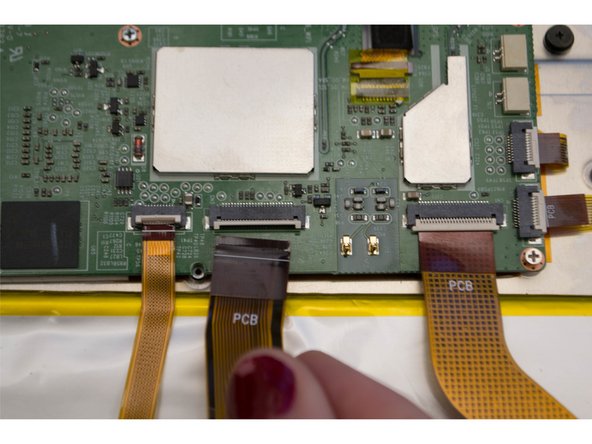
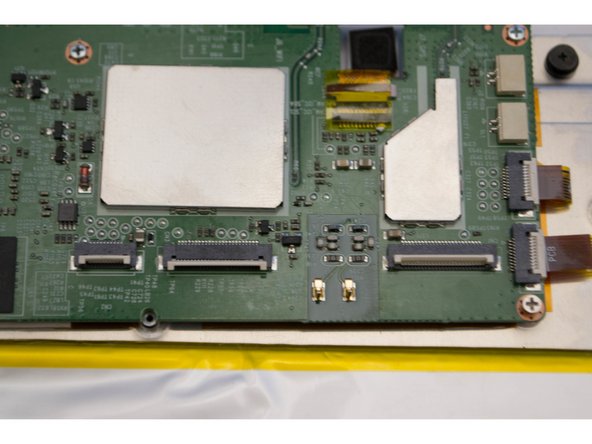
Disconnect the two plastic connectors overlapping the battery from the motherboard.
-
-
Questo passaggio è privo di traduzione. Aiuta a tradurlo
-
Slide a plastic card or opening pick between the battery and case. Gently pry the battery out of the case.
-
-
Questo passaggio è privo di traduzione. Aiuta a tradurlo
-
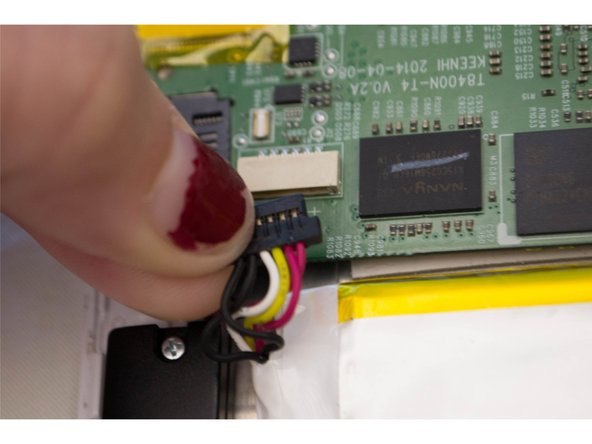
Disconnect the final battery connector from the motherboard.
-
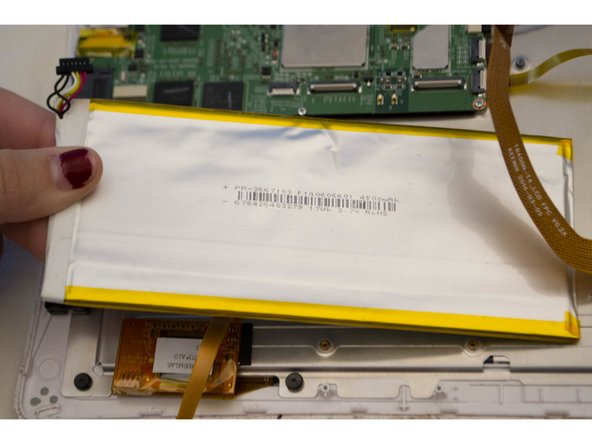
Remove the battery.
-


Annulla: non ho completato questa guida.
Altre 2 persone hanno completato questa guida.
Team

CSU Fullerton, Team 2-3, Bruce Fall 2015 Membro di CSU Fullerton, Team 2-3, Bruce Fall 2015
CSUF-BRUCE-F15S2G3
4 Membri
10 Guide realizzate
8 Commenti
Great directions. Good to know stuff. Where, if I may ask, did you find the replacement battery. Thanks in advance, and, keep on keeping on.
The inside of my DreamTab looks NOTHING like this. For one, the battery is NOT foil wrapped. Other than that, still nothing like your pictures.
There are two different DreamTab models: DMTAB-IN08A and DMTAB-NV08B.
This procedure is using the DMTAB-NV08B.
Restaure mi nabi dream 8 pero ahora no puedo acceder a mi correo me dice , comprobando disponibilidad y no pasa de ahi