Salta al contenuto principale

Nabi 2S Speakers Replacement

Cosa ti serve

  1. Nabi 2S Speakers Replacement, Nabi 2S Disassembly: passo 1, immagine 1 di 1
    • Remove the red rubber case from the device.

  2. Nabi 2S Speakers Replacement: passo 2, immagine 1 di 2 Nabi 2S Speakers Replacement: passo 2, immagine 2 di 2
    • Make sure the screen is facing away from you and the back cover is facing you.

    • Using a Phillips #0 Screwdriver, unscrew the 3mm screws counter-clockwise in each corner of the plastic back cover. It will be a total of four screws. The smaller case on the back cover is attached to the main cover so it will not need to be removed.

  3. Nabi 2S Speakers Replacement: passo 3, immagine 1 di 1
    • Using the plastic opening tool, remove the case.

    • Removing the case will take a bit of effort and force. We recommend using two hands and if possible another person to help. It will require some gusto.

    • It is helpful to pry at the corners first to loosen the case.

  4. Nabi 2S Speakers Replacement: passo 4, immagine 1 di 1
    • After the back case is loosened, remove it from the device to change or access the battery.

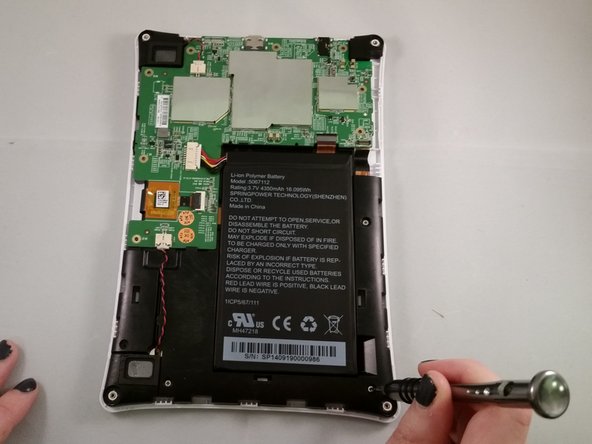
  5. Nabi 2S Speakers Replacement, Speakers: passo 5, immagine 1 di 2 Nabi 2S Speakers Replacement, Speakers: passo 5, immagine 2 di 2
    • Unscrew the circuit board from the motherboard by using a Phillips #0 screwdriver to unscrew the 4mm screws in a clockwise rotation.

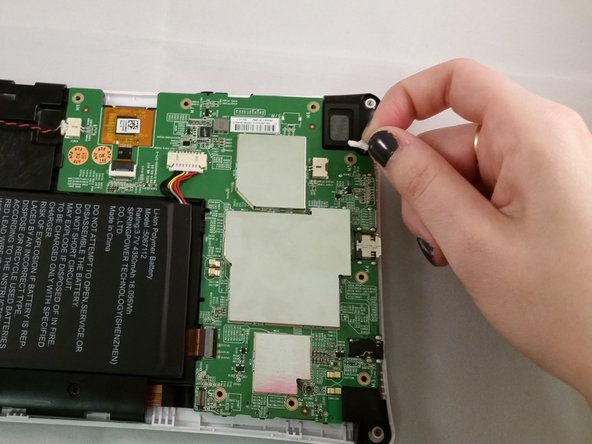
  6. Nabi 2S Speakers Replacement: passo 6, immagine 1 di 2 Nabi 2S Speakers Replacement: passo 6, immagine 2 di 2
    • The speakers are attached to the device via wires that are connected to a circuit. Grasp the circuit connected to the right speaker.

    • Slide the connected wires from the circuit to detach the speakers.

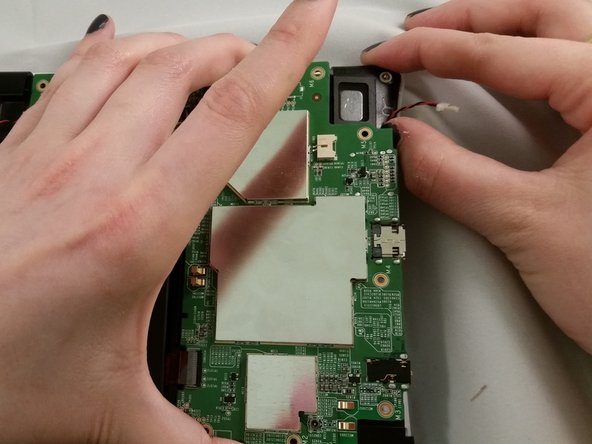
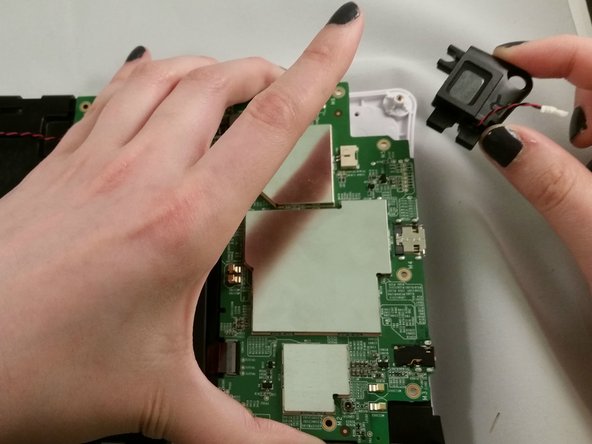
  7. Nabi 2S Speakers Replacement: passo 7, immagine 1 di 3 Nabi 2S Speakers Replacement: passo 7, immagine 2 di 3 Nabi 2S Speakers Replacement: passo 7, immagine 3 di 3
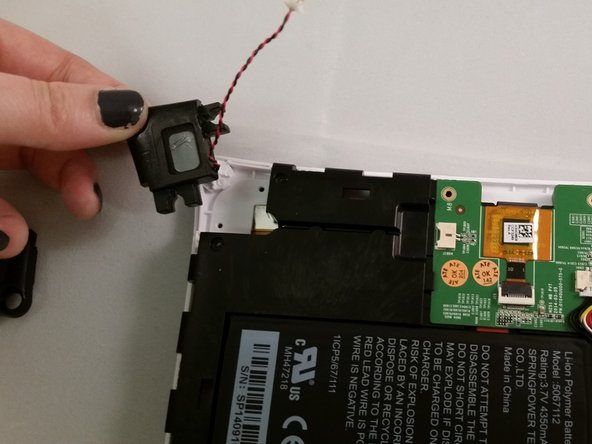
    • Lift the circuit board to get better access for removing the speaker.

    • Grasp the speaker with your fingers and lift it from the plastic

  8. Nabi 2S Speakers Replacement: passo 8, immagine 1 di 2 Nabi 2S Speakers Replacement: passo 8, immagine 2 di 2
    • Repeat steps 6 and 7 for the second speaker on the left side.

    • The circuit board should still be loose to remove the speaker.

Conclusione

To reassemble your device, follow these instructions in reverse order.

Altre 3 persone hanno completato questa guida.

Team

Marist, Team 1-4, Laflen Spring 2016 Membro di Marist, Team 1-4, Laflen Spring 2016

MARS-LAFLEN-S16S1G4

2 Membri

10 Guide realizzate

0 Commenti

Aggiungi Commento

Visualizza Statistiche:

Ultime 24 Ore: 0

Ultimi 7 Giorni: 0

Ultimi 30 Giorni: 0

Tutti i Tempi: 241