Salta al contenuto principale
NETGEAR WGT624 v3 Lower Case Replacement

NETGEAR WGT624 v3 Lower Case Replacement

Nicole Slagle

Nicole Slagle e 4 altri collaboratori

Ultimo aggiornamento il February 3, 2023

5 minuti
Facile

Introduzione

Vai al passo 1

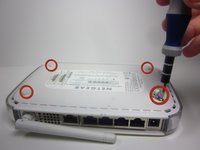
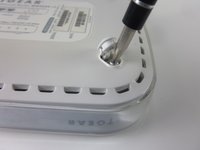
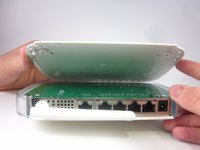
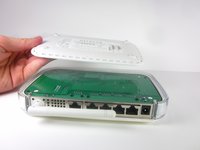
Removing the lower case allows you to replace the hardware inside the device.

Cosa ti serve

Strumenti

Mostra di più…

  1. NETGEAR WGT624 v3 Lower Case Replacement, Lower Case: passo 1, immagine 1 di 1
    • Turn the device so that the bottom is facing up.

  2. NETGEAR WGT624 v3 Lower Case Replacement: passo 2, immagine 1 di 3 NETGEAR WGT624 v3 Lower Case Replacement: passo 2, immagine 2 di 3 NETGEAR WGT624 v3 Lower Case Replacement: passo 2, immagine 3 di 3
    • Use the plastic opening tool to carefully lift the rubber stops in each corner.

    • Do not completely remove the rubber stops, because they are difficult to replace.

  3. NETGEAR WGT624 v3 Lower Case Replacement: passo 3, immagine 1 di 2 NETGEAR WGT624 v3 Lower Case Replacement: passo 3, immagine 2 di 2
    • Unscrew the 4 11.8 mm T-8 Torx screws from each corner of the device.

  4. NETGEAR WGT624 v3 Lower Case Replacement: passo 4, immagine 1 di 2 NETGEAR WGT624 v3 Lower Case Replacement: passo 4, immagine 2 di 2
    • Lift the lower case straight up from the rest of the router.

Conclusione

To reassemble your device, follow these instructions in reverse order.

Team

Cal Poly, Team 3-31, Amido Winter 2013 Membro di Cal Poly, Team 3-31, Amido Winter 2013

CPSU-AMIDO-W13S3G31

3 Membri

12 Guide realizzate

0Commenti sulla guida

Aggiungi Commento

Visualizza Statistiche:

Ultime 24 Ore: 2

Ultimi 7 Giorni: 6

Ultimi 30 Giorni: 6

Tutti i Tempi: 487