Introduzione
If pulling the trigger of your Nerf Nite Finder doesn't cause it to fire, the trigger might need to be replaced. This guide shows how to do so.
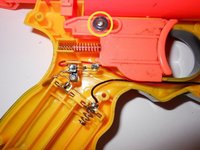
==CAUTION==
Be aware of springs under compression. Take care so these small parts do not fly off the blaster and get lost.
Cosa ti serve
-
-
Place the blaster upside down on the table, and remove the screw in the bottom of the handle.
-
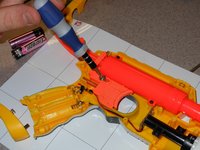
Remove the battery door and take the batteries out.
-
-


To reassemble your device, follow these instructions in reverse order.
To reassemble your device, follow these instructions in reverse order.
Annulla: non ho completato questa guida.
Un'altra persona ha completato questa guida.

Team

Michigan Tech, Team 5-8, Lauer Spring 2014 Membro di Michigan Tech, Team 5-8, Lauer Spring 2014
MTU-LAUER-S14S5G8
3 Membri
13 Guide realizzate