Questa versione può contenere modifiche errate. Passa all'ultima istantanea verificata.
Cosa ti serve
-
Questo passaggio è privo di traduzione. Aiuta a tradurlo
-
Flip the Mr. Coffee DW13 over so that the lid is facing away from you and the base is facing toward you.
-
-
Questo passaggio è privo di traduzione. Aiuta a tradurlo
-
Remove the eight 11 mm screws that secure the base of the machine with a Phillips Head #2 screwdriver.
-
-
Questo passaggio è privo di traduzione. Aiuta a tradurlo
-
Gently lift the base cover to expose the inside of the coffee machine.
-
-
-
Questo passaggio è privo di traduzione. Aiuta a tradurlo
-
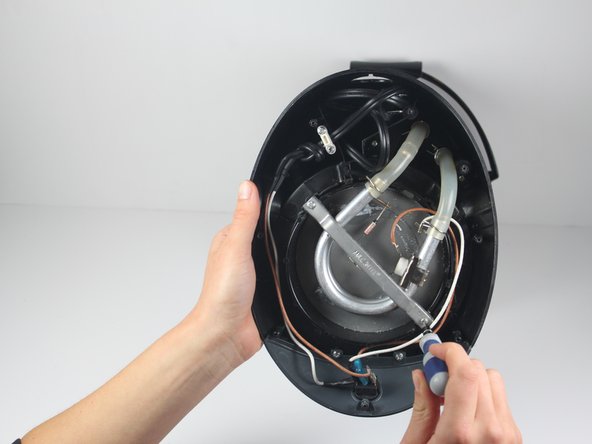
Using the Phillips Head #2 screwdriver, remove the two 13 mm screws that secure the silver support bracket.
-
-
Questo passaggio è privo di traduzione. Aiuta a tradurlo
-
Gently lift the silver support bracket to free the heating plate from the heating coil.
-
-
Questo passaggio è privo di traduzione. Aiuta a tradurlo
-
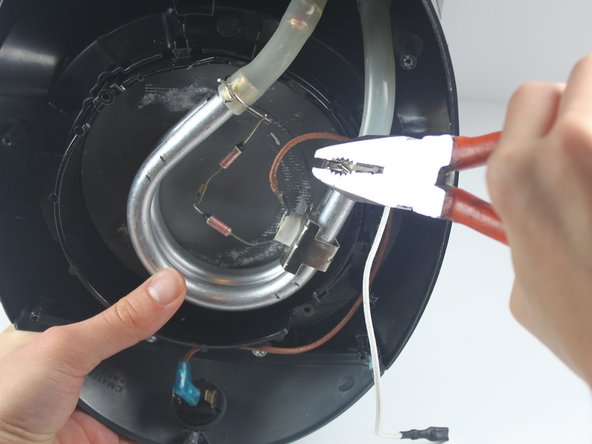
Pinch and loosen the crimps with the needle-nose pliers.
-
-
Questo passaggio è privo di traduzione. Aiuta a tradurlo
-
Once the crimps are loosened, slide them down the tubing.
-
-
Questo passaggio è privo di traduzione. Aiuta a tradurlo
-
Separate the tubing from the heating coil by grasping the tubing in one hand and the heating coil in the other. Gently pull them apart.
-
-
Questo passaggio è privo di traduzione. Aiuta a tradurlo
-
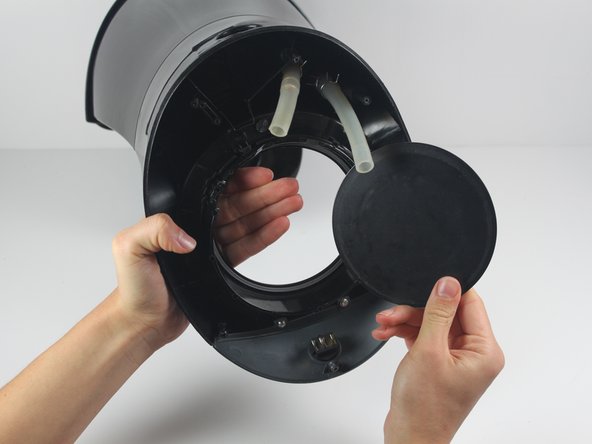
Place your hand on the front side of the heating plate and push towards the bottom of the coffee maker to pop the heating plate out of place.
-


Annulla: non ho completato questa guida.
Altre 6 persone hanno completato questa guida.

Team

Cal Poly, Team 10-31, Maness Winter 2014 Membro di Cal Poly, Team 10-31, Maness Winter 2014
CPSU-MANESS-W14S10G31
4 Membri
6 Guide realizzate
6 Commenti
so where do you get a replacement heating element (Im looking for one for a FTX49)
You're missing steps and including unnecessary steps in this instruction. As well, you don't give a source for replacement warming plates. You might want to consider a rewrite.
I made a substitute hot plate from some sheet metal that I bought at the hardware store, and now I’m back in action with my delicious coffee.
Why they manufacture these plates out of poorly protected mild steel is beyond me. No, actually it isn’t beyond me - using inexpensive, unsuitable components certainly increases their profits. These plates almost certainly cost them less than 1¢ each, which is far cheaper than the 2¢ they’d pay for a suitable, durable part.
Lance J -
Before removing anything, do an in circuit resistance of those two small copper colored cylinders with a black end.
They are thermal fuses, and should have in circuit resistances close to zero.
Their placement is important, especially the one under the silver support bracket.
Our plate rusted out and quit heating very effectively. Will try a new part?