Introduzione
If you have identified an issue with your speaker’s motherboard and need to replace it, use this guide to locate the motherboard. In order to locate, remove, and replace the motherboard of your MPOW MPBH063 speaker, you will need a tech knife, adhesive remover, and precision tweezers.
Cosa ti serve
-
-
Remove four Hex 10 mm screws from the outer speaker cover displaying the speaker's serial number indicated by the red circle.
-
Carefully insert the spudger tool into one of the holes in the cover to pry open the outer cover of the speaker.
-
-
-
-
Carefully detach the battery from the adhesive securing the battery to the inner wall of the speaker.
-
Use the iFixit Adhesive Remover as directed to remove the battery from the inner wall of the speaker.
-
Detach the battery from the inner wall without detaching the wires connecting the battery to the motherboard.
-
-
Attrezzo utilizzato in questo passaggio:Tweezers$4.99
-
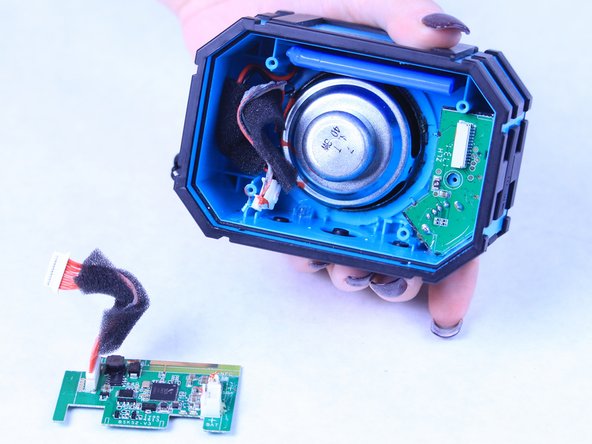
Detach the motherboard from the speaker using the tech knife and the adhesive remover to remove the adhesive securing the motherboard.
-
Use iFixit Adhesive Remover as directed.
-
Use the precision tweezers with the blunt head to carefully grip and pull out the motherboard.
-


To reassemble your device, follow these instructions in reverse order.
Annulla: non ho completato questa guida.
Un'altra persona ha completato questa guida.
Team

Sam Houston State, Team S15-G5, Blackburne Fall 2018 Membro di Sam Houston State, Team S15-G5, Blackburne Fall 2018
SHSU-BLACKBURNE-F18S15G5
3 Membri
5 Guide realizzate