Salta al contenuto principale

Questa guida ha delle modifiche più recenti. Passa all'ultima versione non verificata.

Motorola V710 LCD screen replacement

Cosa ti serve

  1. Motorola V710 LCD screen replacement, Screen: passo 1, immagine 1 di 3 Motorola V710 LCD screen replacement, Screen: passo 1, immagine 2 di 3 Motorola V710 LCD screen replacement, Screen: passo 1, immagine 3 di 3
    • Insert the spudger between the gray and black plates of the screen casing.

    • Using a twist and pry motion work your way around the phone slowly prying the two plates apart.

    • Note: this part of the phone is glued and will require re-gluing to return the phone to its original state.

  2. Motorola V710 LCD screen replacement: passo 2, immagine 1 di 2 Motorola V710 LCD screen replacement: passo 2, immagine 2 di 2
    • If you look at the side of the now exposed screen there should be a metal casing held onto the phone by two tabs.

    • Insert the spudger underneath one of the corners of the metal and bend it out enough to slip it over the tabs.

    • This metal is reasonably resistant to bending and will likely require a good deal of force to get it off the phone.

  3. Motorola V710 LCD screen replacement: passo 3, immagine 1 di 2 Motorola V710 LCD screen replacement: passo 3, immagine 2 di 2
    • Orient the phone so that the main screen is facing upward.

    • Locate the hinge casing, a dark gray piece that covers the hinge.

    • Insert the spudger under one of the top corners of this piece and using a twist and pry motion remove from the phone.

  4. Motorola V710 LCD screen replacement: passo 4, immagine 1 di 2 Motorola V710 LCD screen replacement: passo 4, immagine 2 di 2
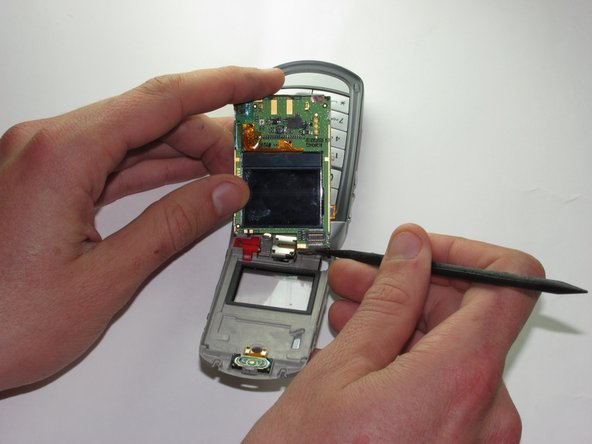
    • Use the spudger to pry upward and remove the plug that connects the screen to the main body of the phone.

  5. Motorola V710 LCD screen replacement: passo 5, immagine 1 di 2 Motorola V710 LCD screen replacement: passo 5, immagine 2 di 2
    • Insert the spudger under the screen and pry the screen forward.

    • Remove the plug on the back of the screen that connects it to the camera.

  6. Motorola V710 LCD screen replacement: passo 6, immagine 1 di 2 Motorola V710 LCD screen replacement: passo 6, immagine 2 di 2
    • Use the spudger to remove the screen.

Conclusione

To reassemble your device, follow these instructions in reverse order.

Team

Cal Poly, Team 8-49, Regan Winter 2010 Membro di Cal Poly, Team 8-49, Regan Winter 2010

CPSU-REGAN-W10S8G49

5 Membri

16 Guide realizzate

0 Commenti

Aggiungi Commento

Visualizza Statistiche:

Ultime 24 Ore: 0

Ultimi 7 Giorni: 0

Ultimi 30 Giorni: 1

Tutti i Tempi: 2,053