Introduzione
Motorola RFS4000 Wireless Switch is an integrated controller service designed to provide comprehensive, secure, high-performance and cost-effective integrated wired and wireless network services.
The RFS4000 provides complete voice services, multiple location technologies, and support for multiple RF technologies.
-
-
-
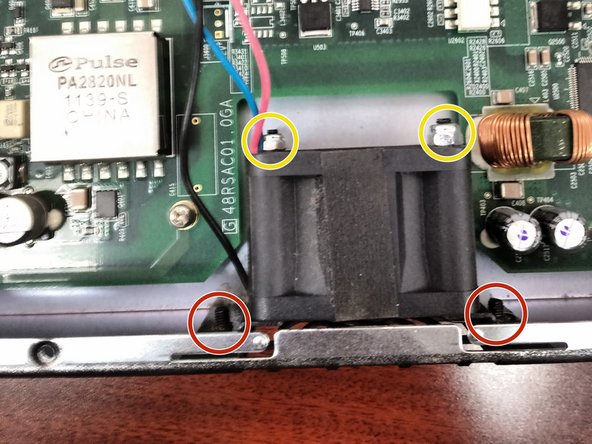
Motherboard screws
-
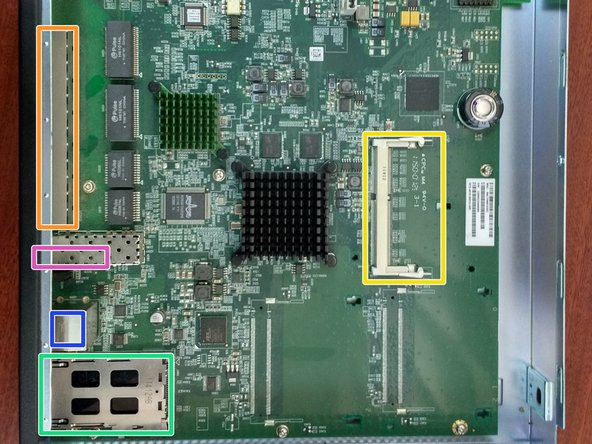
RJ45 ports
-
Console port (rj45) and usb port
-
Express card
-
SFP port (Motorola part number: Fiber-3000-1S-WWR)
-
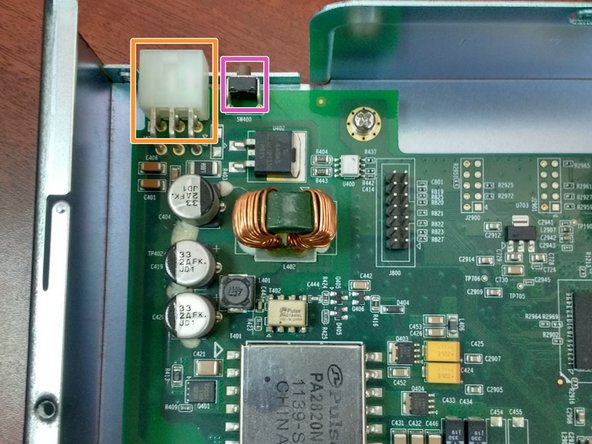
Reset button
-


Para reensamblar tu dispositivo, sigue estas instrucciones en orden inverso.
Para reensamblar tu dispositivo, sigue estas instrucciones en orden inverso.
Annulla: non ho completato questa guida.
Un'altra persona ha completato questa guida.

Team

Comunidad para traductores de español Membro di Comunidad para traductores de español
Community
23 Membri
200 Guide realizzate