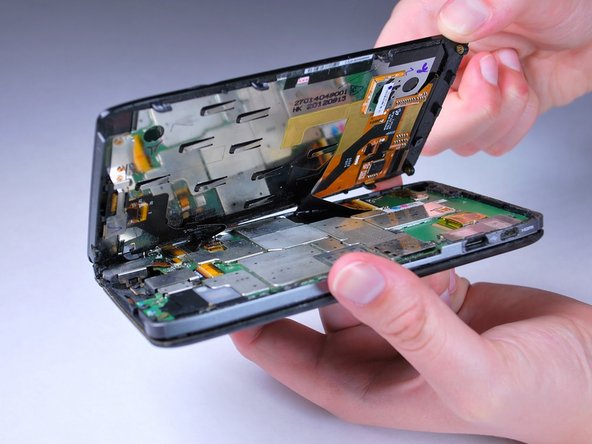
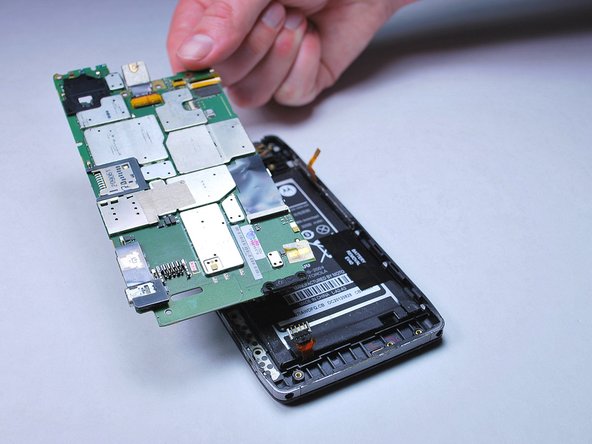
Salta al contenuto principale

Motorola RAZR Maxx HD External Speaker Replacement

Cosa ti serve

  1. Motorola RAZR Maxx HD External Speaker Replacement, Screen Removal: passo 1, immagine 1 di 2 Motorola RAZR Maxx HD External Speaker Replacement, Screen Removal: passo 1, immagine 2 di 2
    • Use the Torx T5 Screwdriver to remove two 5.0 mm screws at the bottom of the phone.

  2. Motorola RAZR Maxx HD External Speaker Replacement: passo 2, immagine 1 di 2 Motorola RAZR Maxx HD External Speaker Replacement: passo 2, immagine 2 di 2
    • To remove the SIM card, use an unfolded paperclip to press down on the metal plate on the left side of the phone until it pops up.

  3. Motorola RAZR Maxx HD External Speaker Replacement: passo 3, immagine 1 di 2 Motorola RAZR Maxx HD External Speaker Replacement: passo 3, immagine 2 di 2
    • Gently push the screen toward the top edge of the phone and tilt the screen to reveal the black flex cables.

    • Do NOT remove the screen all the way or the flex cables will be damaged.

  4. Motorola RAZR Maxx HD External Speaker Replacement: passo 4, immagine 1 di 2 Motorola RAZR Maxx HD External Speaker Replacement: passo 4, immagine 2 di 2
    • Release the two black ribbon flex cables by gently pulling up on the connection using the spudger. Then lift the screen to remove.

    • Make sure to remove the flex cables before completely removing the screen.

    • When reassembling, align the white bands on the edge of the screen so that a connection is made.

  5. Motorola RAZR Maxx HD External Speaker Replacement, Circuit Board: passo 5, immagine 1 di 3 Motorola RAZR Maxx HD External Speaker Replacement, Circuit Board: passo 5, immagine 2 di 3 Motorola RAZR Maxx HD External Speaker Replacement, Circuit Board: passo 5, immagine 3 di 3
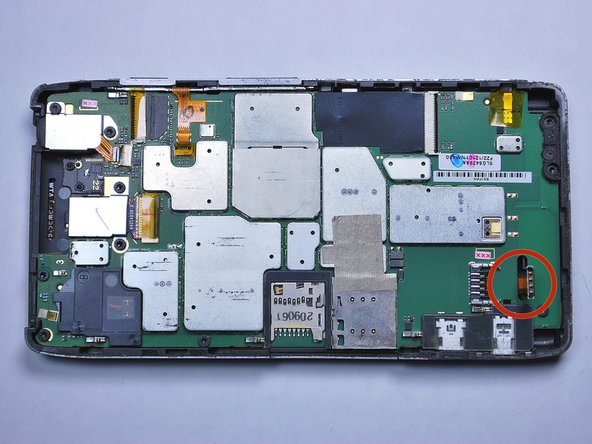
    • Remove the plastic yellow tape on the battery connector using the spudger.

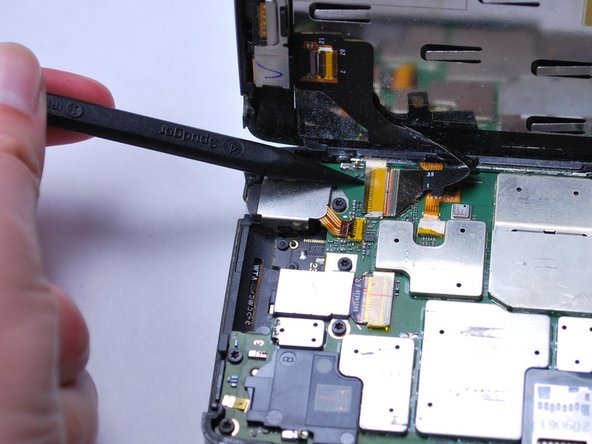
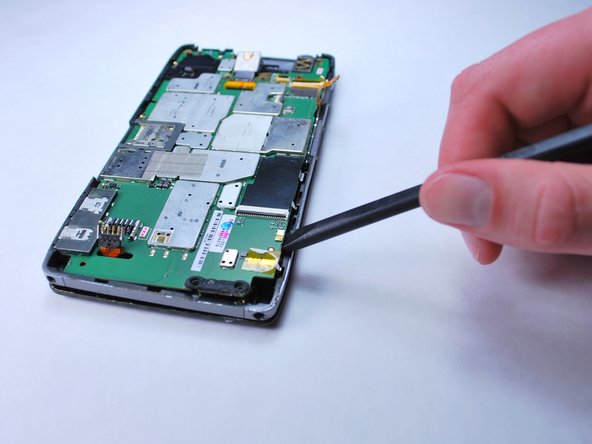
    • Pry up on the orange connection to release it from the motherboard.

  6. Motorola RAZR Maxx HD External Speaker Replacement: passo 6, immagine 1 di 1
    • Unscrew all ten 4.0 mm screws on the motherboard using a T5 Torx screwdriver.

  7. Motorola RAZR Maxx HD External Speaker Replacement: passo 7, immagine 1 di 2 Motorola RAZR Maxx HD External Speaker Replacement: passo 7, immagine 2 di 2
    • Using tweezers, remove the clear plastic covering on the speaker.

    • Pry open the connection by lifting up on the speaker wire connector.

  8. Motorola RAZR Maxx HD External Speaker Replacement: passo 8, immagine 1 di 2 Motorola RAZR Maxx HD External Speaker Replacement: passo 8, immagine 2 di 2
    • Using tweezers, remove the back facing camera cover.

  9. Motorola RAZR Maxx HD External Speaker Replacement: passo 9, immagine 1 di 2 Motorola RAZR Maxx HD External Speaker Replacement: passo 9, immagine 2 di 2
    • Using the spudger tool, release the yellow ribbon cable on the headphone jack cover by pushing up on the connection.

    • Remove the cover from the motherboard.

  10. Motorola RAZR Maxx HD External Speaker Replacement: passo 10, immagine 1 di 1
    • Release the yellow flex cable on the right side of the phone using the spudger by lifting up on the retaining clip.

  11. Motorola RAZR Maxx HD External Speaker Replacement: passo 11, immagine 1 di 3 Motorola RAZR Maxx HD External Speaker Replacement: passo 11, immagine 2 di 3 Motorola RAZR Maxx HD External Speaker Replacement: passo 11, immagine 3 di 3
    • Wedge the spudger between the motherboard and the back case.

    • Work your way around the entire edge of the motherboard to release it and remove it from the back of the phone.

  12. Motorola RAZR Maxx HD External Speaker Replacement, External Speaker: passo 12, immagine 1 di 2 Motorola RAZR Maxx HD External Speaker Replacement, External Speaker: passo 12, immagine 2 di 2
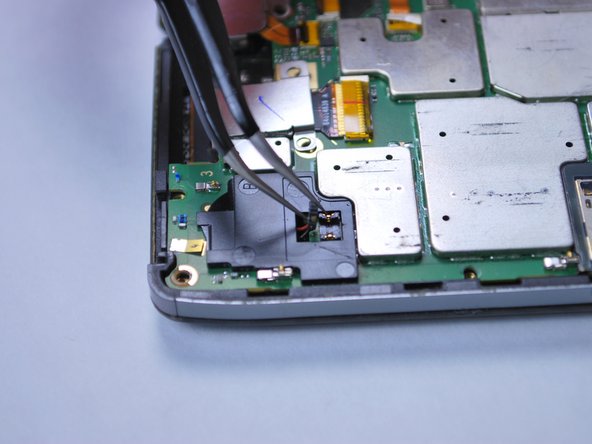
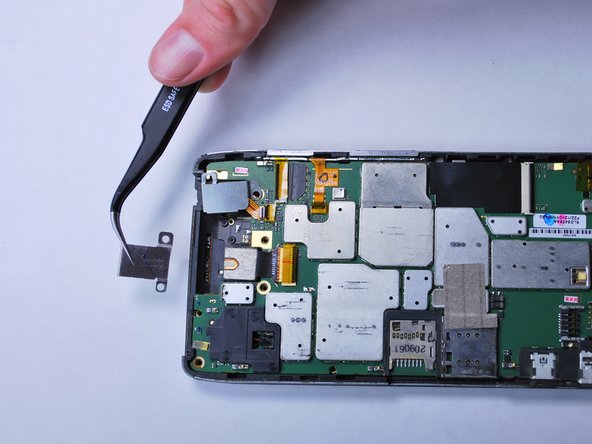
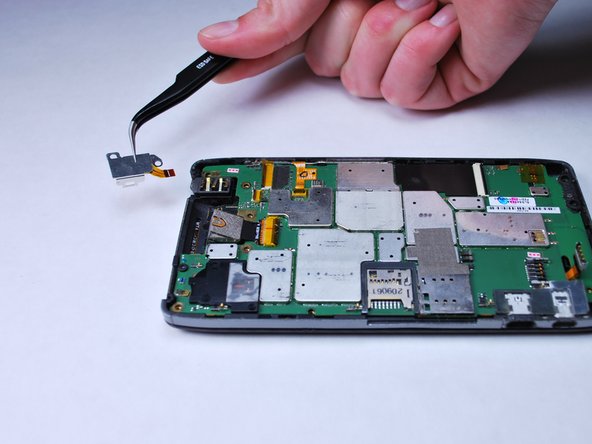
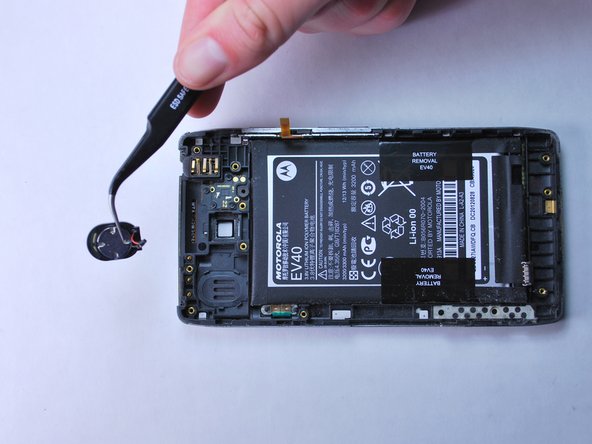
    • Use tweezers to remove the speaker from the top left of the phone by pulling upward.

Conclusione

To reassemble your device, follow these instructions in reverse order.

Un'altra persona ha completato questa guida.

Team

Cal Poly, Team 8-40, Amido Winter 2015 Membro di Cal Poly, Team 8-40, Amido Winter 2015

CPSU-AMIDO-W15S8G40

5 Membri

18 Guide realizzate

0 Commenti

Aggiungi Commento

Visualizza Statistiche:

Ultime 24 Ore: 0

Ultimi 7 Giorni: 0

Ultimi 30 Giorni: 1

Tutti i Tempi: 436