Questa traduzione potrebbe non riflettere gli aggiornamenti più recenti dalla guida originale. Aiuta ad aggiornare la traduzione o visualizza la guida d'origine.
Introduzione
Questa guida ha un prerequisito perché bisogna prima di tutto rimuovere lo schermo.
Se la tua batteria è gonfia, non scaldare il tuo telefono e prendi adeguate precauzioni
Cosa ti serve
-
Questo passaggio è privo di traduzione. Aiuta a tradurlo
-
Heat an iOpener and apply it to the left edge of the phone for two minutes.
-
As you wait, take note of the the following areas:
-
Display cable—be careful not to slice too deeply near the edge here, or you may damage the display cable.
-
Fingerprint sensor cable—be careful not to slice too deeply near the edge here, or you may damage the fingerprint sensor cable.
-
-
Questo passaggio è privo di traduzione. Aiuta a tradurlo
-
Apply a suction cup to the screen, as close to the heated edge as possible.
-
Pull on the suction cup with strong, steady force to create a gap in the seam.
-
Insert the point of an opening pick into the gap.
-
-
Questo passaggio è privo di traduzione. Aiuta a tradurlo
-
Slide the opening pick along the edge to slice through the adhesive.
-
Leave an opening pick in the seam to prevent the adhesive from re-sealing.
-
-
Questo passaggio è privo di traduzione. Aiuta a tradurlo
-
Heat the top edge of the phone with an iOpener.
-
Carefully slice around the corner and through the top edge to separate the adhesive.
-
-
Questo passaggio è privo di traduzione. Aiuta a tradurlo
-
Heat the screen's right edge with an iOpener.
-
Be careful not to slice too deeply near the cables to avoid damaging them.
-
Use an opening pick to slice along the right edge to separate the adhesive.
-
-
Questo passaggio è privo di traduzione. Aiuta a tradurlo
-
Repeat the previous steps to heat and slice the bottom edge of the phone.
-
-
Questo passaggio è privo di traduzione. Aiuta a tradurlo
-
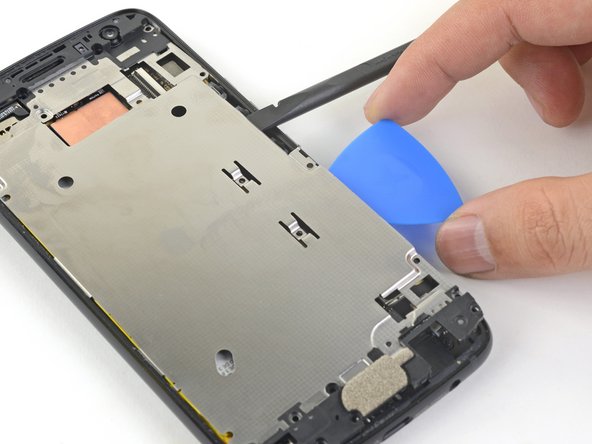
Carefully lift up the left edge of the screen and cut away remaining adhesives with an opening pick.
-
-
Questo passaggio è privo di traduzione. Aiuta a tradurlo
-
Swing open the screen and prop it up with a small box as you work on disconnecting the flex cables.
-
-
-
Questo passaggio è privo di traduzione. Aiuta a tradurlo
-
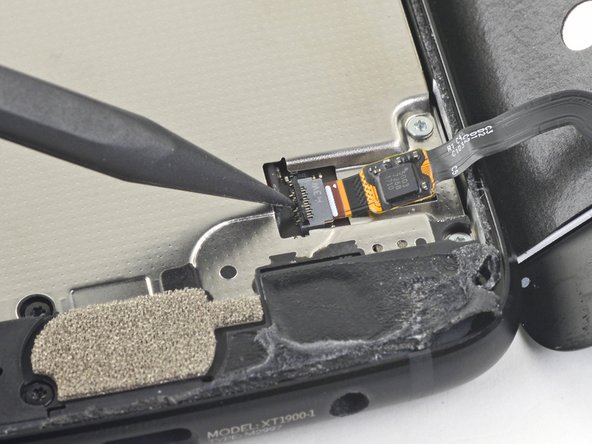
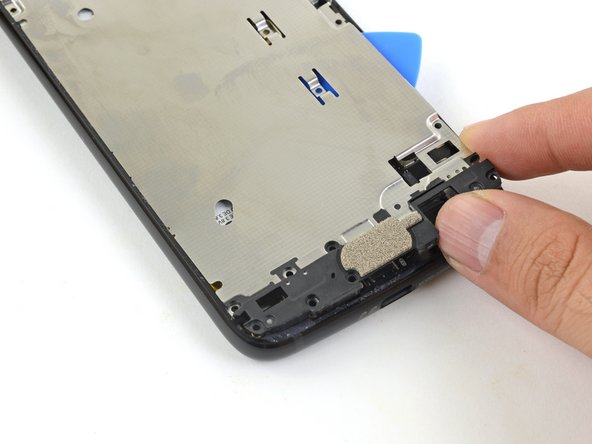
Slide the point of a spudger underneath the fingerprint sensor cable and gently pry up to loosen the cable from the phone.
-
-
Questo passaggio è privo di traduzione. Aiuta a tradurlo
-
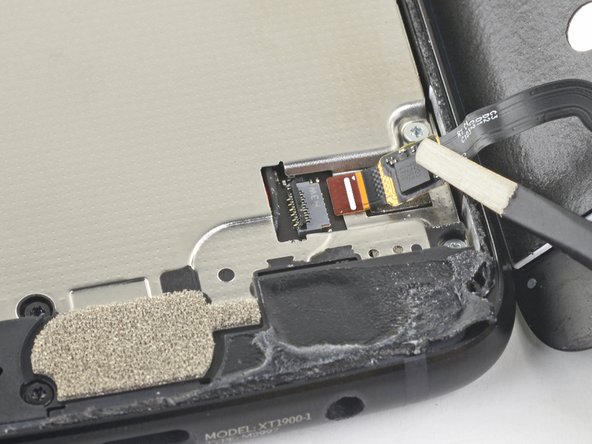
Use the point of a spudger to flip up the lock bar on the fingerprint sensor's ZIF socket, near the bottom right of the phone.
-
Use tweezers to carefully slide the fingerprint sensor cable out of the socket.
-
-
Questo passaggio è privo di traduzione. Aiuta a tradurlo
-
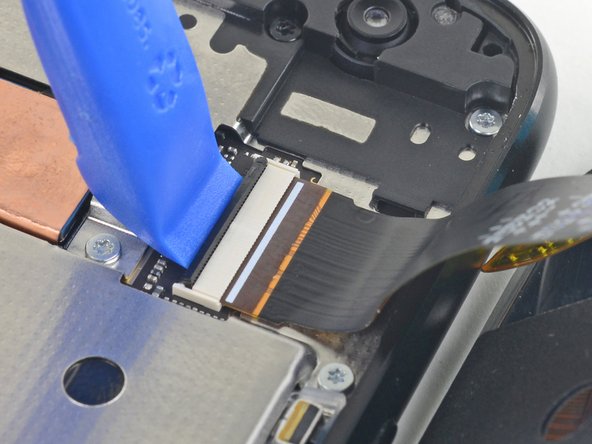
Use an opening tool to flip up the wide lock bar on the display cable's ZIF socket, near the top right of the phone.
-
Use tweezers to carefully slide the display cable out of the ZIF socket.
-
-
Questo passaggio è privo di traduzione. Aiuta a tradurlo
-
Remove the following twenty screws securing the midframe:
-
Eleven silver 2.7 mm-long T3 screws
-
Nine black 3.6 mm-long T4 screws
-
The midframe is still held in place by clips.
-
-
Questo passaggio è privo di traduzione. Aiuta a tradurlo
-
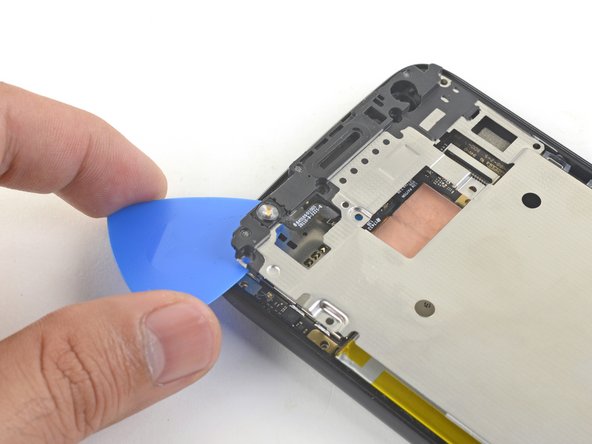
Insert the flat end of a spudger under the right edge of the metal midframe and pry up to loosen the midframe.
-
Insert an opening pick in the edge to hold the midframe in place.
-
-
Questo passaggio è privo di traduzione. Aiuta a tradurlo
-
Insert the flat end of a spudger under the lower right edge of the midframe and pry up to release the midframe clip.
-
-
Questo passaggio è privo di traduzione. Aiuta a tradurlo
-
Grasp the lower edge of the midframe and pull the edge slightly to the right, to clear the metal midframe clip.
-
-
Questo passaggio è privo di traduzione. Aiuta a tradurlo
-
Insert the point of an opening pick under the top left corner of the midframe and twist slightly to release the top clip.
-
-
Questo passaggio è privo di traduzione. Aiuta a tradurlo
-
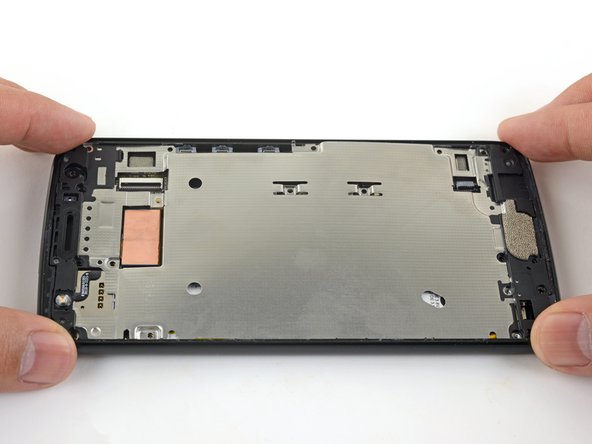
Remove the midframe.
-
Align the the midframe's top edge to the phone and press it into position.
-
Shift the bottom edge slightly to the left, to maneuver the left metal midframe clip underneath the phone edge.
-
Press the midframe's bottom edge into position.
-
-
Questo passaggio è privo di traduzione. Aiuta a tradurlo
-
Insert the point of a spudger underneath the top edge of the battery connector.
-
Gently pry up the connector to disconnect the battery.
-
-
Questo passaggio è privo di traduzione. Aiuta a tradurlo
-
The battery is held in place by two thin strips of adhesive on the underside of the battery.
-
-
Questo passaggio è privo di traduzione. Aiuta a tradurlo
-
Slide the tip of an opening pick under the lower edge of the battery
-
Slowly push the pick in halfway to loosen the adhesive.
-
Insert another opening pick alongside the first pick, and slowly press it in until the adhesive releases the battery.
-
-
Questo passaggio è privo di traduzione. Aiuta a tradurlo
-
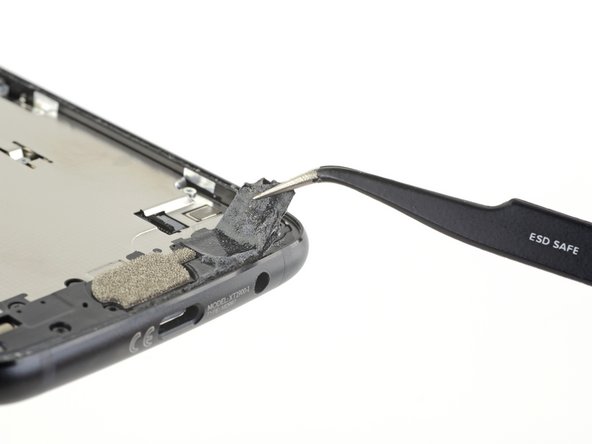
Remove the battery.
-
Remove all traces of adhesive from the battery well.
-
Apply stretch release adhesive strips, double-sided tape, or pre-cut adhesive strips.
-
Press the battery firmly in place for thirty seconds.
-


Per rimontare il tuo dispositivo, segui queste istruzioni in ordine inverso.
Dopo aver completato questa guida, calibra la batteria appena installata.
Per rimontare il tuo dispositivo, segui queste istruzioni in ordine inverso.
Dopo aver completato questa guida, calibra la batteria appena installata.
Annulla: non ho completato questa guida.
Altre 17 persone hanno completato questa guida.
Un ringraziamento speciale a questi traduttori:
22%

albertob ci sta aiutando ad aggiustare il mondo! Vuoi partecipare?
Inizia a tradurre ›


4 Commenti
I want to change my motorola x4 mobile's battery. Where should I go to get the better service (means the original battery and the best service centre)?
My battery keeps overheating and drains quickly. I did everything to close background apps to no avail. Does that mean I need new battery?
Hi Traude,
It may be that your battery is damaged and is has a minor internal short. This can cause the battery to drain and overheat. Replacing the battery would be the first thing I’d try. However, it may also be a motherboard problem.