Salta al contenuto principale

Motorola Moto G3 Rear Camera Replacement

Guida Archiviata
Questa guida è mantenuta solo per scopi storici. Usa la versione aggiornata della guida per eseguire la riparazione.

Cosa ti serve

  1. Motorola Moto G3 Rear Camera  Replacement, Prerequisite Guide: passo 1, immagine 1 di 2 Motorola Moto G3 Rear Camera  Replacement, Prerequisite Guide: passo 1, immagine 2 di 2
    • Use the plastic opening tool to open the back cover as shown in the photo.

  2. Motorola Moto G3 Rear Camera  Replacement: passo 2, immagine 1 di 1
    • Heat an iOpener in the microwave for 30 seconds.

    • Place the heated iOpener on all four edges of the screen for approximately 2 minutes.

  3. Motorola Moto G3 Rear Camera  Replacement: passo 3, immagine 1 di 1
    • Apply the plastic opening tool on the edge of the screen near the front camera.

    • After creating enough space, allow the opening tool to be inserted on the side of the phone.

    • Create another space on the other side of the screen.

    • Leave the opening tool inserted.

    • Carefully apply the larger plastic opening tool by sliding it through the longer edge of the screen.

  4. Motorola Moto G3 Rear Camera  Replacement: passo 4, immagine 1 di 3 Motorola Moto G3 Rear Camera  Replacement: passo 4, immagine 2 di 3 Motorola Moto G3 Rear Camera  Replacement: passo 4, immagine 3 di 3
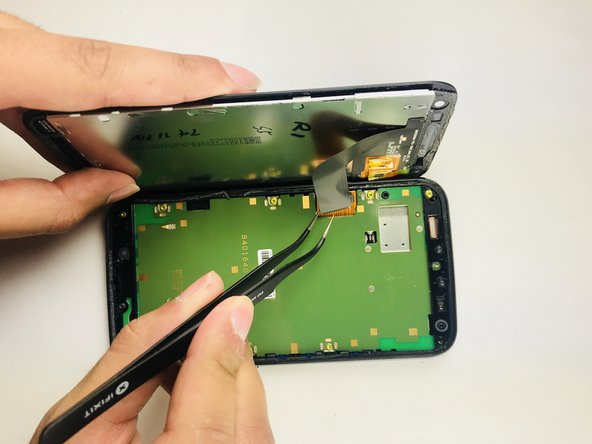
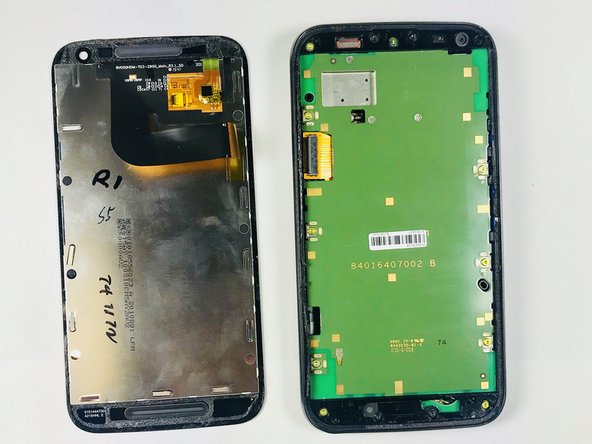
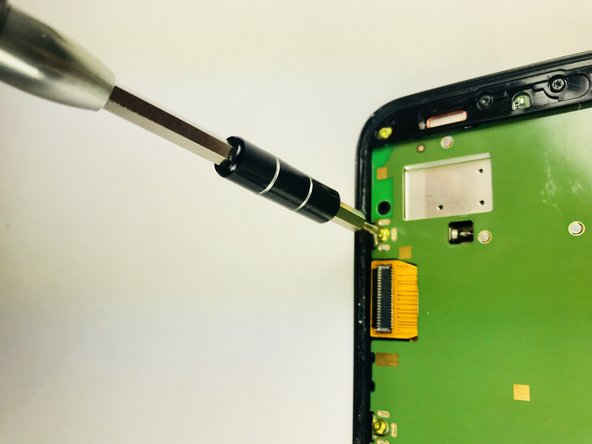
    • A strip will be attached to the motherboard as shown.

    • Using tweezers, carefully detach the strip from the motherboard.

  5. Motorola Moto G3 Rear Camera  Replacement, Rear Camera: passo 5, immagine 1 di 3 Motorola Moto G3 Rear Camera  Replacement, Rear Camera: passo 5, immagine 2 di 3 Motorola Moto G3 Rear Camera  Replacement, Rear Camera: passo 5, immagine 3 di 3
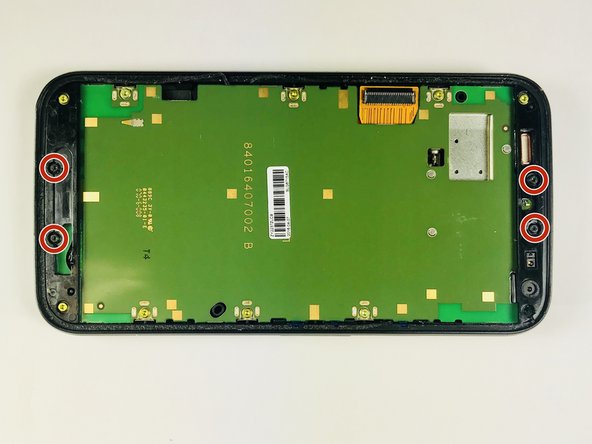
    • With a T4 screwdriver, remove the10 "yellow" 2mm screws and 4 "black" 2mm screws.

  6. Motorola Moto G3 Rear Camera  Replacement: passo 6, immagine 1 di 3 Motorola Moto G3 Rear Camera  Replacement: passo 6, immagine 2 di 3 Motorola Moto G3 Rear Camera  Replacement: passo 6, immagine 3 di 3
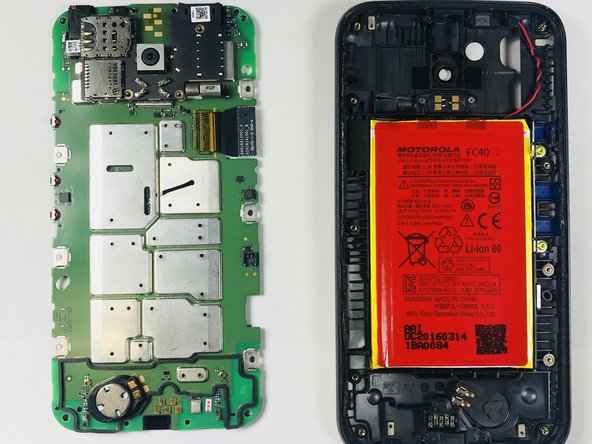
    • Use the metal spudger and lift the back cover on the bottom side of the phone (this is attached to the motherboard).

  7. Motorola Moto G3 Rear Camera  Replacement: passo 7, immagine 1 di 1
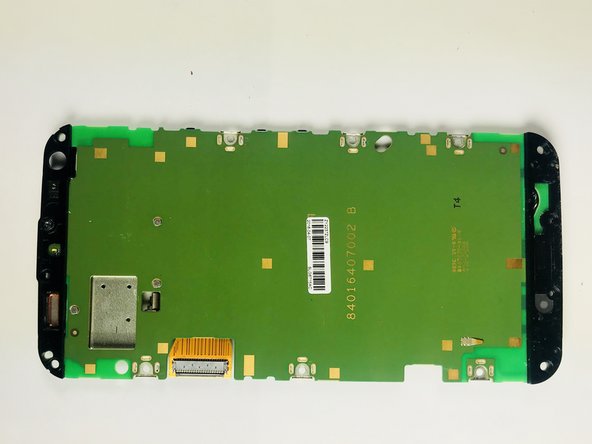
    • Flip the motherboard over.

  8. Motorola Moto G3 Rear Camera  Replacement: passo 8, immagine 1 di 1
    • Using a T4 Torx screwdriver, remove the three 2mm screws.

  9. Motorola Moto G3 Rear Camera  Replacement: passo 9, immagine 1 di 2 Motorola Moto G3 Rear Camera  Replacement: passo 9, immagine 2 di 2
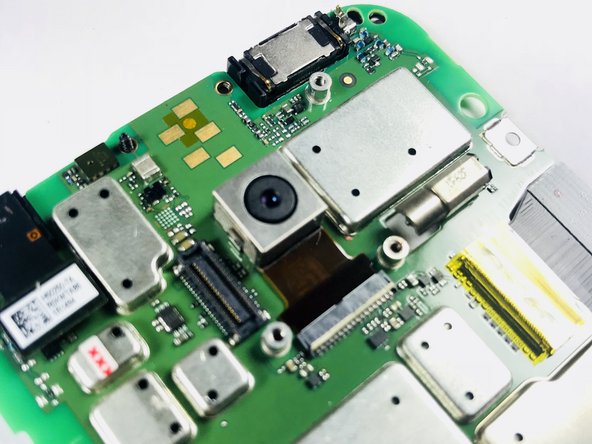
    • Using the tweezers remove the black rear camera cover.

  10. Motorola Moto G3 Rear Camera  Replacement: passo 10, immagine 1 di 2 Motorola Moto G3 Rear Camera  Replacement: passo 10, immagine 2 di 2
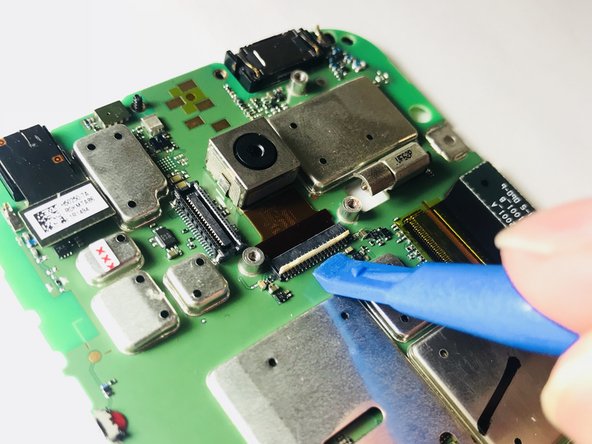
    • Using the small opening tool, carefully flip the camera flex connector in a upright position. You should hear a click allowing you to know the camera flex connector has been released.

  11. Motorola Moto G3 Rear Camera  Replacement: passo 11, immagine 1 di 1
    • Take the tweezers and remove the camera from the motherboard.

Conclusione

To reassemble your device, follow these instructions in reverse order.

Irkan Notta

Membro da: 03/19/18

1.034 Reputazione

7 Guide realizzate

Team

Baylor, Team S5-G3, Williams Spring 2018 Membro di Baylor, Team S5-G3, Williams Spring 2018

BU-WILLIAMS-S18S5G3

3 Membri

9 Guide realizzate

0 Commenti

Aggiungi Commento

Visualizza Statistiche:

Ultime 24 Ore: 0

Ultimi 7 Giorni: 0

Ultimi 30 Giorni: 0

Tutti i Tempi: 210